Viltrox JY-710 Manuale utente

Buku Manual
FSK 2.4GHz
Timer Remote Control Wireless Digital
JY-710
FSK 2.4GHz
JY-710RX

1
2
3
4
5 6 7 8
9
JY-710TX
N1
N2
N3
C1
S1
P1
E2
C3

For Your Safety……………………………………2
Notices……………………………………………2
Introduction………………………………………4
Parts of the JY-710………………………………4
JY-710TX………………………………………4
Display Panel……………………………………5
JY-710RX………………………………………5
Inserting Batteries………………………………5
Replacing Batteries……………………………5
When the JY-710 is Not in use………………5
Lighting/Lock Button…………………………6
Connecting the JY-710…………………………6
Using the JY-710…………………………………7
Timed Photography………………………………7
Manual Release…………………………………14
Precautions for use………………………………15
Caring for the JY-710……………………………15
Specifications………………………………… 16
Support Model…………………………………....17
JY-710RX
1
Daftar Isi
56
N1
N2
N3
C1
S1
P1
E2
C3

2
Peringatan (1/2)
To prevent damage to your product or injury
to yourself or to others,read the following sa-
fety precautions in their entirety before using
this equipment.Keep these safety instructio-
ns where all those who use this equipment
will read them.
The consequences that could result from
failure to observe the precautions listed in
this section are indicated by the following
symbol:
Failure to observe this precaution could re-
sult in electric or product malfunction. Sho-
uld the product break open as the result of
a fall or other accident,remove the batteri-
es and take the product to manufacturer
for inspection.
This icon marks warnings,information
thatshould be read before using this
product to prevent possible injury.
Do not handle with wet hands or immerse
in or expose to water or rain. Failure to ob-
serve this precaution could result in fire or
electric shock.
Failure to observe this precaution could
result in explosion or fire.
This device contains small parts which may
posea chocking hazard.Consult a physician
immediately if a child swallows any part of
this device.
Should you notice smoke or an unusual sm-
ell coming from this device,remove the batt-
ery immediately and take the device to an
authorized service representative for inspec-
tion,taking care to aviod burns. Continued
operation could result in injury.
Do not leave the device in a closed vehicle
under the sun or in other areas subject to
extremely high temperatures. Failure to ob-
serve this precaution could result in fire or in
damage to the c-asing or internal parts.
Do not disassamble or modify
Keep dry
Do not use in the presence of amable
Keep out of reach from children
Turn o immediately in the event of malfunction
Do not expose to high temperatures

3
Peringatan (2/2)
Batteries may leak or explode if improperly han-
dled.Observe the following precautions when hand-
ing batteries for use in this device:
Use only batteries listed in this manual. Do not
mix old and new batteries or batteries of different
types.
Read and follow all warnings and instructions pr-
ovided by manufacturer.
Do not short or disassemble.
Do not expose to flame or excessive heat.
Do not attempt to insert batteries upside down or
backwards.
Batteries are prone to leakage when fully discha-
rged. To avoid damage to the product, be sure to
remove the batteries when leaving the product una-
ttended for prolonged periods or when no charge
remains.
Should liquid from the batteries come into conta-
ct with skin or clothing, rinse immediately with fresh
water.
Read precaution label when in use

4
Pengenalan
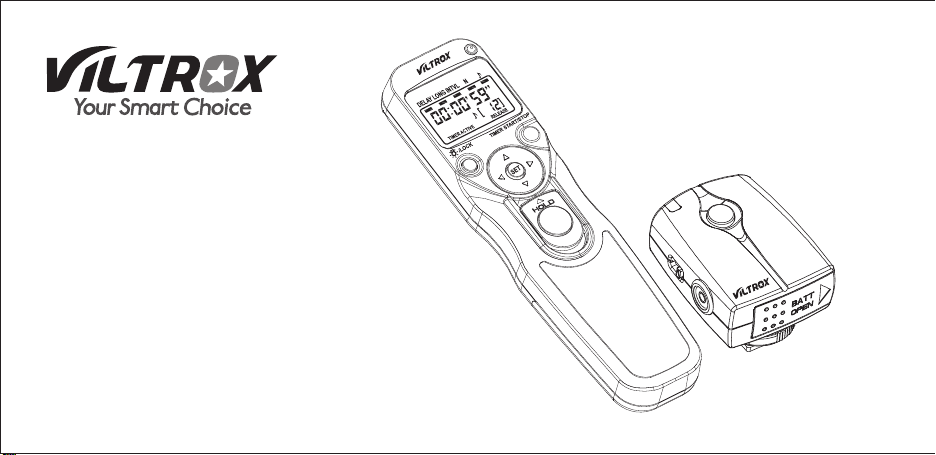
Thank you for your purchase JY-710 wireless remote controller. The JY-710 is composed
by one JY-710TX( transmitter) and one JY-710RX(receiver) is equipped with an interval
timer suited to wide variety of tasks, including astronomical photography.
Bagian Produk (1/3)
Please see the back of the cover
illustrations.
Connector (More models availuble)
Straps fixed deduction(available separately;
use cell phone or other similar strap)
Focus and the release of two-color indicator
light
Display panel
button
button
(Lighting/lock)Button
Arrow button
Shutter-release button
Battery-chamber cover
TIMER START/STOP
JY-710TX

5
Bagian Produk (2/3)
Functional cursor
Show time
Lock indicator
Low battery indicator
“TIMER ACTIVE” indicator
Speaker on/off indicator
“ ” indicator
“ ” indicator
Number of shots
Slide the battery-chamber cover ( ) from
the back of the JY-710TX and insert two
AAA 1.5V LR03 alkaline batteries (available
separately) as shown.
The low battery indicator( )will blink when
the batteries are low. Please replace the
battery.
When replacing batteries:
1.Check that the “ ” ( ) and
“ ”( )indicators are not displayed.
2.Turn the camera off and disconnect the
JY-710
3.Remove the batteries.
4.Wait until the control panel has gone out
and insert new batteries.
The JY-710 is not equipped with an off switch.
To reduce the drain on the batteries when the
JY-710 is not in use,end shooting and check
that the “ ”( ), “ ”( ),
“ ” ( ) indicators are not displayed.
The drain on the batteries increases when
these indicators are flashing.
*The illustration inside the front cover shows
the control panel with all elements lit. In the
other illustrations throughout this manual,
elements relevant to the explanation in the
accompanying text are shown in black. Indi-
cators not mentioned in the text are shown
in gray.
5
shutter release cable shutter socket
channel switch status indicator
shutter release button power on/off switch
6
SET
RELEASE
TIMER ACTIVE
RELEASE
TIMER ACTIVE SET
RELEASE
JY-710RX
Display panel* Inserting batteries Replacing batteries
When the JY-710 is not in use

6
Memasang JY-710
Press the lighting/lock button ( ) briefly
to activate the control panel backlight.The
backlight will remain lit for about six seco-
nds; pressing the arrow button ( ) while
the backlight is on extends the timer for
another six seconds.
To lock all controls except the shutter-
release ( ) and Lighting/lockbuttons, pr-
ess the illuminator lock button until the
lock icon ( ) is displayed in the control
panel. To the release the lock, Please pr-
ess the lighting/lock button until the lock
icon is no longer displayed.
1.Turn the camera off.
2.Check that the “ ” ( ) and
“ ”( ) indicators are not displayed.
3.Remove and Remote cord socket termial
cover from the camera. By connecting the
camera shutter, camera will firmly connec-
ted by JY-710RX with shutter plug ( )
Bagian Produk (3/3)
After checking that the “ ” ( )
and “ ” ( ) indicators are not displ-
ayed,turn the camere off and disconnect the
JY-710. Replace the Remote cord socket te-
rminal cover.
(not flashing)
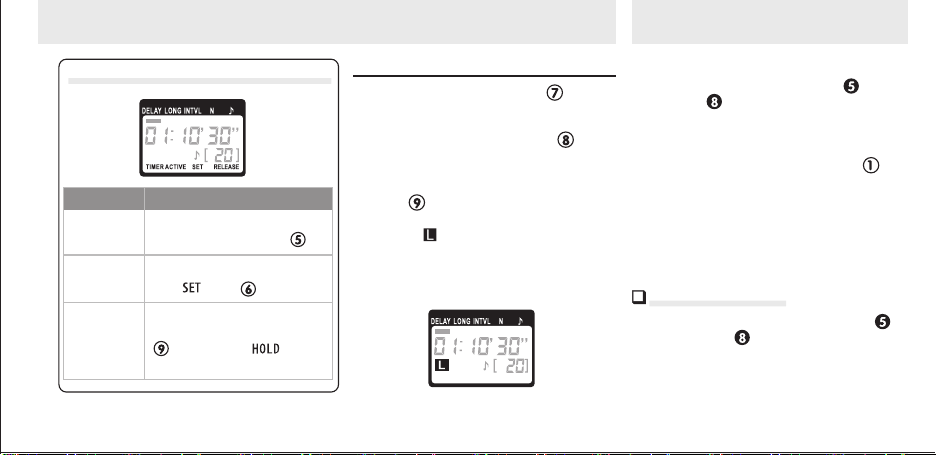
Timer active (page11);press
button( ).
Manual release active (page14);
release shutter-release button
( ; if botton is in position,
release shutter-release lock).
Settings can be modified (page7);
press button( ).
The “TIMER ACTIVE” “SET”and “RELEASE”indicator
If this ashes Expression means: Close method
TIMER ACTIVE
TIMER ACTIVE
RELEASE
SET
TIMER START / STOP
TIMER ACTIVE
RELEASE
TIMER ACTIVE
RELEASE
Disconnecting the JY-710
Lighting / Lock Button

7
Connect the JY-710 and turn the camera
on.
Adjust camera settings as follows (see
the camera manual for details):
The JY-710 functions as:
Choose the delay (ti-
me before shooting starts), exposure
time, interval, and number of shots for
timed interval photography. Shutter
speed can be selected with the camera if
desired.
Take photographs ma-
nually using the shutter-release button
on the JY-710. Photographs can be tak-
en manually even when the timer is
running.
(manual)
Bulb
Off
(continuous-servo auto-
focus)* or (manual)
(single frame)
* Select “release priority” if available.
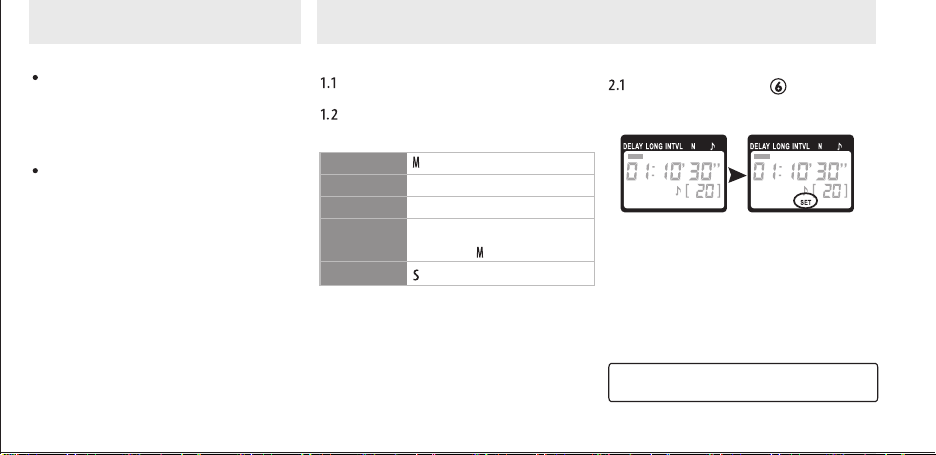
Press the button ( )." " will
flash in the display panel.
The JY-710 can be connected to the
camera after the timer has been set.
Menggunakan Produk Timed Photography (1/7)
An automatic timer
A manual release
1. Adjust camera settings 2. Set the timers
SET SET
Exposure mode
Shutter speed
Interval timer
Focus mode
Continuous
AF-6

8
Timed Photography (2/7)
Adjust the following settings:
Delay before shutter is released
Exposure time
Interval
Number of shots
Speaker on/off
0 s to 99 hrs 59 min 59s (in one-second increments)
1 s to 99 hrs 59 min 59s (in one-second increments)
1 to 399, --(unlimited)
(on), (off)
Delay, Exposure, and Interval Settings
Shutter opens
Shutter closes
Timer starts
1 st frame
Exposure
time
Delay
2nd frame
Number of shots(N)
Timer ends
th frame
n
Interval
Option Description Supported settings
DELAY
LONG
INTVL
Indice