AUTOMATION COMPONENTS, INC Version : 11.0
2305 Pleasant View Road I0000777
Middleton, Wisconsin 53562 Page 2 of 7
www.workaci.com (888) 967-5224
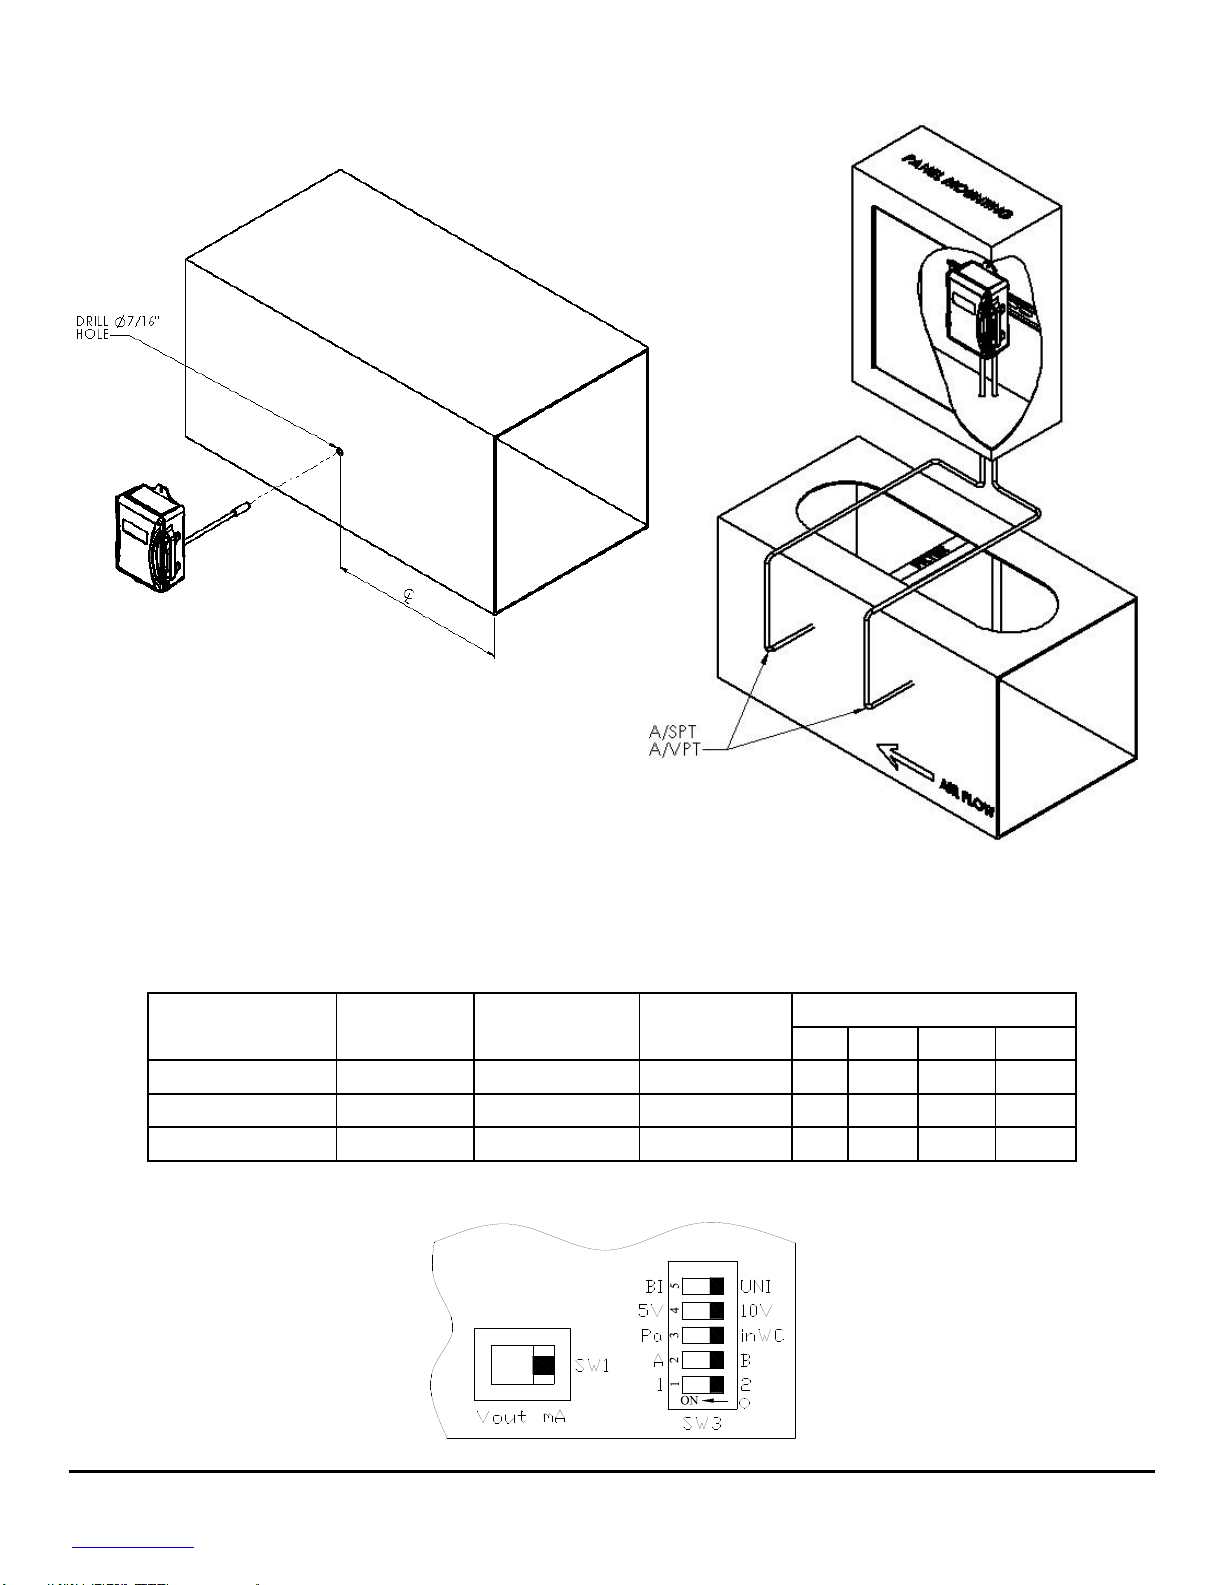
PITOT TUBE INSTALLATION (Optional Accessory Ordered)
Slip the rubber washer over the threaded end of the pitot tube, keeping the washer as close to the threaded end as possible. Fasten the
pitot into the threaded insert on the back of the enclosure. Press the rubber washer against the enclosure.
Figure 3: Pitot Tube Installation
TUBING SETUP WHEN PITOT TUBE IS INSTALLED
Units will be shipped with silicone tubing attached to the high and low pressure barb fittings. The silicone tubing will need to be
removed from the High Pressure (H) barb fitting and secured onto the pitot tube barb fitting. This will leave the high pressure barb
fitting open to atmosphere, and the Low pressure barb fitting remaining at default setup.
Figure 4: Pitot Tube Installation
MOUNTING
Two size #8 x 3/4” self drilling screws are supplied. Mount the unit vertically with the brass fittings pointing towards the ground.
Attach the unit to the mounting surface using the two mounting holes located on the top and bottom flanges. This ensures that any
condensation that may form in the tubing does not have an effect on the pressure sensor. If mounting the unit horizontally, a slight
zero shift may occur and care must be taken to prevent moisture from building up in the sensor. For best results, all tubing lengths
should be limited to a maximum length of 75 feet (23 meters).
PRESSURE CONNECTIONS
The recommended connection tubing is ¼” O.D push-on tubing (1/8”to 3/16” I.D.).