AerialBox T1050PVR Manuale utente

User Manual
aerialBx-ultra
T1050PVR
Warranty & Product Registration
Please register your product to assist with warranty and product updates.
To do this please visit www.dishtv.co.nz and click on Warranty & Registration
2
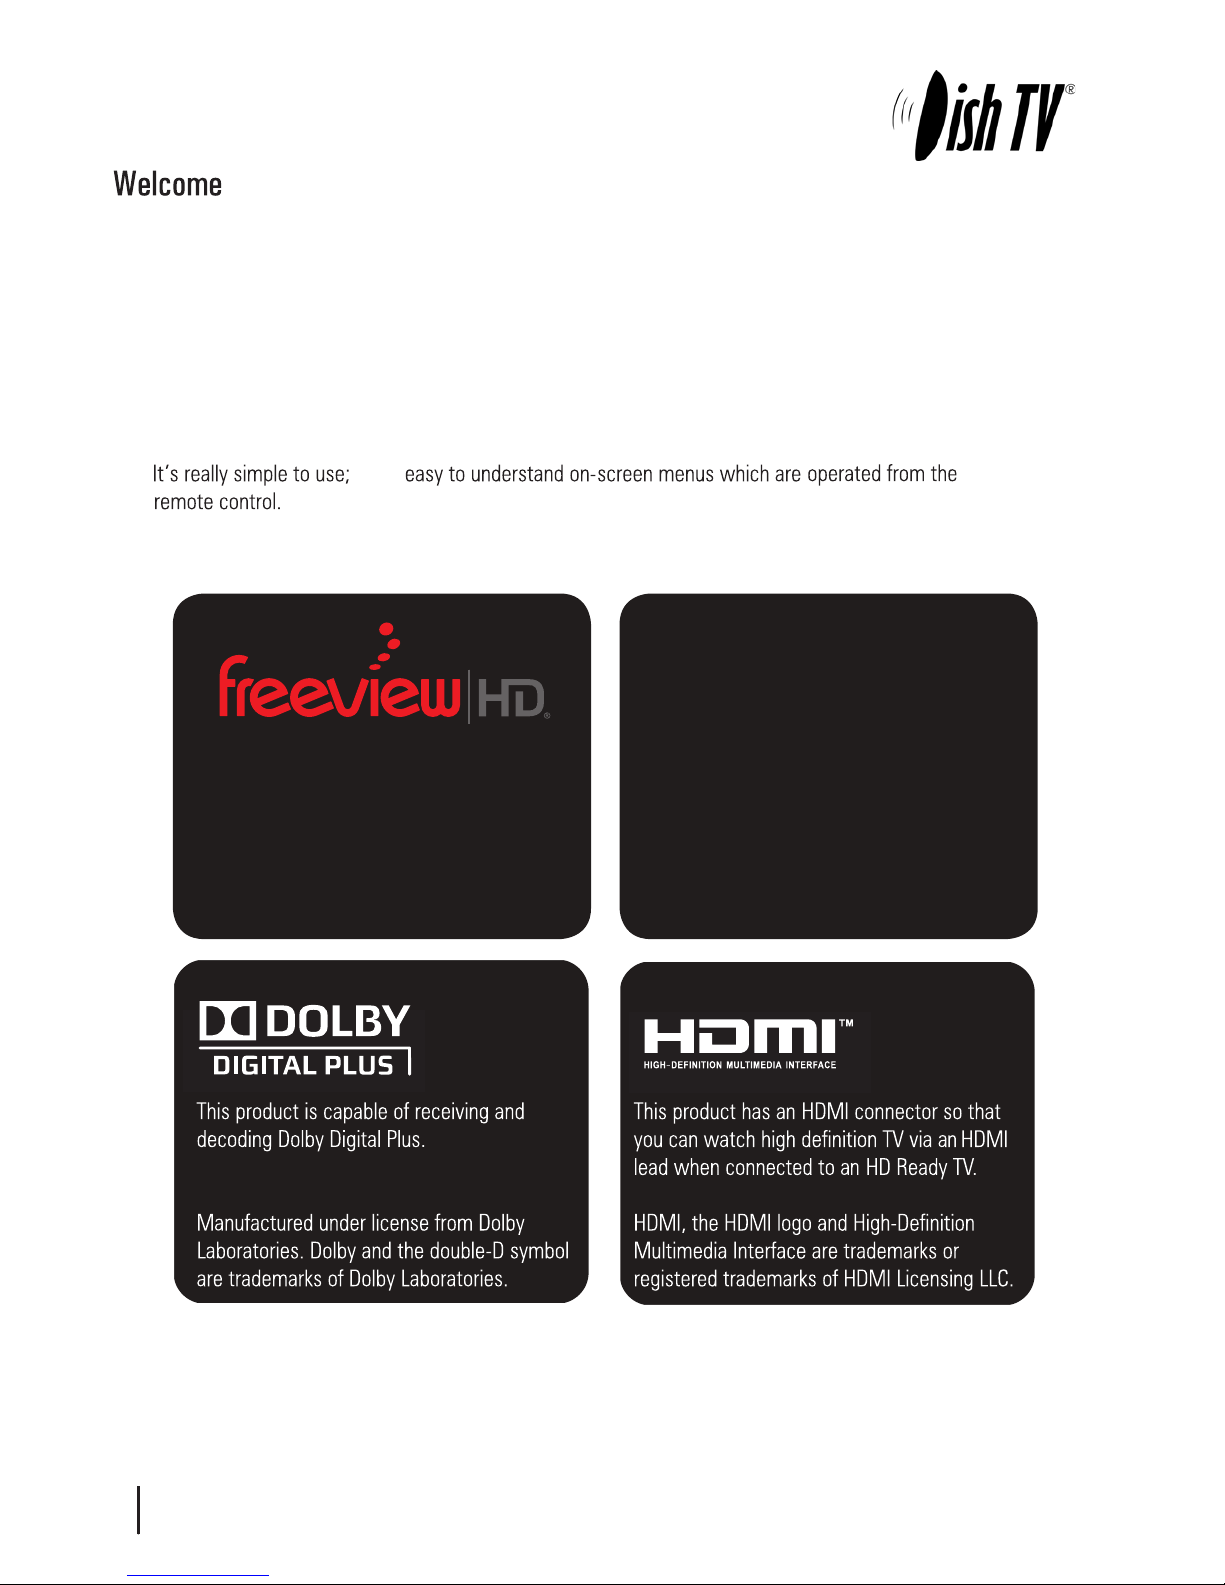
Thank you for choosing this DishTV Freeview®High Definition Digital Set Top Box.
You will be be able to receive all Freeview®UHFHigh Definition and Standard Definition
digital TV channels, as well as detailed Freeview®program information with the
Freeview®8 Day Electronic Program Guide.
For more information about Freeview®visit www.freeviewnz.tv
AFreeview Digital Set Top Box gives you access
over 10 free to air digital channels, without a
subscription or contract. For more information on
Freeview please visit www.freeviewnz.tv
With
DigitalUHF
Adigital box lets you access the free digital
channels that are broadcast in New Zealand.
It uses a digital signal, received through your
normal UHF aerial and lets you watch it
through your existing television.
AV Cable
USB Firmware
upgrade +HDD
connection
RFIN UHF Aerial
input
RFOUT UHF Signal
output
3
DC 12V
Connect 230V - 12v adapter
DishTV T1050PVR
Note: The DishTV T1050PVR is a Freeview|HD receiver. It requires a UHF aerial
and good signal and quality levels to operate correctly.
The Full user Manual can be downloaded at www.dishtv.co.nz
This guide will provide you with simple instructions for connecting an operating your
DishTV unit.
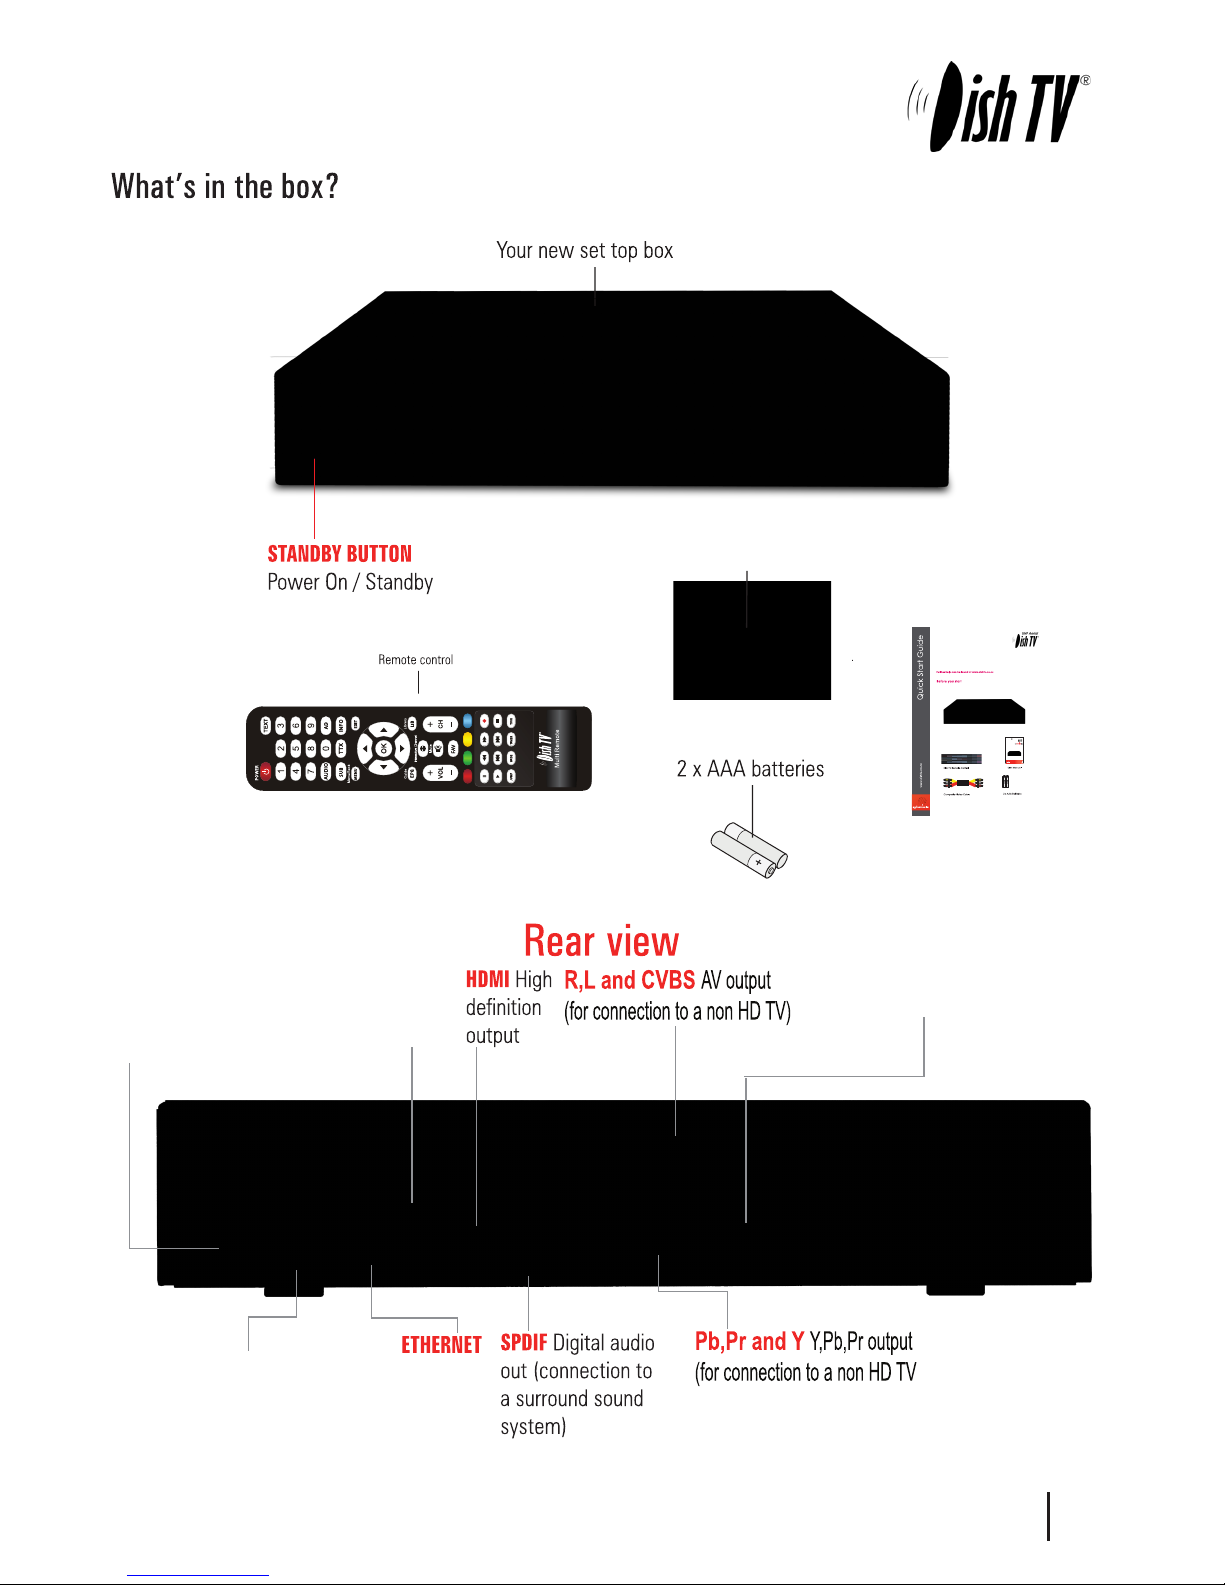
Please check that your DishTV box contains all of the following components.
Thank you for choosing DishTV for your Freeview|HD UHF receiver.
UserManual
aerial
B
x
-
ultra
Quickstart Guide

4
Your Remote Control
Connecting up
Getting Started
Main Menu
User Settings
- Favourite View
- Organizer
- User Preference
Installation
- Tuning Wizard
- Auto Scan
- Manual Scan
- System Setting
- Factory Default
- S/W uprade via OTA
System Conguration
- Wakeup Timer
- Version
ESG
Media Manager
- Thumbnail Browser
- Recorded Book List
- Media Information
Connectivity
- eNet Buttons
- eWeather
- eMap
- eMail
Recording
Recordings Library
Bookmarking
Editing Recordings
Media Center
Firmware Upgrade
Frequently Asked Questions
Freeview|HD Channel groups
Troubleshooting
Check your signal levels
Technical Specications
Warranty
Page
5
6
7
8
9
9
10
11
12
13
14
14
15
15
16
17
18
18
19
20
21
22
23,24
25
26
27
28
29
30
30
31
31
32
33

5
Pause Pause playback
Skip Forward/Back 10min
STANDBY Power On/Standby
Record Instant Record a programme
StopStops playback
Fast Forward/Rewind playback
PLAYPlays your recordings
0to9
Use to select channels & enter Pin numbers
TEXT Digital text if available
TTX Brings up Teletext.
INFO Use for more information
Holding the INFO button for 3 sec displays
the Version page.
AD Enables Audio Descript
EXIT Exits menus or screens
OK Confirms selection in menu/
on screen displays, also plays a
recording from the library
LIB Library displays the recorded
program list (See page 25 for more info)
Holding the LIB button for 3 sec displays the
Record Booking List.
Interactive Channel
MUTE Turns the sound on/off
CH+/- Changes the channel up or down
TV/R Switches between TV and Radio
channels
TIMER Displays the wakeup timer menu
JUMP Allows you to enter a time to
jump to
WIDE Changes the aspect ratio
ColourButtons For interactive use and
navigating menus
VOL+/- Volume up and down
FAV Brings up the favourite channel list
EPG/GUIDE Electronic Programme Guide,
opens the programme guide window
CURSOR Selects options in the
menu / onscreen display
MENU Brings up the Main Menu
SUB Displays Subtitles when availible
AUDIO Changes the audio language
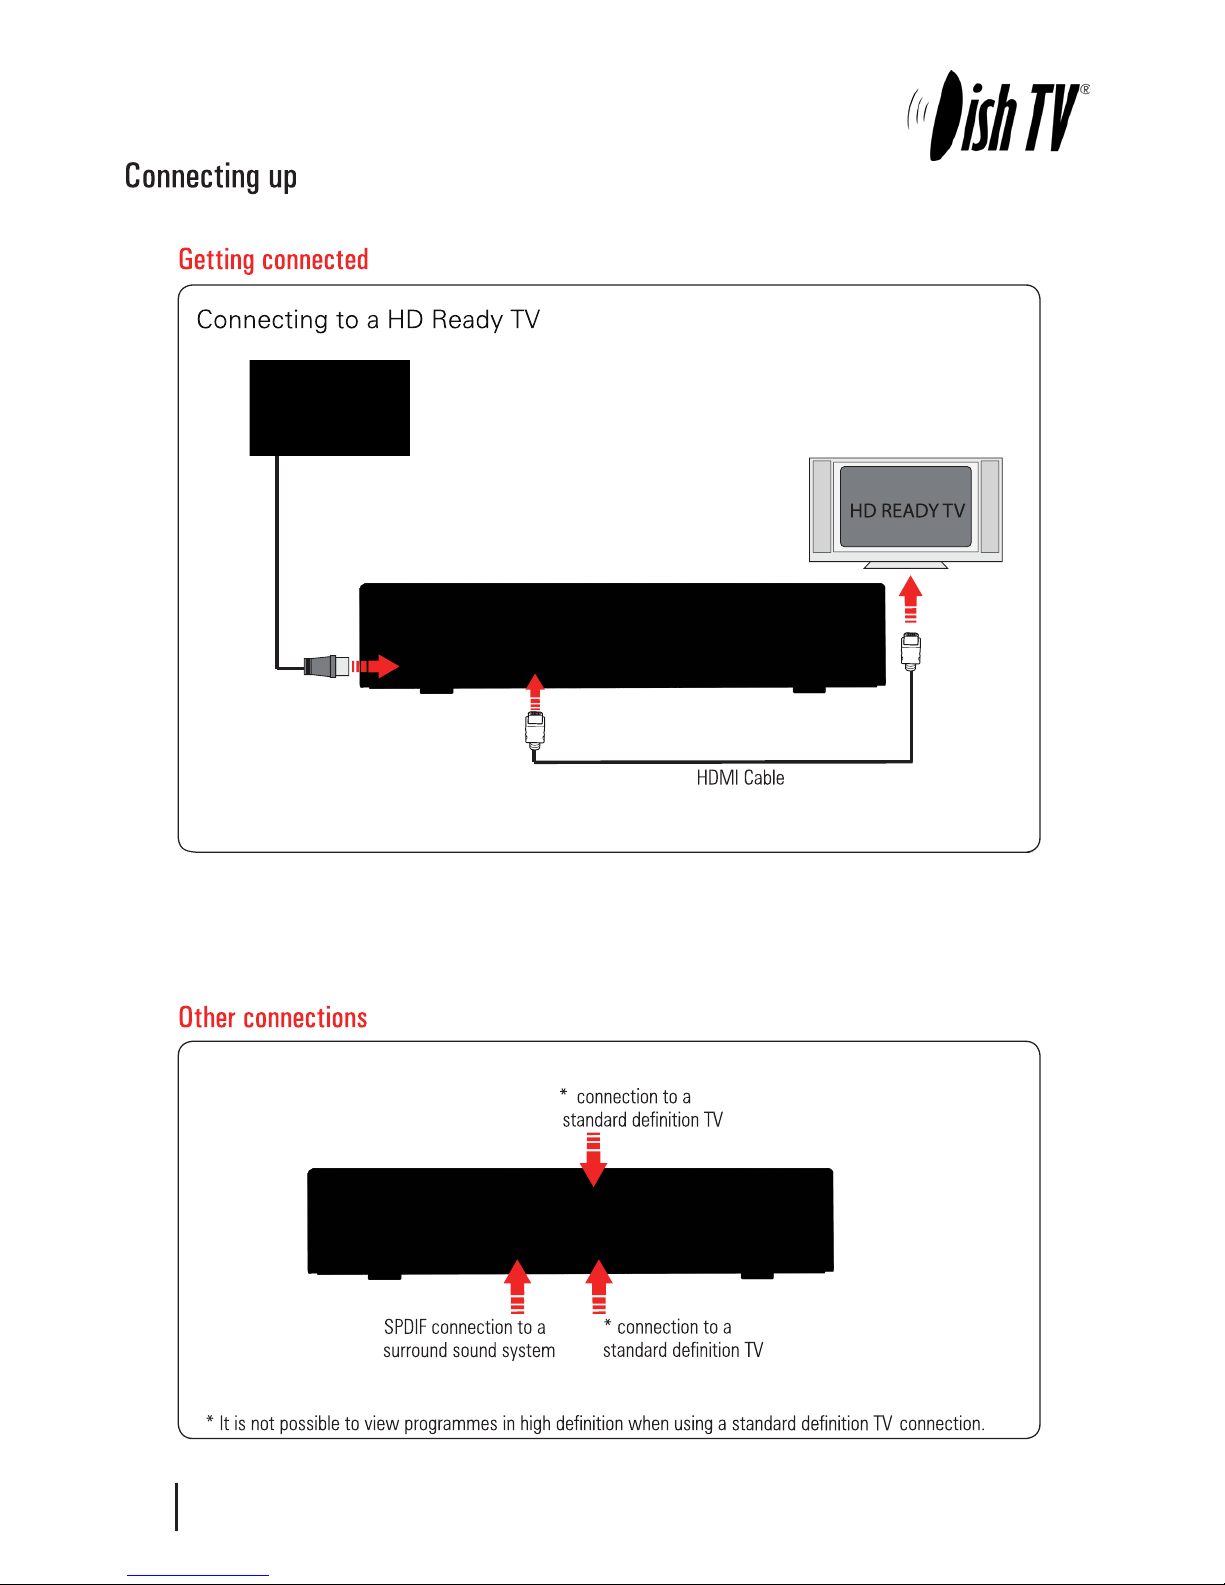
Connect the AV cable that came with your set top box between the yellow red and white
sockets on the.
Connect the cable that comes from your UHF aerial to the RF IN socket in the back of your
set top box.
6
Please make sure you don’t have a USB device plugged in while going through the setup process.
Once you are setup you can then plug your device in.
7
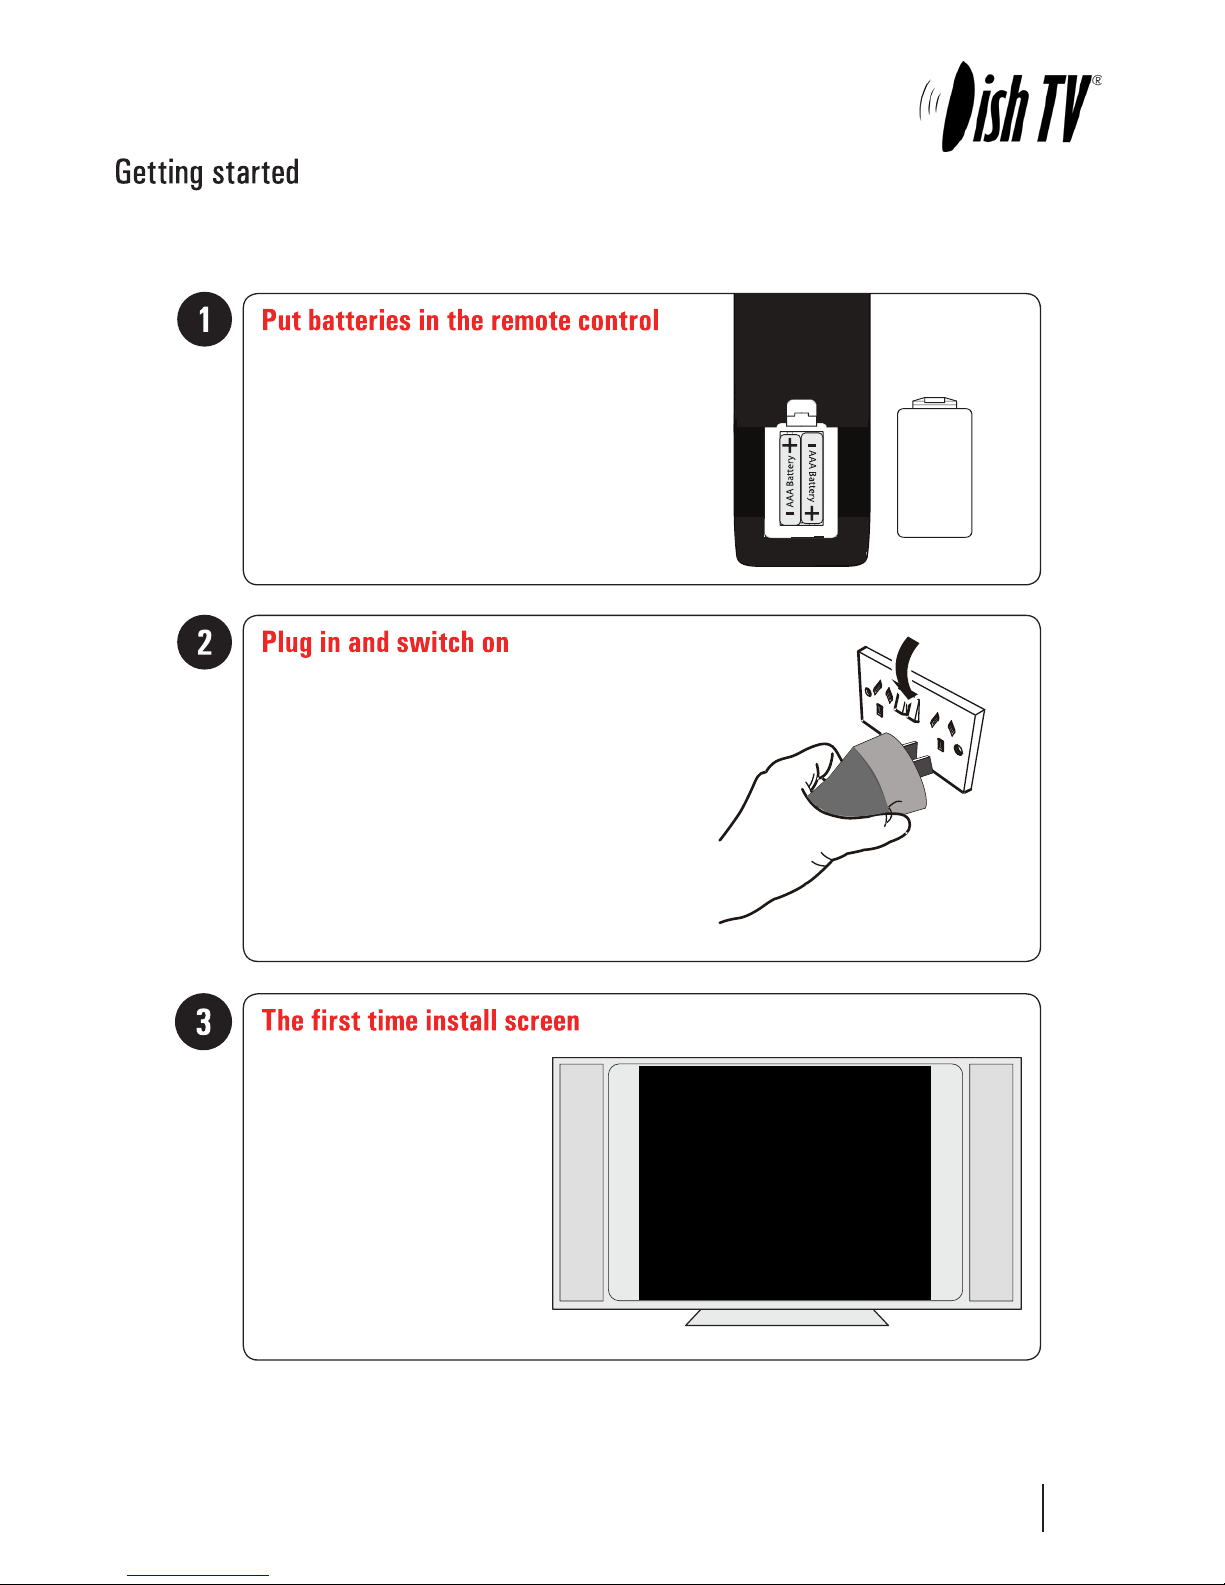
Open the battery cover of the remote control and put two
AAA size batteries so the‘+’ and ‘-’ marks on the batteries
match the‘+’ and ‘-’ marks inside the remote control.
Replace the battery cover.
Switch your TV on and select the correct video input.
Switch the aerialBox ultra on and wait for it to boot up.
The Welcome screen should appear
on your TV*. Press OK to start a scan.
An auto scan will now start, please
do not push any buttons until it has
nnished. Once it has nnished if the
signal from your UHF aerial is good
TV1 will appear and you can start
using your aerialBox Ultra.
* If the Welcome screen does not appear, go to the Menu select Installation then Factory Default. The default
pin/password is 0000.

Main Menu:
All other Settings and tuning menus are selected from this main menu.
This menu is the gateway for all other menus.
User can invoke the main menu by pressing the MENU key.
This main menu contains several options
User Settings
Installation
System Conguration
ESG
MEDIA Manager
Connectivity
User can toggle between the options by using UP/DOWN or LEFT/RIGHT Keys.
Main Menu
8

Organizer:
To enter this menu you will be prompted for your password (Default is 0000)
In this menu you will have the options to Lock, Skip or Delete your channels from the list.
Lock: Allows you to lock a selected channel. Once a channel is set to Lock you will need to enter
your password to view the channel.
Skip: Means when browsing with P+/- the selected channel will be skipped over, but is still able to be
accessed by pressing the channel number button.
Delete: Deletes a channel o the list.
Favourite View:
To enter this menu you will be prompted for your password (Default is 0000)
This menu allows you to view your favourite channel list and allows you to classify channels
and group them together to be viewed through favourites later. These groups can then be accessed via
the FAV button on your remote. Use the number keys on your remote according to the numbers on the
right hand side of the screen to add or remove channels from your favoute group.
Main Menu - User Settings - Favourite View/Organizer
9

10
User Preference:
Note: To adjust a preference use the right arrow on your remote not the OK button.
Here you can adjust your brightness and contrast levels.
The Visual Impaired option turns discriptive audio on/o. This setting is for the sight impaired.
OSD TimeOut or On-Screen-Display timeout, this option will adjust how long the information banners will stay
on the bottom of your screen, these banners appear each time you change channel.
Parental Rating - To enter this option you will be prompted for your password (Default is 0000). Here you can
change the password. (Passwords can only be 4 numbers.) You can also set the parental rating using the
Yellow and Blue buttons on your remote.
Recording Start Oset - This option will adjust how many minutes before your program the unit will start recording.
This is very handy when programs are not running on time so you don’t miss part of your program.
Recording Stop Oset - This option will adjust how many minutes after your program the unit will stop recording.
This is very handy when programs are not running on time so you don’t miss part of your program.
Auto Time Shift Mode - When this option is on the unit will time-shift continually.
Each time you change channel the previous time shift will be deleted and it will start again on that channel.
Time Shift Mode - When this option is on the unit will time-shift only when the Pause button is pushed.
Timeshift Duration - Here you can set the max length the unit will timeshift to.
Main Menu - User Settings - User Preference
Indice
Altri manuali AerialBox Decoder


