Atom ATOM 3 Series Manuale utente

ATOM 3.5 USER'S MANUAL
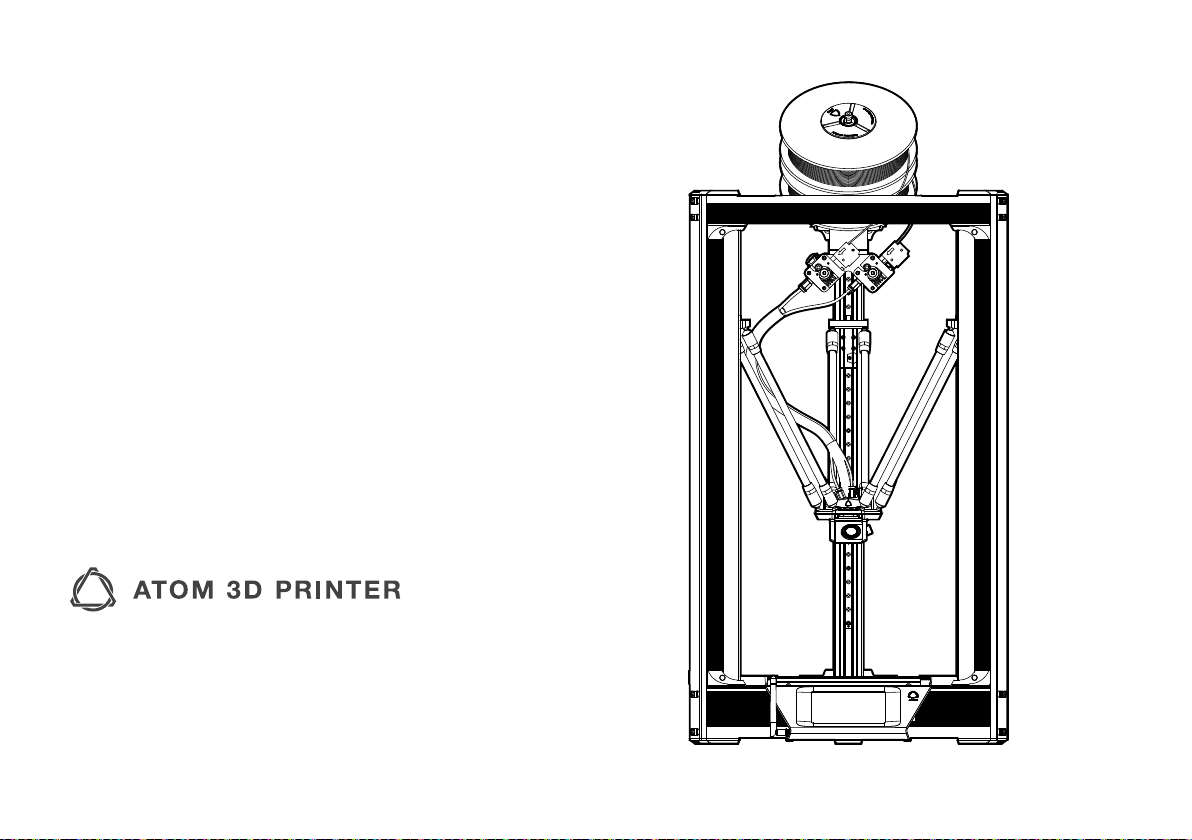
Hello! Welcome to join Atom 3D printer family! Atom 3.5 is a
world-class desktop machine designed for speed, precision and
reliability. We know you’ll love printing your designs on Atom 3
but before you do, please read the manual thoroughly.

SAFETY WARNINGS AND GUIDELINES
P. 4
ATOM 3 SERIES: USER'S MANUAL
P.14
PREPARING TO PRINT
UPLOAD FILES/START PRITING
PRINTER SETTING
PACKAGE CONTENT
Auto-Leveling
Cleaning the Build Plate
Loading Filament
Unloading Filament
Swapping Hotends
Wi-Fi Setting
P. 8
P. 9
P.10
P. 11
P.12
P.12/13
P. 5
P. 6 / 7
CUSTOMER SERVICE
P. 5
CUSTOM SETTING
P.15
SAFETY CERTIFICATIONS
P.18
CARE AND MAINTENANCE
MIC
FCC
CE
P.16
P.17
P.17
FILAMENT RUNOUT SENSOR
P.16
LANGUAGE SETTINGS
P.16
PRINTING ENVIROMENT
P.16
P.19
WARRANTY
P.20
REGULATORY

4
SAFETY WARNINGS AND GUIDELINES
Safety Warnings and Guidelines
1. Be careful not to damage the glass build plate.
2. Take care to avoid touching hot parts, including heat
blocks, nozzle, extruded filament, and the heated build
plate.
3. Keep the printer and all accessories out of reach of small
children.
4. Do not remove or disconnect the USB cable when printing
from a computer.
5. Do not pull or twist the black cable harness at any time.
6. Do not force or tear anything during unpacking and
setup. This may cause damage to the printer and/or its
accessories.
7. Do not reach inside the printer during operation. Always
allow the printer and extruded filament to cool before
reaching inside.
8. Ensure that the printer is turned o and unplugged from
its power source before making repairs or performing
service.
9. Do not install this device on an unstable surface where it
could fall and cause either personal injury or damage to
the device and/or other equipment.
10. Do not subject the product to extreme force, shock, or
uctuations in temperature or humidity.
11. This device is intended for indoor use only.
12. Do not expose this device to water or moisture of any
kind. Do not place drinks or other containers with moisture
on or near the device. If moisture does get in or on the
device, immediately unplug it from the power outlet and
allow it to fully dry before reapplying power.
13. Do not touch the device, the power cord, or any other
connected cables with wet hands.
14. Use only in a well-ventilated area. Do not use in conned
spaces.
15. Prior to operation, check the unit and power cord for
physical damage. Do not use if physical damage has
occurred.
16. Before plugging the unit into a power outlet, ensure that
the outlet provides the same type and level of power
required by the device.

5
Customer Service
ATOM is dedicated to ensuring that your ordering, purchasing,
and delivery experience is second to none. If you have any
problem with your order, please give us an opportunity to
make it right. You can contact an ATOM Customer Service
representative through the phone or email, also you can link on
our website www.atom3dp.com during normal business hours
(Mon-Fri: 9am-12pm, 1pm-6pm)
or via email at [email protected]
Software Installation and Setup
We recommend using Cura for use with both Atom 3.5 and
Atom 3.5 DX. Please visit Atom website to download Cura and
for instruction of installation. The installation package comes
with everything you need to get started.
https://www.atom3dp.com/en/
CCAH21LP1650T7
For low-power radio frequency equipment that has been certied, companies, rms,
or users are not allowed to change the frequency, increase the power, or change the
characteristics and functions of the original design without approval. The use of low-
power radio frequency equipment must not aect ight safety and interfere with legal
communications; if interference is found, it should be stopped immediately, and it can
only be used when there is no interference. The aforementioned legal communications
refer to radio communications operated in accordance with the provisions of the
Telecommunications Administration Law. Low-power radio frequency equipment must
endure the interference of legal communications or industrial, scientic and medical
radio wave radiation electrical equipment.
Package Contents
Please take an inventory of the package contents to ensure
you have all the items listed below. If anything is missing
or damaged, please contact Atom Customer Service for a
replacement.
Atom 3.5
• 1 x Atom 3.5 3D Printer
• 1 x Atom PLA Filament Roll (700g)
• 1 x Power Supply
• 1 x Power Supply AC cable
• 1 x Antenna
• 1 x Spare PTFE-lined Nozzle
• 1 x Auto-level Sensor
• 2 x Spool Axle
• 1 x Teon lubricants
• 1 x Shovel
• 1 x Diagonal pliers
• 1 x Screwdriver( H1.5 )
• 1 x Roll support rod
• 1 x Black hexagon socket screw M5-12mm
• 1 x Washer
• 1 x Retainer clip
CUSTOMER SERVICE/SOFTWARE INSTALLATION AND SETUP/PACKAGE CONTENTS

6
PRINTER SETTING
Follow below instruction before to print :
1. Take the 3D printer out of the package and place it on a stable surface
which near by the AC outlet.
2. Take out the magnetic rod and the mobile platform. In order to ensure
the magnetism of the magnetic rod, please avoid separating the two.
Note: The magnet of each magnetic rod is marked with N-level; those
not marked are S-level.
※ If the mobile platform and the magnetic rod are connected together, please
reconnect the two corresponding to the magnet (as shown in the picture)
3. Install the rod
4. Install Washer > Spool Axie > Filament Roll > Spool Axie
> Retainer Clip
A
T
O
M
3
D
P
R
I
N
T
E
R
S
w
w
w
.
a
t
o
m
3
d
p
.
c
o
m
1
2
3
4
5
N
S
N
S
NS
The fan faces the front

7
6. Plug in the power and turn on the switch5. Install antenna
A. First lock the antenna horizontally into the screw
and tighten it
B. Fold up the antenna at the bend
PRINTER SETTING

8
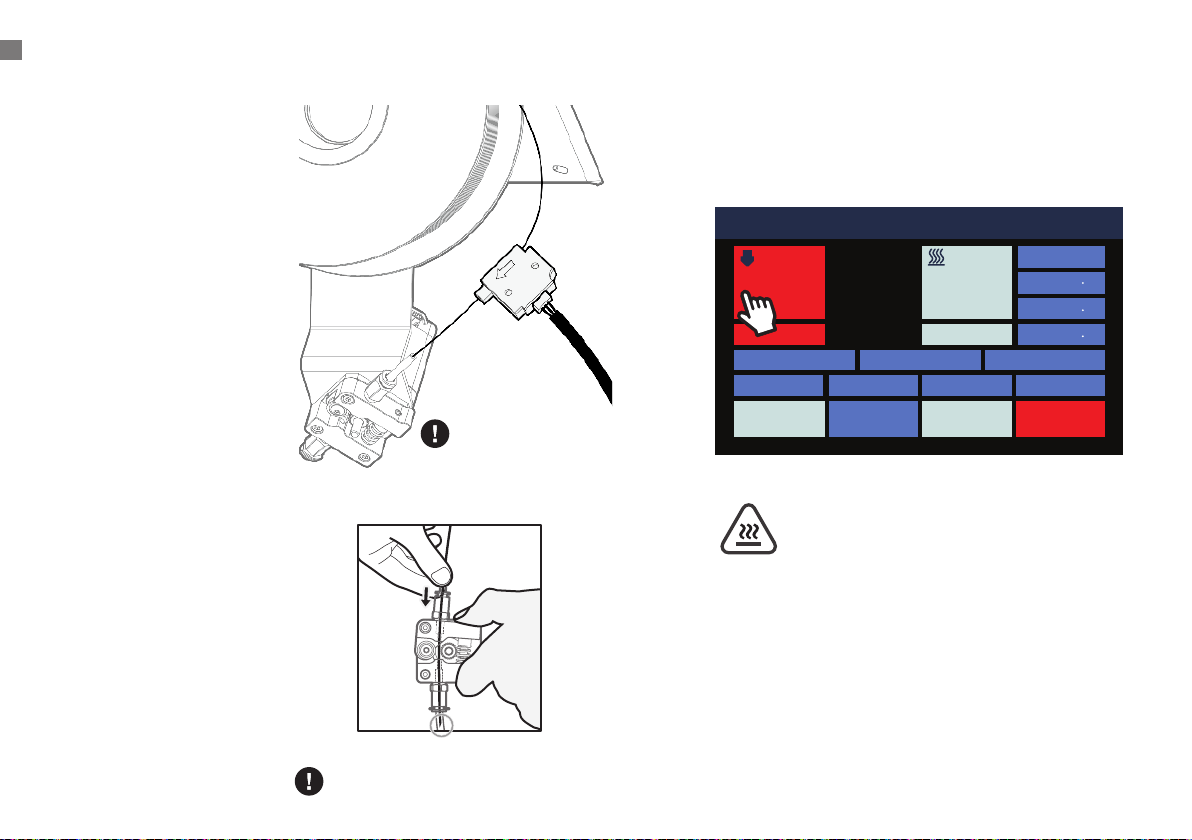
Auto-Leveling
Before your rst print, and anytime you remove the build plate,
you’ll want to run an auto-level to ensure that your parts adhere
well to the glass. Follow the procedure below to run an auto-
level
1. Make sure the nozzle temperature is in room temperature
2. After connecting the automatic calibration sensor to the
green line of the mobile platform cable set, properly cover
the nozzle with the white sponge ring.
Please gently put the sensor
on the nozzle. If the nozzle
touches the plastic lm, it
will cause calibration errors.
Do not touch
the running fan
to avoid injury!
Connect the platform
calibration module cable
and the green connector
which above the nozzle
※Regardless of positive
and negative polarity
Automatic sensor
correction
PREPARING TO PRINT
011 Idle
Position
X 0 0
Y 0 0
Z 337 3
Bed Calibration Extrusion
Macro
Fan 0%
HOMEConsoleMove
STOPControlPrint Setup
Nozzle 1 Hot Bed
200 70
23.3 24.2
1
Note: Please gently put the sensor on the nozzle. If the
nozzle touches the plastic lm, it will cause calibration
errors.

9
011 Idle
Position
X 0 0
Y 0 0
Z 337 3
Bed Calibration Extrusion
Macro
Fan 0%
HOMEConsoleMove
STOPControlPrint Setup
Nozzle 1 Hot Bed
200 70
23.3 24.2
1
Clean the Build Plate
To prepare the build plate for printing, use rubbing alcohol and
a soft, lint-free cloth or white paper towel to remove any dust
and oil from the surface of the glass. DO NOT use colored paper
towels or white board cleaners.
3. Click [ Control ] > [ HOME ] > [ Bed Calibration ] on the
LCD screen to auto-leveling.
4. After the automatic calibration is completed, the automatic
calibration sensor will be removed
1
2
3
PREPARING TO PRINT
10
6. Touch the LCD screen to preheat the nozzle to the
working temperature of the material, for example,
PLA is 200° C.
1. Place the filament spool
on the holder so that
the working end of the
filament hangs down to
the right.
2. Cut the end of the
filament at an angle as
illustrated.
3. Gently straighten a
segment about 5 cm
(2”) from the end with
your ngertips to make it
easier to feed the lament
through the sensor and
the extruder.
4. Remove the filament
sensor from its holder
and feed the end of the
filament through the
sensor in the direction as
indicated by the arrow,
then into the tube on the
right side of the extruder.
5. Pinch the extruder idler
lever and push the
filament past the gear
and into the bowden tube
just past the pneumatic
connector.
Pass the coil to the beginning of the
circle shown in the gure
Place the Sensor Module
back when it is not in use.
Do not touch the heated nozzle
and the heated build plate to
avoid burn scald !
LOADING FILAMENT
011 Idle
Position
X 0 0
Y 0 0
Z 337 3
Bed Calibration Extrusion
Macro
Fan 0%
HOMEConsoleMove
STOPControlPrint Setup
Nozzle 1 Hot Bed
200 70
23.3 24.2
1
Loading Filament
Questo manuale è adatto per i seguenti modelli
1
Indice
Altri manuali Atom Stampante 3D


