
Bresser Circuiti Neo Manuale utente

Digital thermometer ·
Circuiti Neo
EN Instruction manual


3
Contents
1 Imprint (German) .................................................................. 4
2 About this Instruction Manual............................................. 5
3 General safety instructions ................................................. 5
4 Parts overview and scope of delivery ................................ 8
5 Screen display ...................................................................... 9
6 Setting up power supply...................................................... 9
7 Automatic measurement display ...................................... 10
8 Trend arrow indicators....................................................... 10
9 Display change ................................................................... 10
10 Disposal .............................................................................. 11
11 EC Declaration of Conformity ........................................... 11
12 Warranty.............................................................................. 12

4 / 16
1 Imprint (German)
Bresser GmbH
Gutenbergstr. 2
46414 Rhede
Germany
http://www.bresser.de
For any warranty claims or service enquiries, please refer to
the information on "Warranty" and "Service" in this docu-
mentation. We apologize for any inconvenience caused by
the fact that we cannot process enquiries or submissions
sent directly to the manufacturer's address.
Errors and technical changes excepted.
© 2019 Bresser GmbH
All rights reserved.
The reproduction of this documentation - even in extracts -
in any form (e.g. photocopy, print, etc.) as well as the use
and distribution by means of electronic systems (e.g. image
file, website, etc.) without the prior written permission of the
manufacturer is prohibited.
The designations and brand names of the respective com-
panies used in this documentation are generally protected
by trade, trademark and/or patent law in Germany, the
European Union and/or other countries.
5 / 16
2 About this Instruction Manual
NOTICE
These operating instructions are to be considered a
component of the device.
Read the safety instructions and the operating manual care-
fully before using this device.
Keep this manual in a safe place for future reference. When
the device is sold or given to someone else, the instruction
manual must be provided to the new owner/user of the
product.
3 General safety instructions
DANGER
Danger of suffocation!
Improper use of this product may result in suffocation, espe-
cially for children. It is therefore imperative that you observe
the following safety information.
• Keep packaging materials (plastic bags, rubber bands,
etc.) away from children! There is a DANGER OF
CHOKING [These pose a CHOKING HAZZARD]
• This product contains small parts that can be swal-
lowed by children! There is a DANGER OF CHOKING
[These pose a CHOKING HAZZARD]

6 / 16
DANGER
Risk of electric shock
This device has electronic parts operated via a power
source (power supply and/or batteries). Improper use of this
product can cause an electric shock. An electric shock can
cause serious or potentially fatal injuries. The following
safety information must be observed at all times.
• Children must only use the device under adult supervi-
sion! Only use the device as described in the manual;
otherwise, you run the risk of an electric shock.
DANGER
Risk of explosion
Improper use of this product can cause an explosion. The
following safety information must be observed at all times to
prevent an explosion.
• Do not expose the device to high temperatures. Use
only the recommended batteries. Do not short-circuit
the device or batteries, or throw them into a fire! Ex-
cessive heat or improper handling could trigger a short-
circuit, a fire or an explosion!
NOTICE
DANGER of material damage!
Improper handling may result in damage to the unit and/or
accessories. Therefore, use the device only in accordance
with the following safety information.
• Never disassemble the device. In the event of a fault,
please contact your specialist retailer. The specialist re-
tailer will contact the service centre and send the
device for repair if necessary.
7 / 16
• Do not immerse the unit in water!
• Do not expose the device to impacts, vibrations, dust,
constant high temperatures or excessive humidity. This
can result in malfunctions, short-circuits or damage to
the batteries and components.
• Use only the recommended batteries. Always replace
weak or empty batteries with a new, complete set of
batteries at full capacity. Do not use batteries from dif-
ferent brands or with different capacities. Remove the
batteries from the unit if it has not been used for a long
time.
• Never use rechargeable batteries.
NOTICE
Risk of voltage damage!
The manufacturer is not liable for damage related to improp-
erly installed batteries!
Bresser GmbH
Gutenbergstr. 2
46414 Rhede
Germany
http://www.bresser.de
For any warranty claims or service enquiries, please refer to
the information on "Warranty" and "Service" in this docu-
mentation. We apologize for any inconvenience caused by
the fact that we cannot process enquiries or submissions
sent directly to the manufacturer's address.
Errors and technical changes excepted.
© 2019 Bresser GmbH
All rights reserved.

8 / 16
The reproduction of this documentation - even in extracts -
in any form (e.g. photocopy, print, etc.) as well as the use
and distribution by means of electronic systems (e.g. image
file, website, etc.) without the prior written permission of the
manufacturer is prohibited.
The designations and brand names of the respective com-
panies used in this documentation are generally protected
by trade, trademark and/or patent law in Germany, the
European Union and/or other countries.
4 Parts overview and scope of
delivery
1
3
4
5
6
2
7
Illustration1: All parts of the digital thermometer
1 Display 2 Housing
3 Battery compartment 4 Battery door
5 Stand, fold-out 6 °C/°F button (display
change between °C and
°F)
7 Wall mount fixture

9 / 16
5 Screen display
5
4
2
3
1
Illustration2: Screen display of the digital thermometer
1 Climate indicator 2 Humidity trend
3 Temperature trend 4 Indoor temperature (in
°C or °F)
5 Humidity
6 Setting up power supply
1. Remove the battery compartment cover.
10 / 16
2. Insert battery(ies) into the battery compartment. Ensure
that the battery polarity (+/-) is correct.
3. Replace the battery compartment cover.
7 Automatic measurement display
Once the power is established, the readings for the current
environment are displayed on the unit.
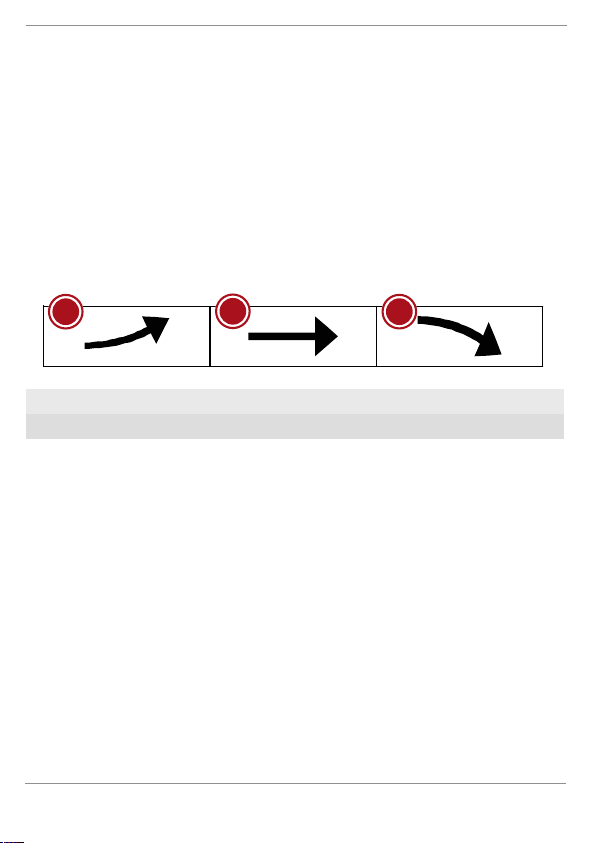
8 Trend arrow indicators
123
1 Rising 2 Steady
3 Falling
The temperature and humidity trend indicator shows the
trends of changes in the forthcoming few minutes. Arrows
indicate a rising, steady or falling trend.
9 Display change
In normal display mode, press the C/F button to toggle
between °C and °F when displaying the temperature unit.
Questo manuale è adatto per i seguenti modelli
1
Indice
Altri manuali Bresser Termometro


