Data I/O FlashPAK Manuale utente

Congratulations on purchasing FlashPAK™— a scalable desktop
solution for engineering and manual production programming of
Flash devices using the latest FlashCORE technology.
FlashPAK programs device package types: TSOP • CSP • PLCC •
SOIC • BGA • µBGA, • FBGA, • EBGA, • TFBGA, • QFP, • TQFP,
• PoP, and more, and supports microcontrollers and EPROMs.
For support send e-mail to
support@dataio.com or see the
FlashPAK Operator’s Guide.
On the Web:
www.dataio.com [USA]
www.dataio.de [Germany]
www.dataio.cn [China]
Set up FlashPAK.
A
Install PC Card
Reader/Writer.
B
Install TaskLink.
C
Create a Job.
Configure Network.
D
Load a Job into
FlashPAK & Program
E
Getting Started Guide
Fast Device Support Online
Searches:
In TaskLink click Help > Data I/O on the Web > Search for Device Support.
Select your programmer model.
If no device is found, you can click on Submit a Device Support Request on the
same Web page.
Requests:
In TaskLink click Help > Data I/O on the Web > Request Device Support.
For information on FlashPAK see:
–FlashPAK Operator’s Guide (hardcopy included).
–in TaskLink click Help > Documentation > FlashPAK Operator’s
Guide to see the PDF.
For information on TaskLink see:
–the TaskLink on-screen Help menu.
–the Data I/O Web site.
PC Cards
FlashPAKs read type I and type II ATA 68-pin PC cards. PC Cards (originally
called PCMCIA Cards) use 68 pin dual row connecting interface.
CompactFlash (CF) cards can be used directly in a PC Card slot as an ATA (IDE)
or PCMCIA storage device with a passive adapter. A passive adapter is supplied
with FlashPAK. CF is a mass storage Flash memory card format.
New PC Cards must be formatted using FAT16.
Computer Requirements (for TaskLink)
• Operating System: Windows 2000, NT, XP, Vista
• Hard disk space: 90 MB minimum for TaskLink files
• CD ROM drive capable of reading CDR discs
•Mouse
• VGA monitor
• A PC Card reader/writer or a port (USB or parallel) to install an external
reader/writer
FlashPAK Electrical Requirements
• Operating voltage: 110 to 240 VAC
• Power Consumption: 100 watts maximum
• Frequency Range: 50 to 60 Hz
Data I/O has endeavores to ensure that this document is accurate. Data I/O assumes no liability for
error, or for any incidental, consequential, indirect, or special damages, including but without limita-
tion, loss of use, loss or alteration of data, delays, or lost profits or savings, arising from the use of this
document or the product that it accompanies.
©2004-2009 Data I/O Corporation. All rights reserved.
5. Close the Device
Footnote box if it displays.
6. Load Job is complete.
Click OK.
CAUTION: Before pushing
the eject button on your card reader,
be sure to use the proper procedure
for closing files on your system. This
may mean right-clicking the drive let-
ter in Windows Explorer and select-
ing Eject. Some systems display an
icon in the Windows taskbar to stop
programs.
7. Eject your PC Card from the com-
puter and insert it into FlashPAK and
switch the power on.
CAUTION: Never remove the PC
Card from FlashPAK while the yellow
lamp is blinking.
Your Job is ready to run
(after the Self-test passes). Press the
green Start button and follow the
instructions in the Control Panel win-
dow.
• A vacuum tweezer is supplied for
handling devices.
• Lift the yellow Actuating Bar to pro-
gram devices.
983-0708-005E

1. Unpack
FlashPAK. Use
ESD precautions.
Plug an ESD strap
into the back.
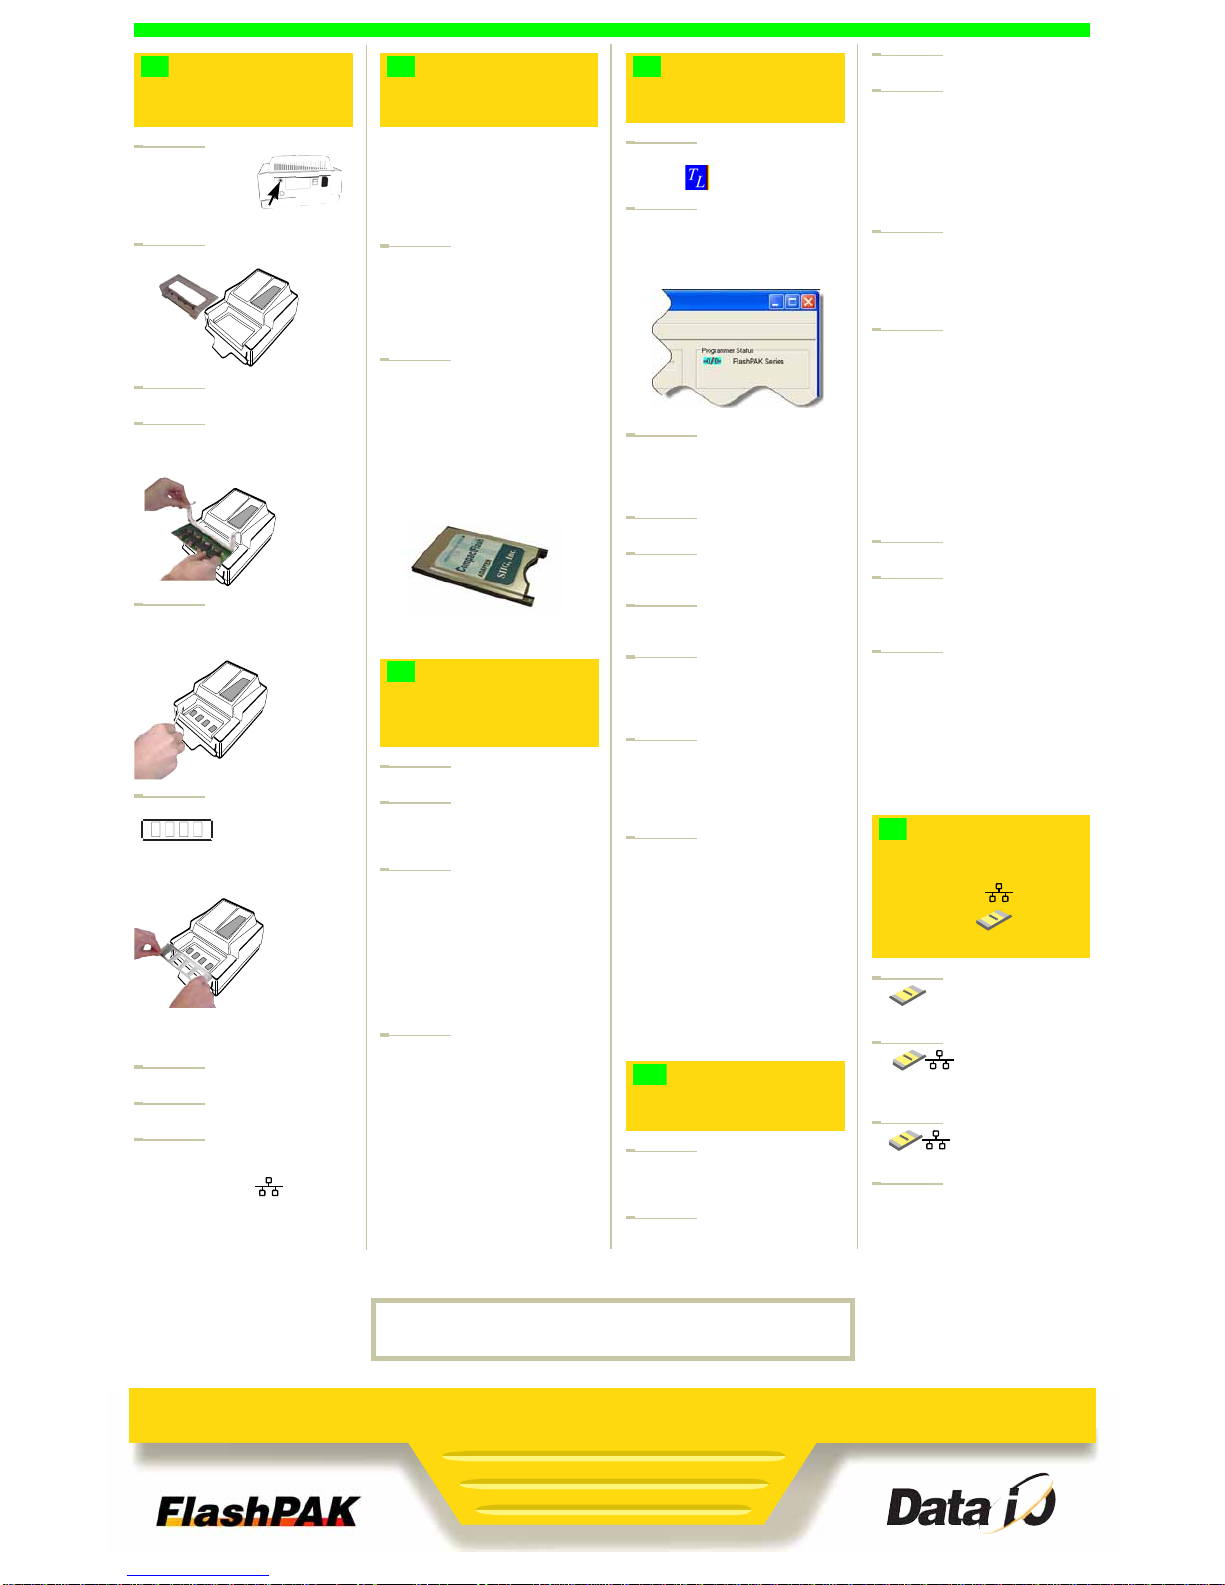
2. Lift off the Actuator Cover.
3. Unbox the Socket Adapter.
4. Lift the bracket open and install
the Socket Adapter onto the dowel
pins.
5. Lower the bracket and screw in
two screws. An hex key (Allen
wrench) is included.
6. Unbox the metal Actuator Plate
and slide it into the
bracket grooves, flanges up, until it
snaps into place. The part number is
visible from the front.
NOTE: The yellow Actuating Bar
must be in the up position.
7. Replace the Actuator Cover.
8. Plug in the Power Cord.
9. Plug your Ethernet cable into the
back of FlashPAK if you want to use
the Network option.
This is a 10BASE-T connection for
FlashPAK and FlashPAK II, and
100BASE-T connection for
FlashPAK III and higher.
If your PC already has a PC
Card Reader/Writer, skip to C.
To install a Card Reader/ Writer
(ATA drive) with USB cable onto
your Windows-based PC:
1. Plug your card reader into the PC
that will get TaskLink installed.
Windows XP and Vista detect and
install the correct driver(s) when the
reader is connected.
2. Follow instructions that came with
your card reader.
NOTE: More than one new drive let-
ter may appear in Windows Explorer.
The Compact Flash (CF) drive is the
only one required.
NOTE: Any card adapter that comes
with the reader is extra. FlashPAK
supplies what is needed.
1. Start your computer.
2. Unbox the FlashPAK CD and put
it into your computer’s CD drive. It
has TaskLink-for-FlashPAK on it.
3. If the CD doesn’t auto-start, click
Start > Run. Then type D:\setup.exe
into the command box, if ‘D’ is the
drive letter of your CD drive.
Note: If this version of the TaskLink
application is not on the target com-
puter, the InstallWizard automatically
checks the boxes for FlashPAK and
TaskLink.
4. Ensure that boxes for TaskLink
Program Files and FlashPAK
System Software and Algorithms
are checked. If there is a preexisting
TaskLink application on the target
computer, checking the boxes will
write over your existing version (rec-
ommended). Click Next.
Continue the Install Wizard setup
instructions.
1. Start TaskLink by double-clicking
the icon.
2. If FlashPAK is not the current pro-
gramming system, click System >
Select Programming System. Select
FlashPAK and then OK.
3. Click System > Options. Then
click the Communications tab. Enter
the drive letter for your PC Card
reader. Click OK.
4. Click Task > Task Manager.
5. Click Add, and type a name for
your new job. Click OK.
6. (Optional) In the Edit Task dialog
that opens, enter a description.
7. In the Edit Task dialog, select a
device by clicking the drop-down
arrow next to the Primary Device
box.
8. In the Select Device dialog win-
dow, click your target device, then
click Select. If you are asked if you
want to reset device specific param-
eters, click Yes.
9. Click the Data tab. Type a data
filename into the PC file box, or
browse to your filename (you must
have a data file to copy to your tar-
get device), or click the drop-down
arrow and click
c:\dataio\tlwin\demo.dat to use the
demonstration file.
On the other tabs, all information is
set to default values and can be vis-
ited and changed for your specific
programming options. Click OK.
1. Insert a PC Card (or Compact
Flash and Adapter) into the
Reader/Writer.
2. In TaskLink, close the Task Man-
ager, then click Tools > Create Net-
work Configuration Card.
3. Click Next.
4. Type in the data for the desired
FlashPAK: • Programmer Port num-
ber, • IP Address, • Subnet Mask,
and • Default Gateway. Your Infor-
mation Systems (IS) Department
should supply these numbers. Click
Next.
5. If you use a Day and Time Server,
enter its IP Address. Otherwise,
select Not using a Day and Time
Server. Check with your IS Deptart-
ment. Click Next.
6. Type in a name to assign to this
programmer. Click Finish. The Net-
work Configuration is written to the
PC Card. Click OK.
NOTE: Before pushing the eject but-
ton on your card reader, be sure to
use the proper procedure for closing
files on your system. This may mean
right-clicking the drive letter in Win-
dows Explorer and selecting Eject.
Some systems display an icon in the
Windows taskbar to stop programs.
7. Remove the PC Card.
8. Insert the PC Card into FlashPAK.
CAUTION: Do not switch power off
when the yellow lamp is blinking.
9. Cycle the power on FlashPAK to
set your Network Configuration.
NOTE: This step assumes that the
programmer has not been Net-
work-configured before. If it has, use
the steps provided in TaskLink
on-screen Help for Configuring
FlashPAK.
1. Insert a PC Card into the
Reader/Writer.
2. In TaskLink open the
Task Manager and select the job
you created (step D1). Click Load.
3. Select your target pro-
grammer/drive and click OK.
4. (Optional) Enter a Pass Limit and
Session ID in the dialog that opens,
and click OK.
continued
Unbox and Set Up
FlashPAK.
A
Install a PC Card
Reader/Writer.
Unbox the CD and
Install TaskLink onto
Your PC.
B
PC Card adapter, supplied
C
Create a Job in
TaskLink.
(Optional)
Set up the Network
feature (or skip to E).
D1
D2
Load a Job into
FlashPAK
via Network ,
or via Card ,
and Program Devices.
E
For computer requirements see the back page.
For information on PC Card Reader/Writers see manufacturers Web sites.
Fl a s h P A K

Congratulations on purchasing FlashPAK™— a scalable desktop
solution for engineering and manual production programming of
Flash devices using the latest FlashCORE technology.
FlashPAK programs device package types: TSOP • CSP • PLCC •
SOIC • BGA • µBGA, • FBGA, • EBGA, • TFBGA, • QFP, • TQFP,
• PoP, and more, and supports microcontrollers and EPROMs.
For support send e-mail to
support@dataio.com or see the
FlashPAK Operator’s Guide.
On the Web:
www.dataio.com [USA]
www.dataio.de [Germany]
www.dataio.cn [China]
Set up FlashPAK.
A
Install PC Card
Reader/Writer.
B
Install TaskLink.
C
Create a Job.
Configure Network.
D
Load a Job into
FlashPAK & Program
E
Getting Started Guide
Fast Device Support Online
Searches:
In TaskLink click Help > Data I/O on the Web > Search for Device Support.
Select your programmer model.
If no device is found, you can click on Submit a Device Support Request on the
same Web page.
Requests:
In TaskLink click Help > Data I/O on the Web > Request Device Support.
For information on FlashPAK see:
–FlashPAK Operator’s Guide (hardcopy included).
–in TaskLink click Help > Documentation > FlashPAK Operator’s
Guide to see the PDF.
For information on TaskLink see:
–the TaskLink on-screen Help menu.
–the Data I/O Web site.
PC Cards
FlashPAKs read type I and type II ATA 68-pin PC cards. PC Cards (originally
called PCMCIA Cards) use 68 pin dual row connecting interface.
CompactFlash (CF) cards can be used directly in a PC Card slot as an ATA (IDE)
or PCMCIA storage device with a passive adapter. A passive adapter is supplied
with FlashPAK. CF is a mass storage Flash memory card format.
New PC Cards must be formatted using FAT16.
Computer Requirements (for TaskLink)
• Operating System: Windows 2000, NT, XP, Vista
• Hard disk space: 90 MB minimum for TaskLink files
• CD ROM drive capable of reading CDR discs
•Mouse
• VGA monitor
• A PC Card reader/writer or a port (USB or parallel) to install an external
reader/writer
FlashPAK Electrical Requirements
• Operating voltage: 110 to 240 VAC
• Power Consumption: 100 watts maximum
• Frequency Range: 50 to 60 Hz
Data I/O has endeavores to ensure that this document is accurate. Data I/O assumes no liability for
error, or for any incidental, consequential, indirect, or special damages, including but without limita-
tion, loss of use, loss or alteration of data, delays, or lost profits or savings, arising from the use of this
document or the product that it accompanies.
©2004-2009 Data I/O Corporation. All rights reserved.
5. Close the Device
Footnote box if it displays.
6. Load Job is complete.
Click OK.
CAUTION: Before pushing the eject
button on your card reader, be sure
to use the proper procedure for clos-
ing files on your system. This may
mean right-clicking the drive letter in
Windows Explorer and selecting
Eject. Some systems display an icon
in the Windows taskbar to stop pro-
grams.
7. Eject your PC Card from
the computer and insert it into
FlashPAK and switch the power on.
CAUTION: Never remove the PC
Card from FlashPAK while the yellow
lamp is blinking.
8. Your Job is ready torun
(after the Self-test passes). Press
the green Start button and follow the
instructions in the Control Panel
window.
• A vacuum tweezer is supplied for
handling devices.
• Lift the yellow Actuating Bar to pro-
gram devices.
983-0708-005E
Altri manuali Data I/O Scheda madre

Data I/O
Data I/O 29B Manuale utente

Data I/O
Data I/O FLX500 Manuale utente

Data I/O
Data I/O Sprint PLUS 48 Manuale utente

Data I/O
Data I/O OPTIMA Manuale utente

Data I/O
Data I/O PSV7000 Manuale utente

Data I/O
Data I/O 298 Manuale utente

Data I/O
Data I/O DUAL Manuale utente

Data I/O
Data I/O UniSite-xpi Manuale utente
Manuali Scheda madre popolari di altre marche

Telit Wireless Solutions
Telit Wireless Solutions SL869-3DR Manuale utente

Gigabyte
Gigabyte GA-9IVDT Manuale utente

Texas Instruments
Texas Instruments ADS8372EVM Manuale utente

Commell
Commell MS-C73 Manuale utente

IBT Technologies
IBT Technologies MB860 Manuale utente

Nvidia
Nvidia TEGRA DG-04927-001_V01 Manuale utente


