dji OSMO ACTION 3 Manuale utente

User Manual
2022.9v1.0
2
©2022 DJI All Rights Reserved.
Using this Manual
Legend
Important Hints and Tips
Read Before First Use
Read the following documents before using DJI™ OSMO™ Action 3.
Osmo Action 3 Quick Start Guide
Osmo Action 3 User Manual
Osmo Action 3 Safety Guidelines
It is recommended to watch all the tutorial videos on the official website (www.dji.com/
action-3) or in the DJI Mimo app and read the safety guidelines before using for the first
time. Make sure to review the quick start guide before using for the first time and refer to
this user manual for more information.
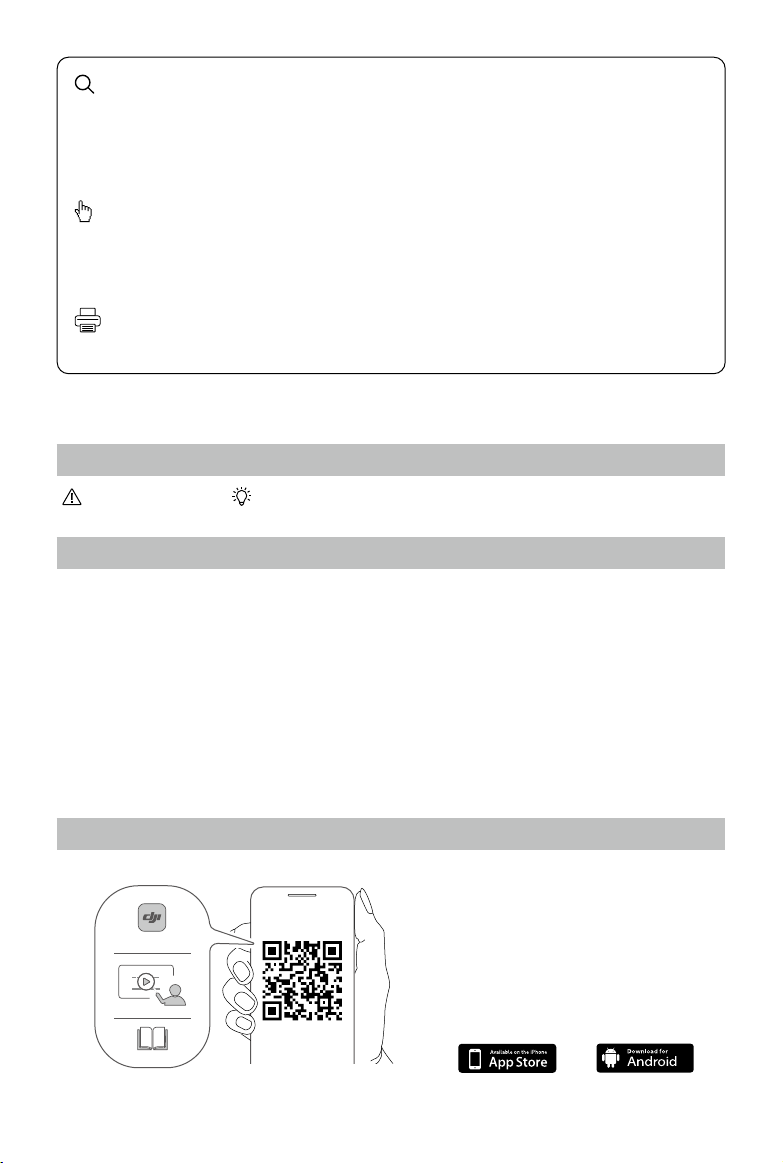
Download DJI Mimo App and Watch the Tutorial Videos
https://s.dji.com/guide35
DJI Mimo App
Android 8.0 or aboveiOS 12.0 or above
Searching for Keywords
Search for keywords such as “battery” and “install” to find a topic. If you are
using Adobe Acrobat Reader to read this document, press Ctrl+F on Windows or
Command+F on Mac to begin a search.
Navigating to a Topic
View a complete list of topics in the table of contents. Click on a topic to navigate to
that section.
Printing this Document
This document supports high resolution printing.

©2022 DJI All Rights Reserved. 3
Contents
Using this Manual 2
Legend 2
Read Before First Use 2
Download DJI Mimo App and Watch the Tutorial Videos 2
Introduction 4
Overview 4
Accessories 5
Using for the First Time 8
Attaching the Battery 8
Inserting the microSD Card 8
Charging Osmo Action 3 8
Activating Osmo Action 3 9
Operation 10
Button Features 10
Operating the Touchscreen 10
Storing Photos and Videos 16
Status LED Descriptions 16
DJI Mimo App 17
Transferring Files 20
Webcam Mode 20
Microphone Connection 20
Maintenance 22
Firmware Update 22
Underwater Usage Notes 22
Cleaning Notes 23
Battery Usage Notes 23
Using Other Accessories (Excluded) 24
Specifications 27

4
©2022 DJI All Rights Reserved.
Introduction
Osmo Action 3 is capable of shooting sharp 12MP photos and capturing smooth video
at up to 4K/120fps. With DJI’s latest EIS (Electronic Image Stabilization) technology, Osmo
Action 3 can record super smooth footage for various sports scenes. Osmo Action 3 is
equipped with dual touchscreens. The front touchscreen helps capture the perfect selfie,
while the rear touchscreen displays the live view of the camera. Both touchscreens enable
users to change the settings with hand gestures and fingertip movements. The buttons on
the camera enable users to control recording or switch the shooting mode. Osmo Action
3 is waterproof at depths of up to 16 m. With different Osmo accessories, users can enjoy
the full range of Osmo Action 3 features.
Overview
1. Shutter/Record Button
2. Front Touchscreen
3. Lens
4. Status LED I
5. Microphone I
6. Color Temperature Photo Sensor
7. Microphone II
8. USB-C Port
9. USB-C Port Cover
10. USB-C Port Cover Release Button
11. Lens Protective Cover
12. Quick Switch Button
13. Speaker
14. Status LED II
15. Rear Touchscreen
16. Battery Compartment Cover
17. Battery Compartment Cover
Release Button
1
2
18
19 20
14
15
7
13
3
48
9
16
17
10
11
12
5
6
18. Windproof Microphone
19. Quick-Release Slot I
20. Quick-Release Slot II

DJI Osmo Action 3 User Manual
©2022 DJI All Rights Reserved. 5
Accessories
Osmo Action 3 is compatible with various accessories to flexibly change the position to
shoot various sports scenes.
Osmo Action 3 Adhesive Base Kit
The Osmo Action 3 Adhesive Base Kit includes the following accessories.
Accessory Description
Osmo Action 3 Quick-Release Adapter Mount: With a
magnetic design, the quick-release adapter mount can be
easily attached to the camera and connected to the other
accessories.
Osmo Locking Screw: Secures the Osmo Action 3 Quick-
Release Adapter Mount to the Osmo Flat Adhesive Base.
Osmo Flat Adhesive Base: The base forms a strong, durable,
and long-lasting bond on clean and flat surfaces, ensuring
secure mounting.
Press down on the camera until the clips of the quick-release adapter mount are firmly
inserted into the quick-release slots on the camera, and then tighten the locking screws.
Wipe the surface of the object before attaching the adhesive base. Attach and press the
adhesive base down firmly, and hold for at least 10 seconds. It is recommended to wait 30
minutes before attaching the camera.
•Make sure that the clips of the quick-release adapter mount are firmly inserted into
the quick-release slots on the camera before use. Press both clips of the quick-release
adapter mount when removing the camera.
•DO NOT attach the adhesive base to surfaces that are arched, curved, rough,
powdered, peeling, covered in dust or sand, or have oil, wax, or water stains.
Otherwise, the adapter mount may not be attached firmly.
•The recommended application temperature for the base is -10° to 40° C (14° to 104° F).
DO NOT attach the adhesive base to a surface with a higher or lower temperature.

DJI Osmo Action 3 User Manual
6
©2022 DJI All Rights Reserved.
1
2
3
Osmo Action 3 Horizontal-Vertical Protective Frame
With the Osmo Action 3 Horizontal-Vertical Protective Frame, users can flip the camera
from the horizontal to the vertical position for different shooting angles. As shown in the
figure below, open the buckle of the horizontal-vertical protective frame, align and put the
camera into the frame, then close the buckle. The left side of the frame is equipped with
two quick-release slots, which can be used with the Osmo Action 3 Quick-Release Adapter
Mount to fasten other accessories such as the Osmo Action 3 Adhesive Base Kit and the
Osmo 1.5m Extension Rod.
Osmo Action 3 Rubber Lens Protector
Recording videos of high specifications for an extended time may cause the Osmo Action
3 lens protective cover to heat up. Install the rubber lens cover to prevent overheating.
•The rubber lens protector is made of rubber, where any damaged areas may result in
cracking.
•The rubber lens protector may stretch or break if subjected to excessive force.
•DO NOT store the rubber lens protector in locations exposed to direct sunlight, high
temperatures, or humidity.
Osmo Action 3 Extreme Battery
The Osmo Action 3 Extreme Battery boosts Osmo Action 3 performance across a wide
temperature range from -20° to 45° C (-4° F to 113° F). With a 1770mAh capacity, the battery
can continuously work for up to 160 minutes*. Refer to Battery Usage Notes for more
detailed information on battery usage.
* Tested in a -20° C (-4° F) laboratory environment while recording 1080p/30fps videos with EIS
disabled and the screen off. For reference only.
Osmo Action 3 Multifunctional Battery Case
The Osmo Action 3 Multifunctional Battery Case (hereinafter referred to as “the battery
case”) is designed for storing two microSD cards and three Osmo Action 3 Extreme
Batteries safely. Users can check the battery levels by pressing the button once or

DJI Osmo Action 3 User Manual
©2022 DJI All Rights Reserved. 7
opening the battery case. The status LEDs will display the battery level. When a charger
is connected to the battery case with batteries inserted, the battery case will charge the
batteries. When the batteries are inserted into the battery case, with external devices
connected to the USB-C port, the batteries can be used as a power bank to charge the
connected external devices.
The batteries with the highest power level will be charged first, followed by the remaining
batteries to be charged in sequence. The batteries with the lowest power level will be
discharged first, followed by the remaining batteries to be discharged in sequence.
When using the battery case to charge the Osmo Action 3 Extreme Battery, it is
recommended to use the DJI 30 W USB-C Charger (not included as standard) or a USB-C
charger that supports Power Delivery or PPS (Programmable Power Delivery). Three
batteries can be fully charged in about two hours with the DJI 30 W USB-C Charger.
•DO NOT use the battery case to charge a non-DJI OSMO battery. DJI OSMO shall not be
responsible for any fault or damage caused by the use of any non-DJI OSMO battery.
•Place the battery case on a flat and stable surface when in use. Ensure the device is
properly insulated to prevent fire hazards.
•DO NOT attempt to touch the metal terminals on the battery case.
•Clean the metal terminals on the battery case with a clean, dry cloth if there is any
noticeable buildup.
•The battery case is not waterproof. DO NOT place it in water or spill any liquid on the
case.

8
©2022 DJI All Rights Reserved.
Charging Osmo Action 3
Press the release button on the USB-C port cover and slide the cover down.
Connect a USB-C charger (not included) to the USB-C port using the Type-C to Type-C PD
cable (included). It is recommended to use the DJI 30 W USB-C Charger or a USB-C charger
that supports Power Delivery or PPS (Programmable Power Supply). When powered off,
the status LEDs blink green while charging. When the status LEDs turn off, the battery is
fully charged. It takes about 18 minutes to charge the battery to 80%. The battery can be
fully charged in about 49 minutes*.
* Charging time was tested using a DJI 30 W USB-C Charger in a 25° C (77° F) environment. For
reference only.
Inserting the microSD Card
The footage shot on Osmo Action 3 is stored on a microSD card. A UHS-I Speed Grade 3
rating microSD card is required due to the fast reading and writing speeds necessary for
high-resolution video data. Refer to the recommended microSD card list in “Specifications”
for more information. Insert the microSD card into the microSD card slot as shown.
Gently push the microSD card into the camera to partially eject the microSD card.
1
2
1
2
1
2
Using for the First Time
Attaching the Battery
Press the release button on the battery compartment cover and slide upward, then insert
the battery into the battery compartment, as shown below. Make sure the battery is
properly inserted, then close the battery compartment cover. Note: if the battery cover is
properly mounted, the orange marks on its bottom will not be visible.

DJI Osmo Action 3 User Manual
©2022 DJI All Rights Reserved. 9
Activating Osmo Action 3
The DJI Mimo app is required for activation when using Osmo Action 3 for the first time.
Follow the steps below to activate.
1. Press and hold the Quick Switch Button to power on.
2. Enable Wi-Fi and Bluetooth on the mobile device.
3. Launch DJI Mimo, tap , and follow the instructions to activate Osmo Action 3.
Refer to the relevant sections on “DJI Mimo App” for more detailed information on how to
operate the app.
00!39
Life Advice Looking Through... Do A Sporting Stag
01!23
OSMO MOBILE 4 MORE
OSMO ACTION MORE
TEMPLATE
SUPPORT
COMMUNITY
Home EditAlbum Me
Device ACADEMY
DJI MIMO
00!39
Life Advice Looking Through... Do A Sporting Stag
01!23
OSMO MOBILE 4 MORE
OSMO ACTION MORE
TEMPLATE
SUPPORT
COMMUNITY
Home EditAlbum Me
Device ACADEMY
DJI MIMO
1
2
1
2
10
©2022 DJI All Rights Reserved.
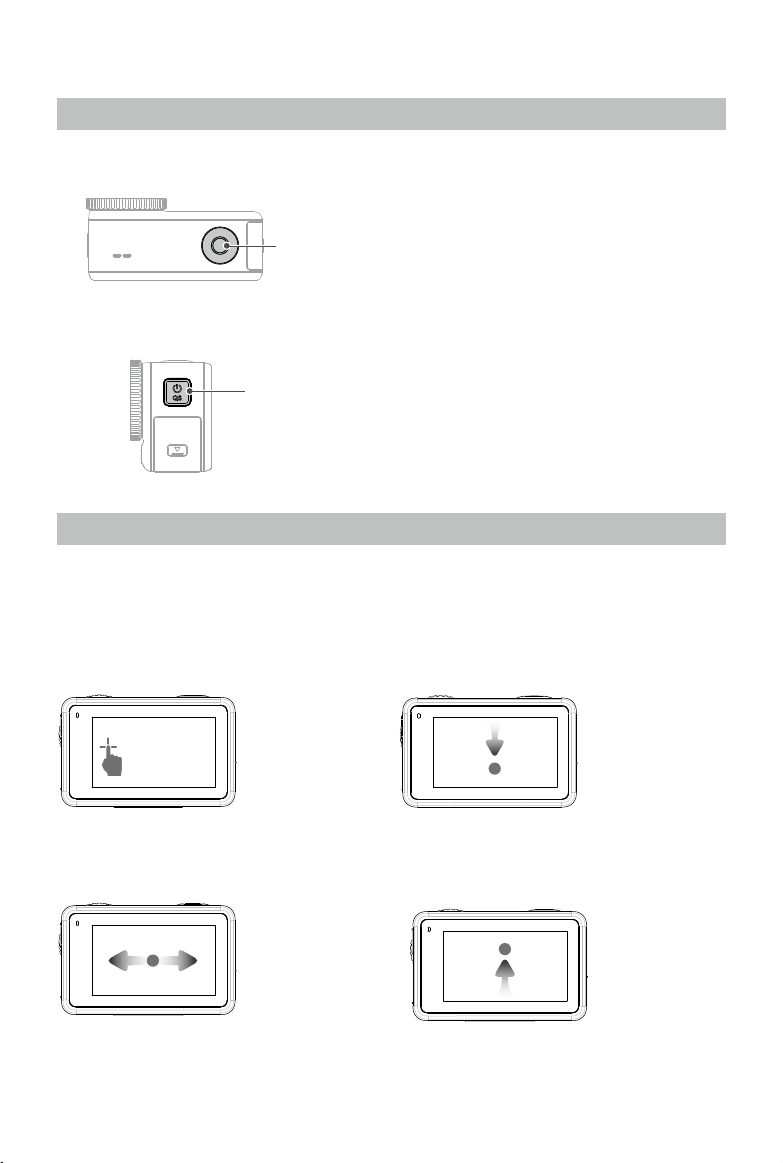
Shutter/Record Button
•Press once: Take a photo or start/
stop recording
• SnapShot: Press and hold to quickly
power on and begin shooting. The
shooting mode will depend on the
SnapShot settings.
Quick Switch Button
• Press and hold: Power on or off
•Press once: Switch between shooting
modes
Operating the Touchscreen
After the camera is powered on, both touchscreens of the camera display the live view as
well as the shooting mode, battery level, and microSD card information. Tap or swipe on a
touchscreen to interact with the camera. Note: the two touchscreens cannot be operated
at the same time. When one touchscreen is operated, the other touchscreen is locked.
Tap
Select the icons on
both sides of the
screen to playback
shot footage
and change the
camera settings.
Swipe Left or
Right
Switches between
video, photo, and
other shooting
modes.
Swipe Down
from the Edge
of the Screen
Enters the
Control Menu.
Swipe Up from
the Edge of the
Screen
To set shooting
parameters such
as aspect ratio,
countdown time,
and resolution.
Shutter/Record
Button
Quick Switch Button
Operation
Button Features
Altri manuali per OSMO ACTION 3
2
Indice
Altri manuali dji Macchina fotografica digitale

dji
dji ZENMUSE P1 Manuale utente

dji
dji O3 Air Unit Manuale utente

dji
dji OSMO+ Manuale utente

dji
dji OSMO POCKET 3 Manuale di istruzioni

dji
dji Zenmuse X5R Manuale utente

dji
dji Osmo Pocket Manuale utente

dji
dji ZENMUSE P1 Manuale utente

dji
dji Zenmuse X5 Manuale utente

dji
dji POCKET 2 Manuale utente

dji
dji RONIN 4D Manuale utente

dji
dji FPV AIR UNIT Manuale utente

dji
dji ACTION 2 Manuale utente

dji
dji POCKET 2 Manuale utente

dji
dji ZENMUSE L1 Manuale utente

dji
dji Osmo Pocket Manuale di istruzioni

dji
dji Zenmuse X5 Manuale utente

dji
dji RS 2 Manuale utente

dji
dji ZENMUSE H20N Manuale utente

dji
dji ZENMUSE X5S Manuale utente

dji
dji POCKET 2 Manuale utente


