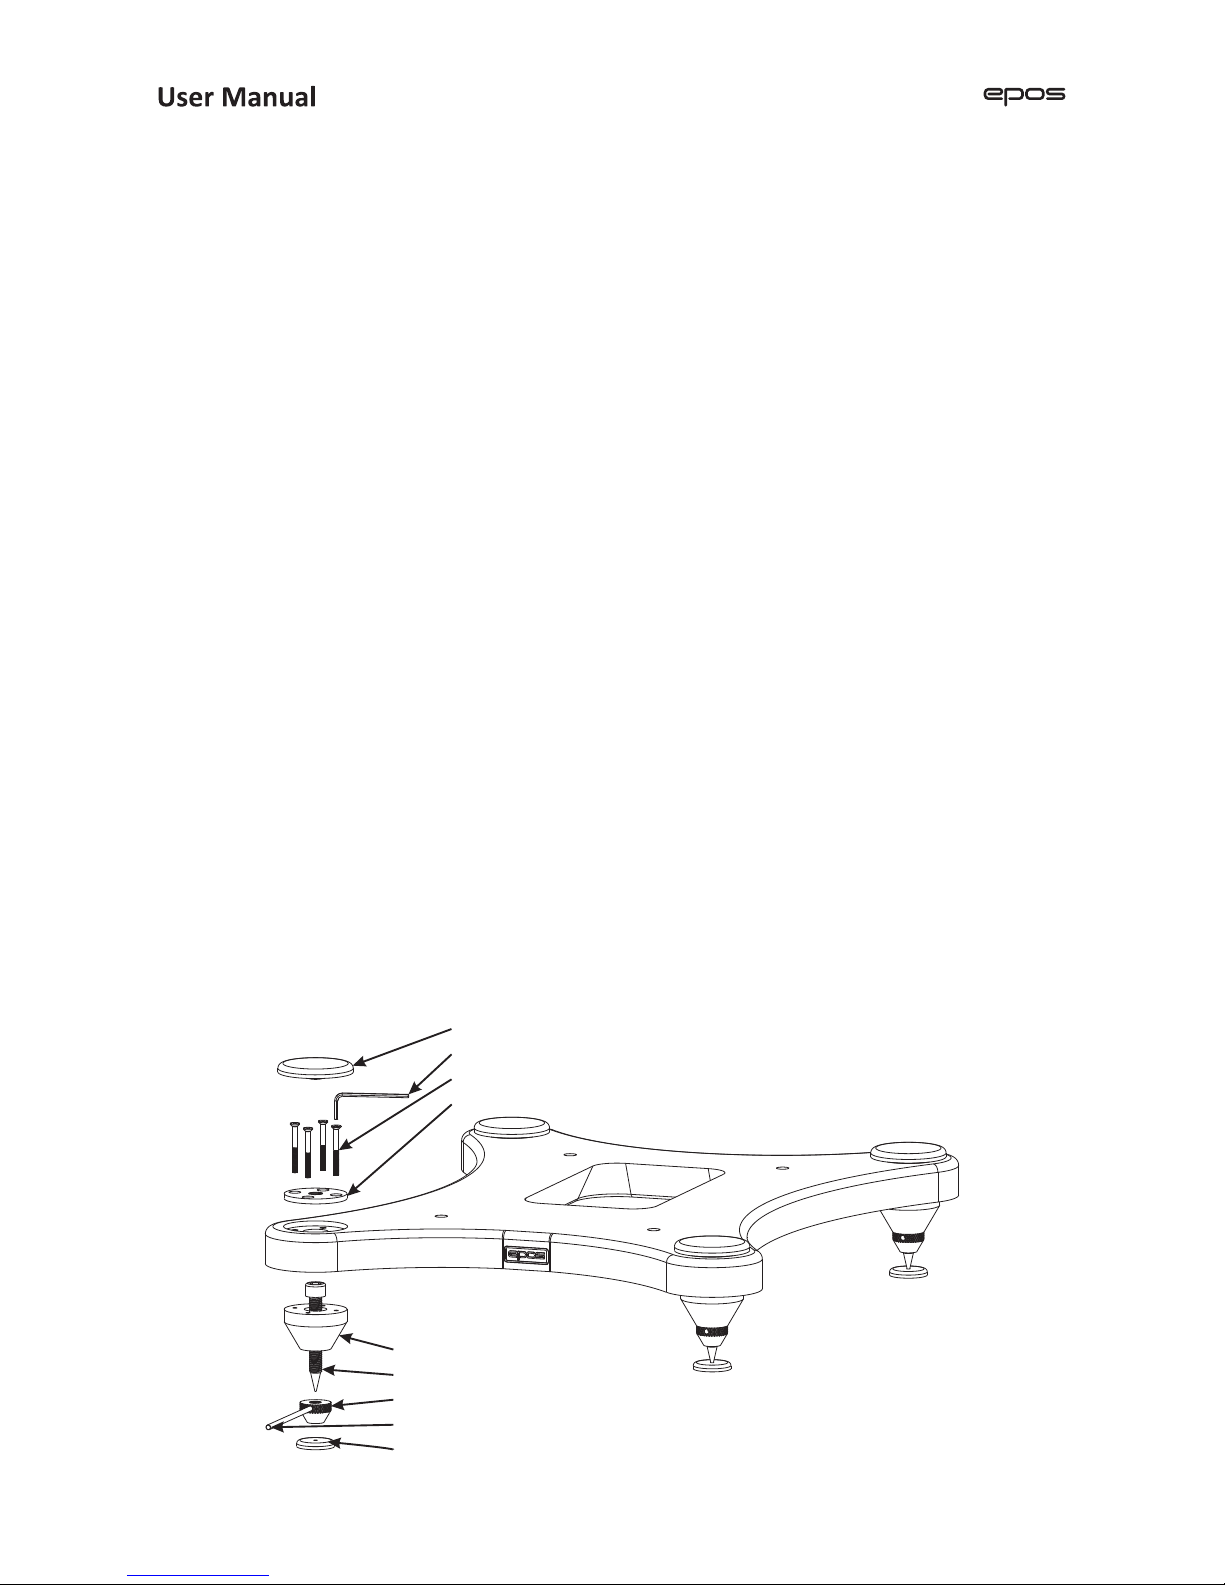
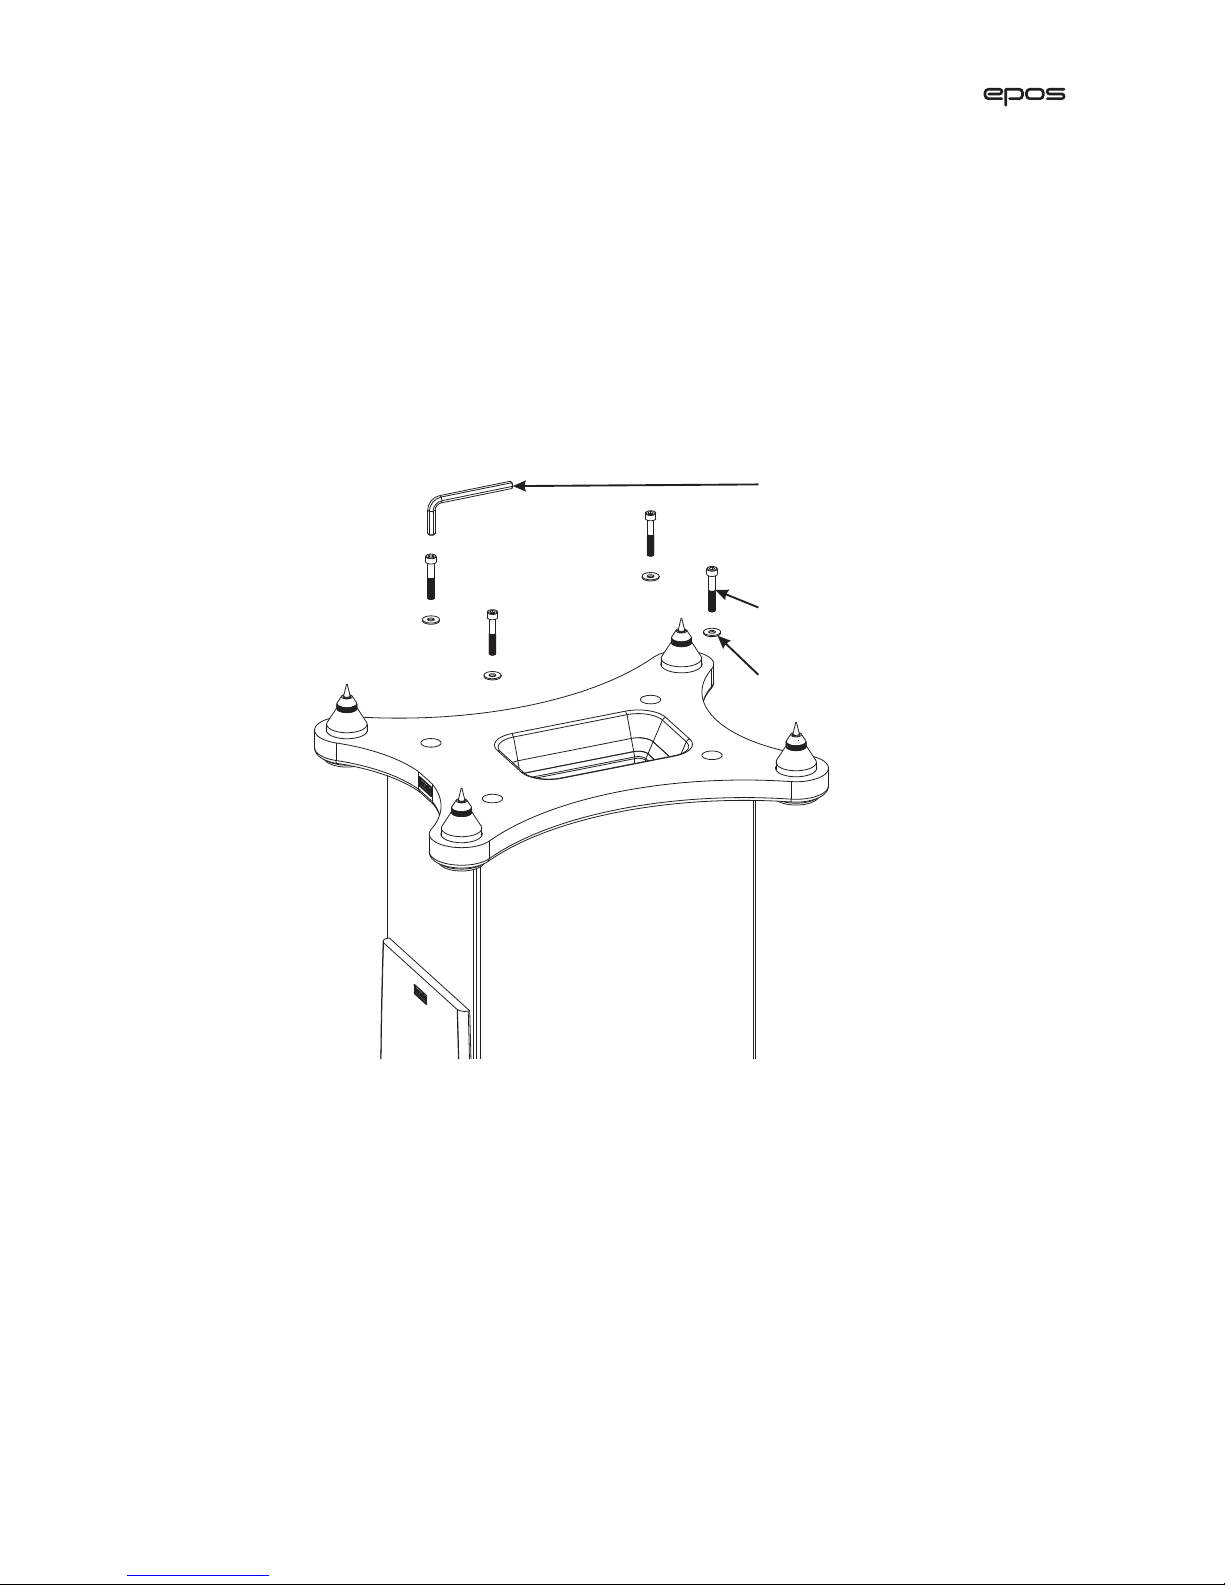
Page 8
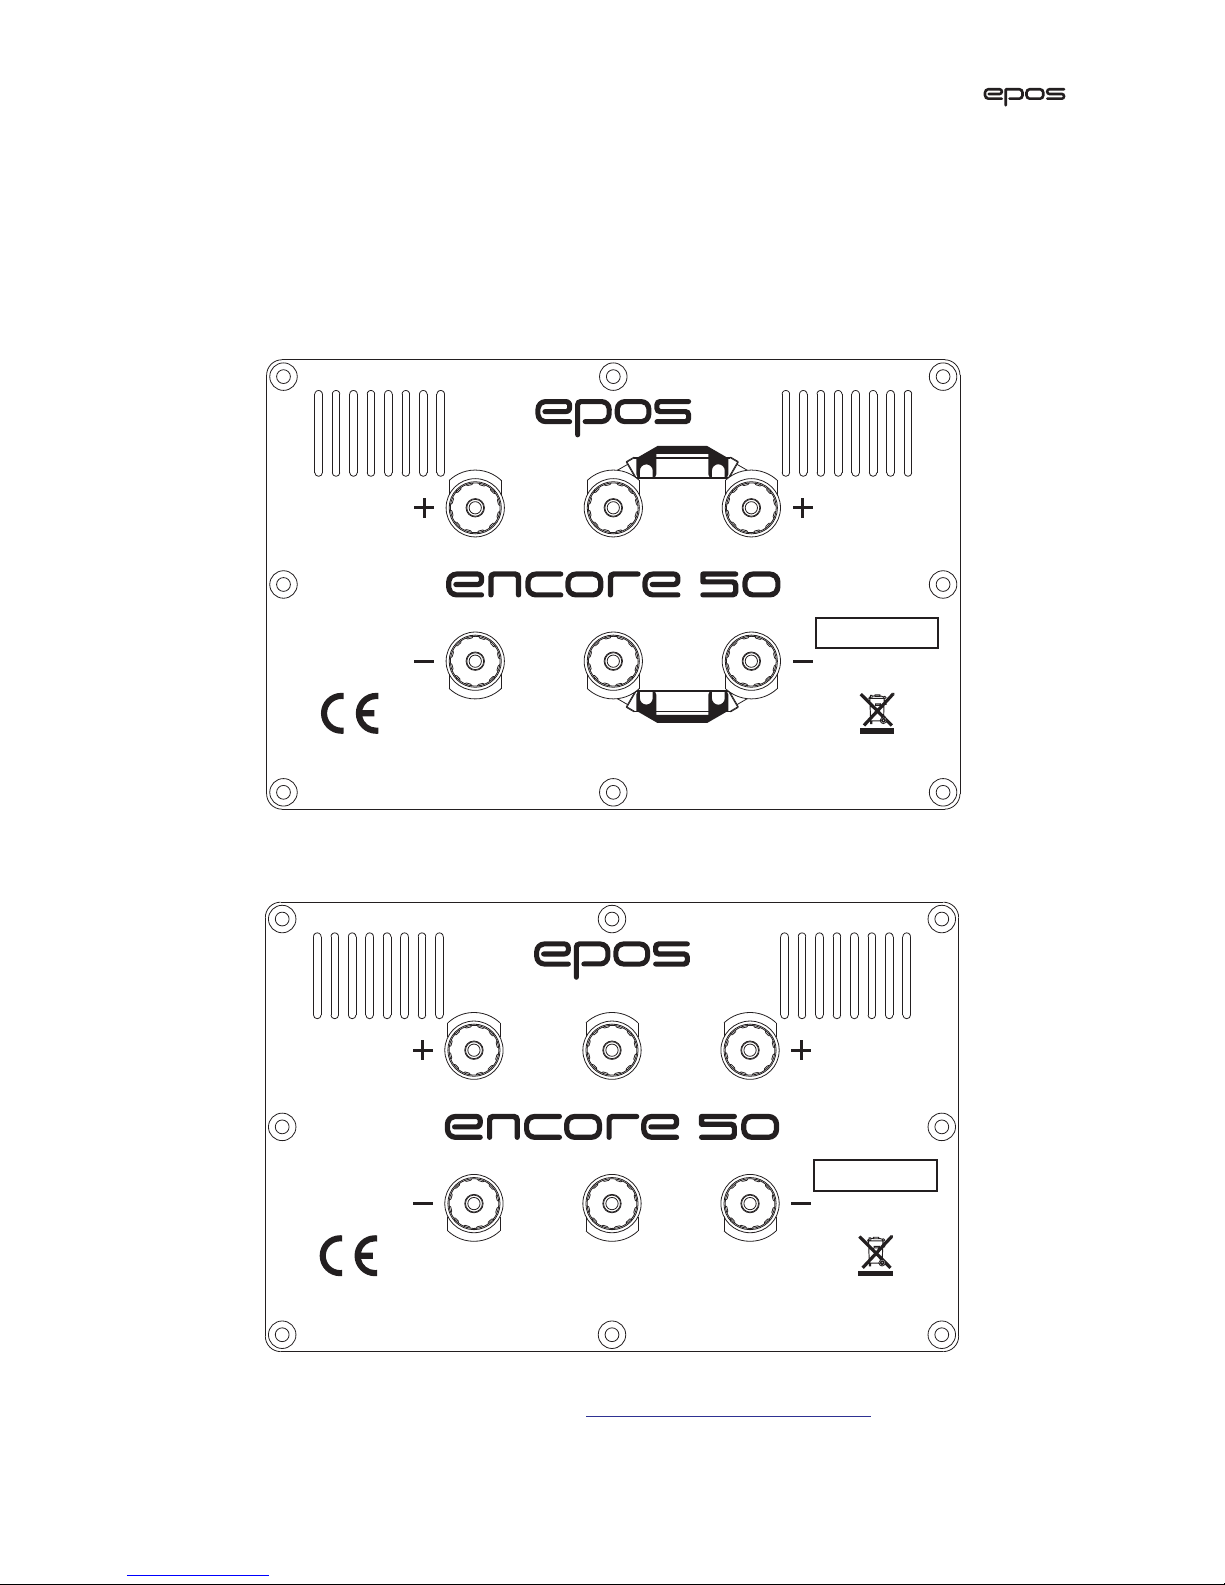
CABLE TERMINATION
A set of screw-on 4mm plugs is supplied which will allow you to terminate your loudspeaker cables. These
plugs have been selected to provide a good electrical connection. To terminate your cables simply remove
enough insulation to allow the plastic shroud on the plug provided to fit over the end of your cable. Then
make a connection to the plug and screw the shroud fully over the plug until no bare plug is evident. Once
again, if you are in doubt consult your Epos dealer. Better plugs can be used but try to avoid ones that have
a large bare metal finish as they can accidentally short-out the amplifier and must really be touch proof in
operation. A big amplifier driving these speakers can produce a large voltage potential that can give the
user an electrical shock, if not careful. It cannot kill but it will certainly shock.
Residents of the European Union may wish to use spade lugs into the terminal posts, as 4mm plugs have
been outlawed. If bare wires are used, take care to avoid stray strands which can 'short circuit' the power
amplifier. Spade type connectors may also be used. Check with your hi-fi retailer.
WARNING
The red sockets on the loudspeaker marked + should be connected to the red (or positive) output terminals
on your amplifier, while the black sockets should be connected to the negative (or ground) output terminals
on your amplifier.
Use good quality cable to connect your loudspeakers to the amplifier. Ensure that the cables from each
speaker are of roughly equal length and that any surplus is gathered in a loose hank. Do not coil the surplus
tightly.
PHASE
If the cables are not connected to the left and right speaker in exactly the same way, the effect may produce
an out of phase signal. This will cause the bass to be cancelled and the stereo image to spread from the
middle to a position outside the two speakers, leaving a ‘hole in the middle’ sound.
Correctly wiring the polarity of the speakers will restore the image to between the speakers and provide
proper bass. Most speaker cables have a polarising mark, such as a bump or writing on the positive wire.
LISTENING
Switch on the amplifier and play a signal with the volume turned down low. Check that sound is coming
from bass, middle and treble speaker drivers on both speakers. If not, switch off and check the
connections. Once you are satisfied everything is working OK, you can turn the music up and sit and listen
to you new speakers.
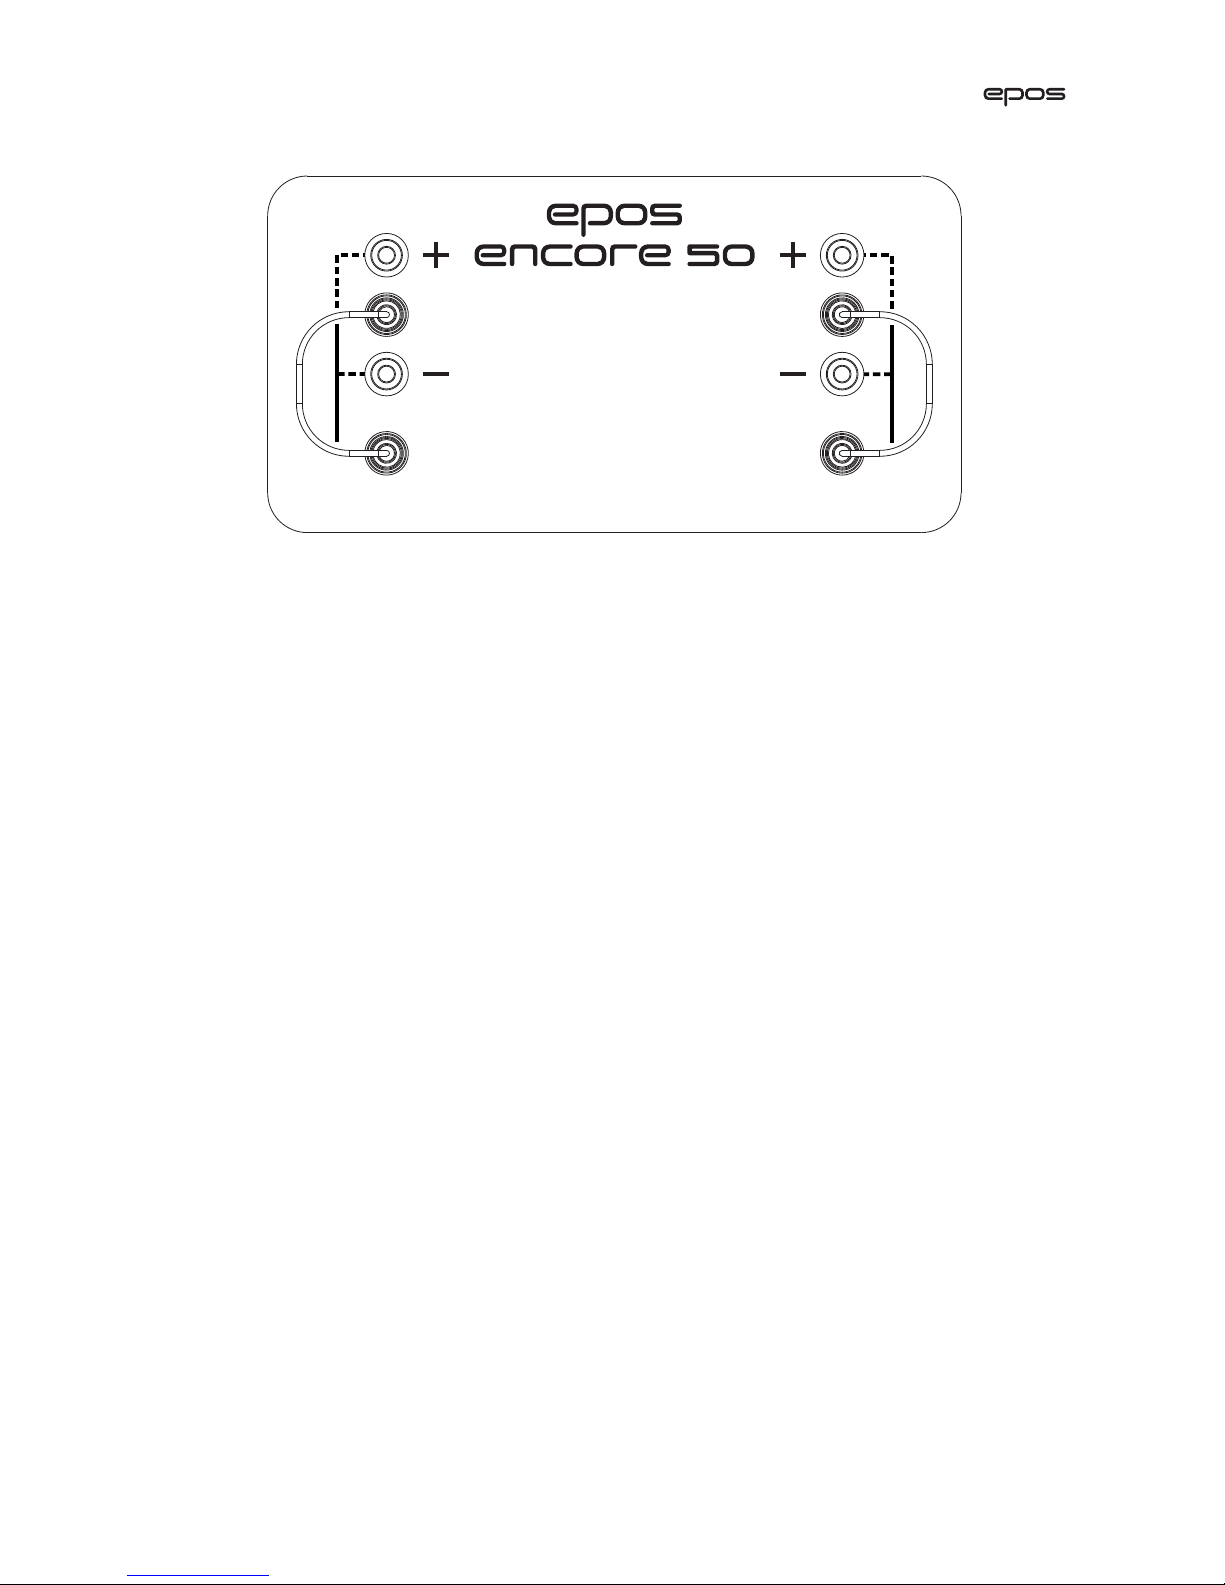
LEVEL ADJUSTMENT
When fitting the plinth to the bottom of the cabinet, you were sure to see the panel at the bottom which
had eight 4mm sockets and two cables with 4mm instrument plugs fitted to the ends. These two cables are
necessary to complete the circuit in the crossover that drives the Mid-range and Tweeter.
The sockets at the edge marked with 0 next to the words Mid-Range and Tweeter must not be unplugged.
However, the factory setting for the other end is in the 4mm socket marked 0dB. This sets the frequency
balance at the nominal level. If after listening for a while, you find the level could be usefully changed to
either make the treble brighter or duller, or the mid-range more forward or laid back, please disconnect the
amplifier first and then unplug the link from the 0 dB in the middle and move it to either (+) or (–) setting. If
more or less bass is required, it is also possible to move both mid-range and treble together to lift or lower
the bass, relative to the other frequencies. Once you know where the plugs and sockets are, it is possible to
move these plugs from underneath, without too much effort. If you have to tilt the speaker backwards, to
make the change, please get help to prevent it from falling over.