Type A31A
10
CAUTION
Tighten the packing flange only enough
to prevent shaft leakage. Excessive
tightening will only accelerate wear of
the packing and could produce higher
torques on the valve.
Usually, packing leakage can be eliminated by merely
tightening the hex nuts (key 15) located above the
packing flange while the valve is in the pipeline. How-
ever, if leakage continues, replace the packing.
CAUTION
Never use a wrench or pliers on the
valve shaft. A damaged shaft could cut
the packing and allow leakage.
1. Before loosening any parts, isolate the valve from
the line pressure, release pressure from both sides of
the valve body, and drain the process media from both
sides of the valve. Then, remove the hex nuts (key 15)
and lift off the packing flange (key 11).
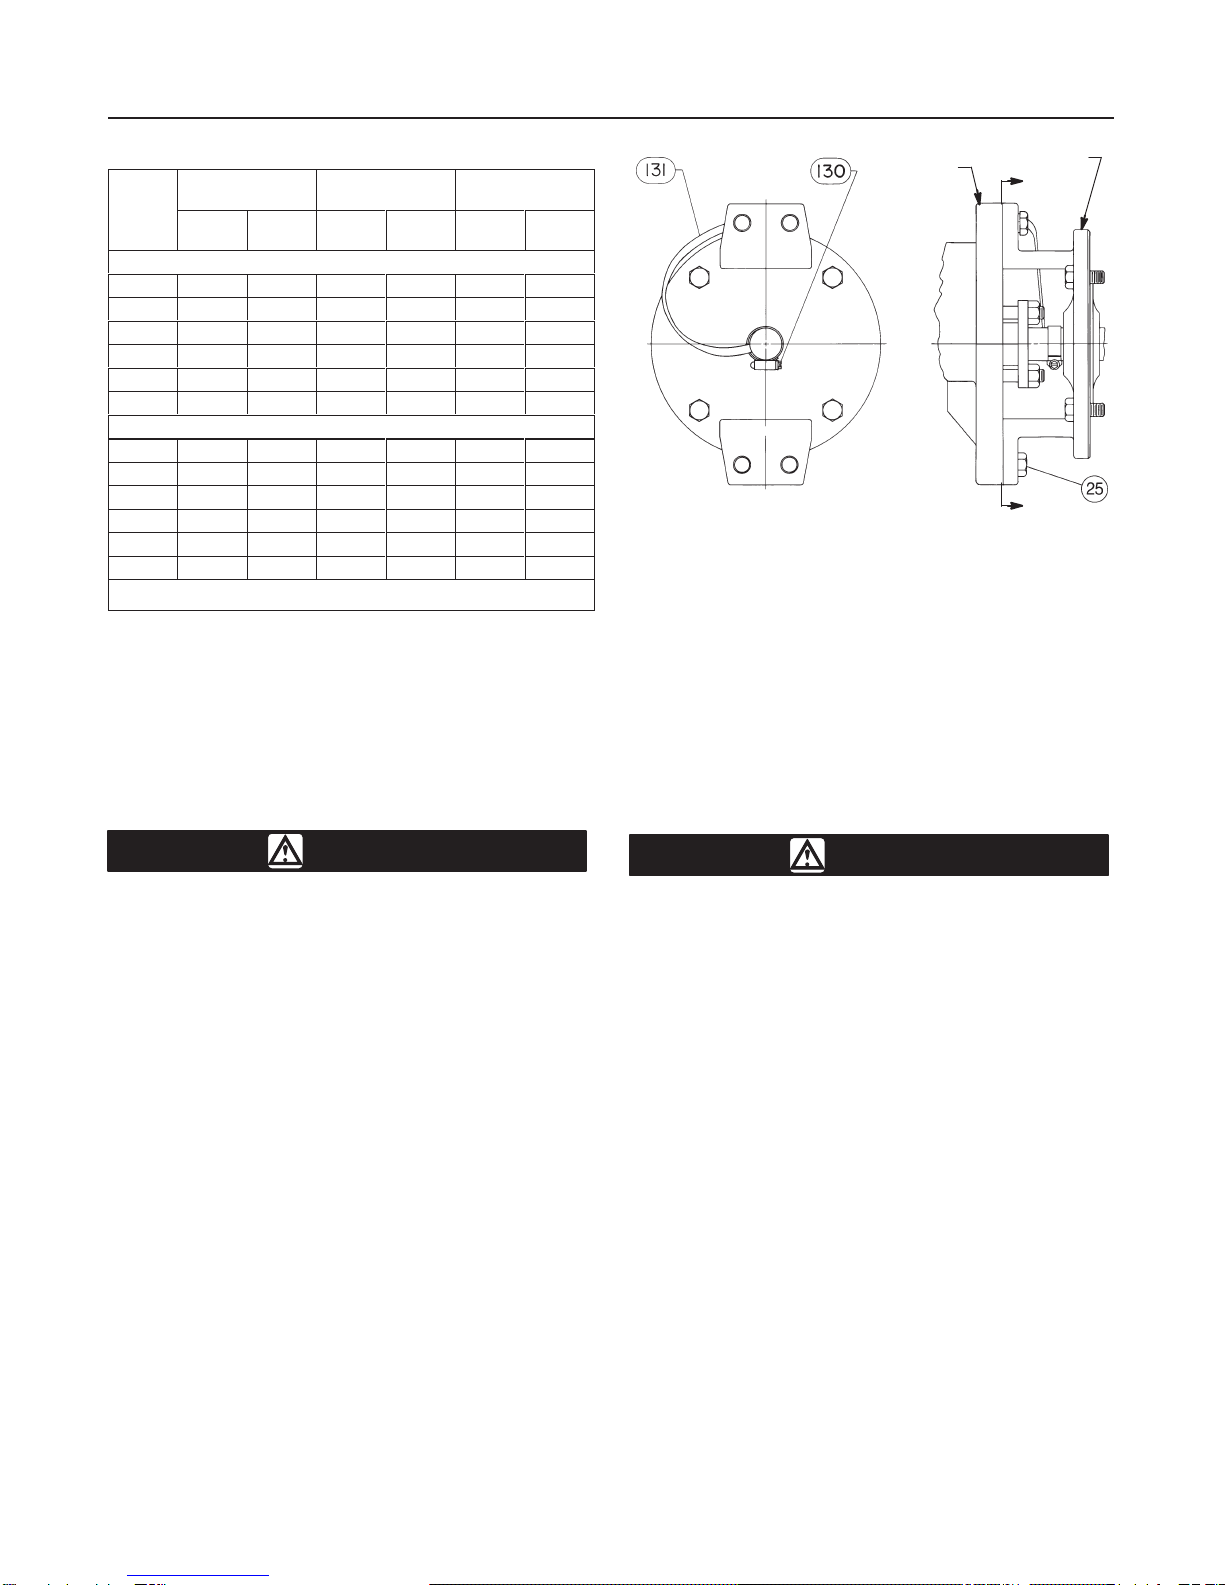
2. Remove the hex jam nuts (key 17), anti-blowout
flange (key 10) and the packing follower (key 12). Also
remove the anti-blowout ring (key 16) using a needle-
nose pliers. The packing (key 13) is now accessible.
Refer to figure 6 for details of the blowout protection.
3. Use a packing extractor to remove packing. Insert
the corkscrew-like end of the tool into the first piece of
packing and pull firmly to remove the packing. Repeat
this process until all packing has been removed.
CAUTION
Be careful when cleaning the packing
box. Scratches to the shaft or inside di-
ameter of packing bore might cause
leakage.
4. Before installing new packing, clean the packing
box.
5. Install new packing (key 13) one ring at a time, us-
ing the packing follower (key 12) as a driver. If using
split-ring packing, stagger the splits in the rings to
avoid creating a leak path.
6. Reinstall all parts. Tighten the packing flange nuts
(key 15) as needed to stop leakage under operating
conditions.
For valves using the ENVIRO-SEAL packing
system:
Normally, the packing nuts should not require re-tight-
ening. However, when servicing an ENVIRO-SEAL
packing system, if the springs do not remain nearly
flat, retighten the packing box nuts until the springs
are almost completely compressed. If leakage contin-
ues, replace the packing components as described in
the following procedures. Keys numbers in this section
may be found in figure 7.
CAUTION
Be careful when cleaning the packing
box. Scratches to the shaft or inside di-
ameter of the packing bore may cause
leakage.
1. Before loosening any parts on the valve, isolate the
control valve from the line pressure and release pres-
sure from both sides of the valve body.
2. Loosen the two packing hex nuts evenly to remove
spring tension, then remove the nuts.
3. Remove the packing flange and spring stack. The
spring stack is held in place by an O-ring on the pack-
ing flange. Remove the two hex jam nuts and remove
the anti-blowout flange, packing flange, anti-blowout
ring, packing box ring, anti-extrusion washer, packing
set, and packing box ring.
CAUTION
The valve shaft surface condition is crit-
ical in making and maintaining a good
seal. If the valve shaft surface is
scratched, nicked, dented, or worn, re-
place the valve shaft before replacing
the packing system components.
4. Inspect the existing valve shaft. If necessary, re-
place the valve shaft as described in the procedures in
this section.
5. Install the new packing system components as de-
scribed in the
ENVIRO-SEAL Packing Instruction
Manual
(Form 5320).
Removing the Valve from the Pipeline
1. Disconnect any operating lines providing air pres-
sure, electric power, or a control signal to the actuator.
Be sure the actuator cannot suddenly open the valve.
Vent the power actuator loading pressure.
2. Use bypass valves or completely shut off the pro-
cess to isolate the valve from process pressure. Re-
lieve process pressure on both sides of the valve.
Drain the process media from either side of the valve.