Lorex L15LD420 SERIES Manuale utente

Copyright ©2008 LOREX Technology Inc.
www.lorexcctv.com
LOREX CLIENT 2.2
Integrated Remote
Agent Software
Instruction Manual
English Version 1.0
MODEL:
L15LD420 / L17LD420 Series

2
Table of Contents
Table of Contents
System Requirements ............................................................................... 3
Lorex Integrated Remote Agent Software Installation .............................. 4
Integrated Remote Agent Software - Main Screen ................................... 6
1. IRS Setup .............................................................................................. 7
2. The H.264 Viewer ................................................................................. 9
3. Search ................................................................................................. 11
4. Backup ................................................................................................ 13
5. Player .................................................................................................. 15
6. Remote Setup ..................................................................................... 18
Appendix #1 - Setting up Remote Viewing ............................................. 22
What do you need? ................................................................................................................... 22
Network Setup / Remote Access Overview ............................................................................... 22
Network Checklist ...................................................................................................................... 23
IP & MAC Address ..................................................................................................................... 25
Network - Router Port Forwarding ............................................................................................. 26
Network - Setting Up Your DDNS Account ................................................................................ 27
DDNS SETUP ........................................................................................................................... 31
Appendix #2 - Remote Viewing with Internet Explorer ............................ 32
Web Player Interface Screen ..................................................................................................... 33
Please visit us on the web for the most current Manuals, Quick Start
Guides and Firmware. Additional Language Manuals are also available at:
http://www.lorexcctv.com

3
System Requirements
System Requirements
The Lorex Client 2.2 software (included with the System) has the following installation
requirements.
Operating System Windows XP Home Edition
Windows XP Professional
Windows Vista
Processor .Pentium 4 - 1.5 GHz Processor (or equivalent)
Memory 512 MB RAM (1GB Min. Recommended)
Hard Drive 50 MB - Installation space required
*Additional Hard Drive space required for recording.
Recorded file size will vary depending on recording
quality settings
Minimum System Requirements:
Recommended System Requirements:
Operating System Windows XP Home Edition
Windows XP Professional
Windows Vista
Processor Pentium 4 / 3 GHz Processor (or equivalent)
Memory 1024 MB RAM
Hard Drive 50 MB - Installation space required
*Additional Hard Drive space required for recording.
Recorded file size will vary depending on recording
quality settings
Internet Requirements Requires a high speed internet connection (minimum
upload speed: 256Kb/s, download speed512Kb/s) and a
broadband router – not included.
Typical network remote viewing at 1-2 FPS (Frames Per
Second). Please check with your Internet Provider for your
current upload and download speeds - this may impact the
performance of the Audio and PTZ functions over the
Internet (WAN).
Please refer to the Lorex Client 2.2 Software User Guide included with your Observation System
for further details. Visit the Lorex support website at http://www.lorexcctv.com for information on
Windows Vista compatibility.
4
Lorex Integrated Remote Agent Software Installation
Lorex Integrated Remote Agent Software Installation
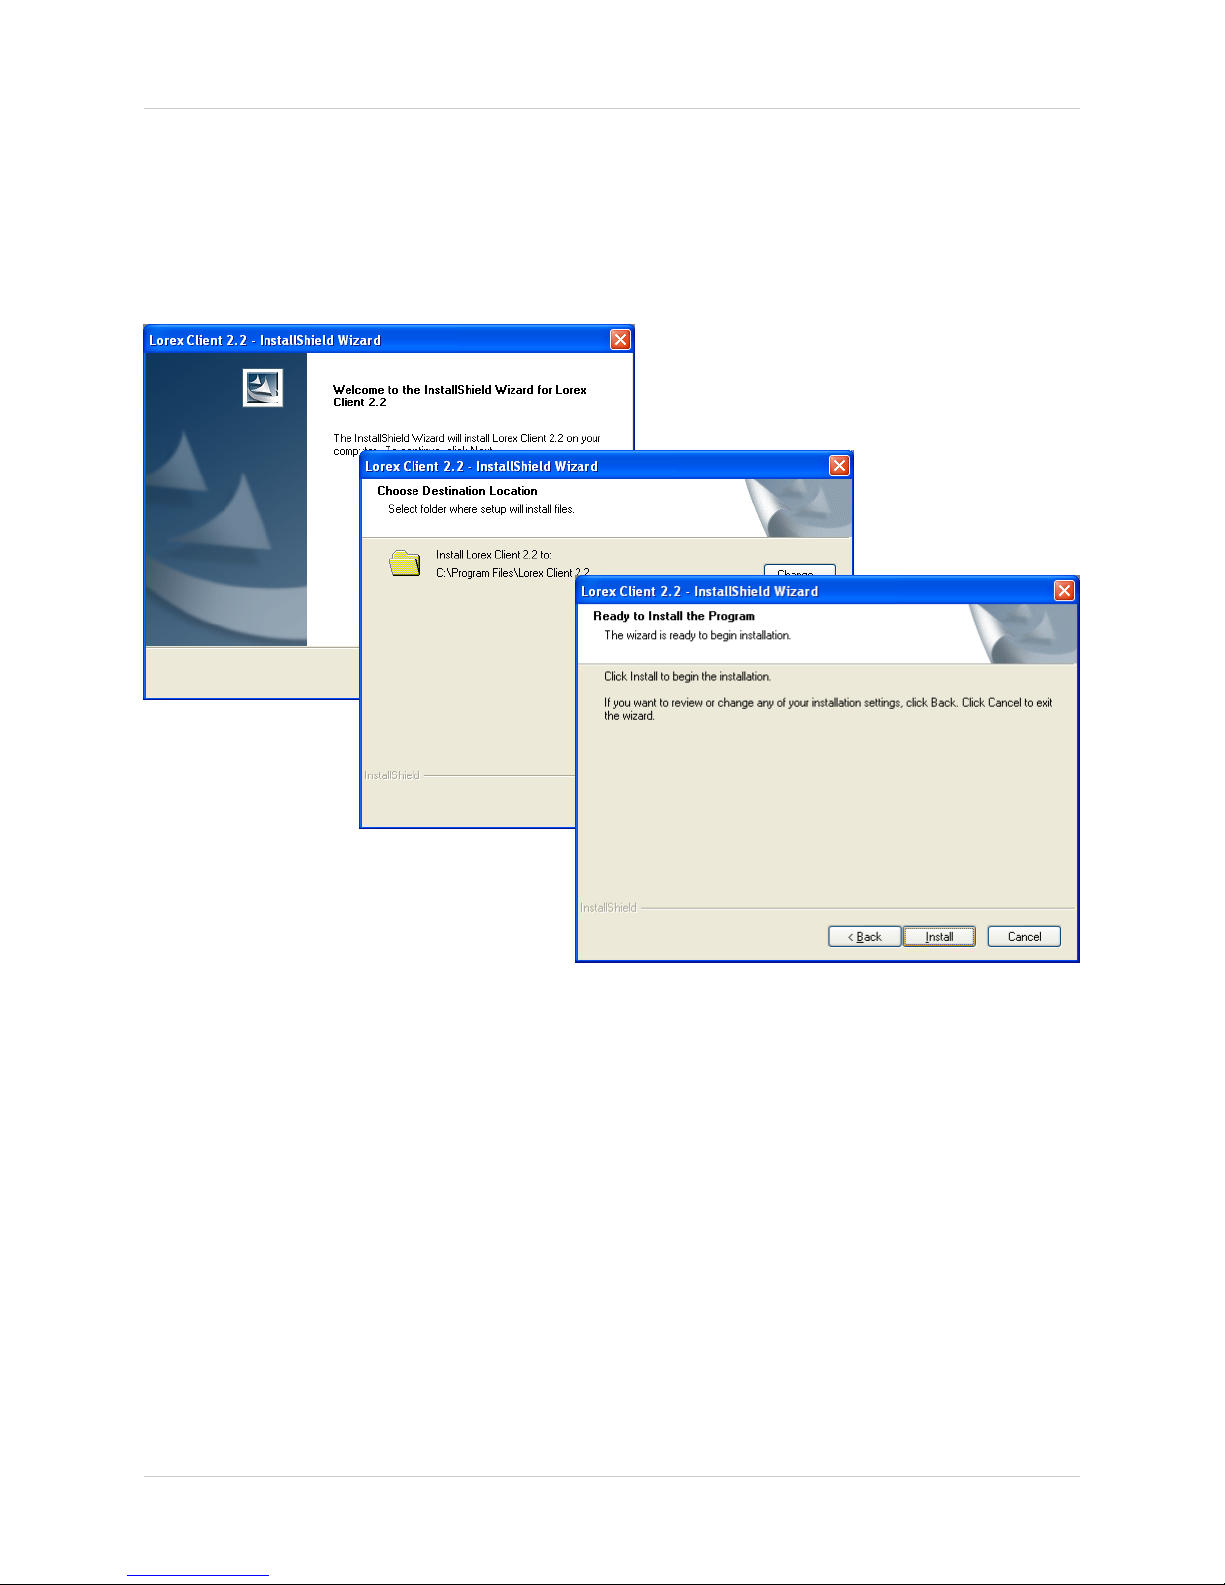
Place the Installation CD in the CD-ROM Drive of your Computer. Select the Install Wizard for
the Lorex Client 2.2 Software to begin.
1. Click the NEXT button on all dialogue windows to continue the Installation:
2. Press the Install Button to initialize the installation process.
NOTE: If the Installation Process does not automatically start, you will have to begin the
installation process manually:
• Double Click the MY COMPUTER icon on your Desktop
• Double Click the CD-ROM DRIVE (Drive Letter will vary depending on the number of drives
in your computer)
• Double Click the LOREXCLIENT.EXE file (may appear as LOREX CLIENT with no file
extension, depending on your system settings.
The Installation Process will begin.

5
Lorex Integrated Remote Agent Software Installation
Program Shortcuts
• Start Menu - Programs - Lorex Client 2.2
zLorex Internet Remote Software
• Desktop Shortcut for:
zLorex Internet Remote Software
3. The installation process will continue. Once the install is complete, press the Finish button.
NOTE: Make sure to close all open programs and save any open files before rebooting the
system.
Lorex Client
2.2

6
Integrated Remote Agent Software - Main Screen
Integrated Remote Agent Software - Main Screen
The Lorex Client allows you to remotely connect to your system, and view live images.
1. IRS Setup - Used to configure the System Remote Access Settings. A remote location must be
configured, and a connection made to the system prior to using the H.264 Viewer, Search,
Backup or Remote Setup options.
2. H.264 Viewer - Used to remotely connect and view video from the remote System using H.264
video compression.
3. Search - Used to search and playback recorded video from a remote location.
4. Backup - Used to backup data from a remote location to the local PC.
5. Player - Used to playback data that was backed up from the System (using a USB Memory
Stick) or backed up using the Backup Software.
6. Remote Setup - Configuration and setup for remote system configurations.
7. Exit - Exits the Integrated Remote Access program.
1. IRS Setup 2. H.264 Viewer 3. Search
4. Backup 5. Player 6. Remote Setup
7. Exit
1
2
3
4
5
6
7

7
1. IRS Setup
1. IRS Setup
The IRS Setup is Used to configure the System Remote Access Settings. A remote location must
be configured, and a connection made to the system prior to using the H.264 Viewer, Search,
Backup or Remote Setup options.
1. IP LIST - Lists the previously Registered Sites by System IP or DDNS Location.
2. REGISTERING SITE - Used to add new System Information to the list.
3. UPDATE - Used to make changes to existing site information. Highlight the desired site, and
click the Update button to modify.
4. DELETE - Used to delete System profiles.
5. SAVE - Saves changes to the selected IP address.
6. OK - Select a site from the list, and click OK to connect to the remote site.
7. CANCEL - Exits the IRS setup screen.
1. IP List 2. Registering Site 3. Update
4. Delete 5. Save 6. OK
7. Cancel
2
3
4
5
6
7
1

8
1. IRS Setup
Registering a Site
IP SETUP / CONNECTION:
1. ADDRESS - Enter the IP address or
DDNS Address for the System:
• Internal IP Address - If using the
software within the same network, enter
the Internal IP Address (i.e.
192.168.1.104)
• External IP Address - If using the
software from a remote location, use
either the External IP Address (i.e.
72.45.122.30), or use the DDNS
Address.
• DDNS Address - Enter the URL
configured from
http://www.lorexddns.net
(i.e. myurl.lorexddns.net
2. PORT - The default port is 50000. The
only time the port number needs to be
changed, is if a new port has been assigned
on the System. Please refer to the Hardware
Manual for details.
IP SETUP / LOGIN:
3. USER ID - Enter the User ID for the
System (same as the System login):
• Default ID: ADMIN
• Other users can be configured on the
System for Remote Access. Please
refer to the hardware manual for User
setup.
4. PASSWORD - Enter the Password to
match the System User ID:
• Default ADMIN Password: <blank>
• Other users can be configured on the
System for Remote Access (One
ADMIN, One MANAGER and up to 8
USER accounts), for a total of 10 logins.
Note that if using multiple concurrent
connections, the performance will be
slower due to bandwidth constraints.
1
2
3
4
Your completed screen should appear
similar to:
Connecting to the Remote System:
Select the System from the IP list on the
main IRS Screen. Click on the OK button to
connect to the Remote System.
Enter the Password (the System ADMIN
password is blank by default), and click
LOGIN to connect.
After you successfully connect, the login
screen will disappear, and all the buttons in
the main screen will be activated.

9
2. The H.264 Viewer
2. The H.264 Viewer
The H.264 viewer is used to remotely monitor the system using H.264 video compression. The
IRS Setup must be configured and connected prior to using the H.264 Viewer.
1. Main Screen Camera View - Displays the cameras in live view.
2. Connect / Disconnect / Setup - Used to connect or disconnect from a configured System.
Use the setup to configure the data transfer settings:
• Connect - Click the Connect Button to establish a connection to the Remote System (must
be configured in the IRS Setup first). The connection details appear in the Status Window (#4).
• Disconnect - Stops the connection to the Remote System.
• Setup - Opens the Data transfer setup window. The parameters will allow you to optimize
the image quality for your specific network bandwidth:
zQuality - Set the Image Quality from the Remote System to Normal, High or Highest.
zFrame Rate - Controls the DATA RATE from the remote system. Typically a higher
frame rate should result in a smoother image, however due to data compression and
bandwidth constraints with H.264 compression, it is recommended to set the frame
rate to 10~15 FPS for higher quality network viewing.
Set Values: 3, 5, 10, 15 & 30 FPS.
zBaudrate - Set the data transfer speed from the remote
system. Set Values: 500Kbps, 700Kbps, 850Kbps,
1Mbps or 1.5Mbps.
zClick the READ Button to retrieve system settings, and
press Write to save the System settings.
1. Main Screen View 2. Connect / Disconnect / Setup 3. Connection Information
4. Status Window 5. Screen Views 6. PTZ Controls
3
4
5
6
1
2

10
2. The H.264 Viewer
3. Connection Information - The Connection Information will automatically be populated once it
has been entered into the IRS Setup (and a connection to the System has successfully been
established). This information can also be manually changed on this screen:
• IP: Enter the IP address of the System
• PORT: Enter the PORT for the system (default 50000)
• ID: Enter ID (default: ADMIN)
• PW: Enter the password (default: blank)
NOTE: To use the DDNS as a connection type, you must first enter the DDNS information into
the IRS Setup Program.
4. Status Window - Displays the current connection status and bit rate.
5. Screen Views - Changes the Screen Division to Single Channel view or 4-Channel Split
Screen View. Use the Channel Buttons 1~4 to switch to the corresponding camera.
6. PTZ Controls - Use the PTZ Controls to change the
view on a PTZ Type Camera (if connected - PTZ
Cameras are not provided with the System).
Set the CH number to the PTZ Camera, then click the
arrow keys to change the viewing angle. Use the UP
and DOWN arrows to increase and decrease the
ZOOM and FOCUS.
To View Live Camera Images:
1. Click on the Connect button to access the Remote System.
2. The Connection Log will display a CONNECTION
ESTABLISHED message once the Remote System has been
accessed.
1. Main Screen View 2. Connect / Disconnect / Setup 3. Connection Information
4. Status Window 5. Screen Views 6. PTZ Controls
Altri manuali per L15LD420 SERIES
2
Questo manuale è adatto per i seguenti modelli
1
Indice
Altri manuali Lorex Software


Manuali Software popolari di altre marche


PS Audio
PS Audio PowerPlay Manuale del proprietario

Brady
Brady LOCKOUT PRO 3.0 Manuale di servizio

Avaya
Avaya Interaction Center Manuale utente

Texas Instruments
Texas Instruments TI-83 Plus Silver Edition Manuale

Novell
Novell GROUPWISE 8 - INTERNET AGENT Manuale utente

Oracle
Oracle Application 9i Manuale utente

Acer
Acer RDM Manuale utente

Canon
Canon Vixia HF21 Manuale utente

Canon
Canon ZR950 Manuale utente

Samsung
Samsung Auto Backup Manuale utente

Polycom
Polycom Vortex EF2201 Istruzioni per l'installazione e il funzionamento

Brocade Communications Systems
Brocade Communications Systems Brocade 8/12c Manuale utente