READY REBEL 3D READY REBEL 1 Manuale utente

1.9.2020 2/19 V1.0
Accountability disclaimer
Read the contents of this manual carefully please. If you don’t read this manual carefully,
it can at minimum lead to underwhelming results or to damaging of the printer REBEL
READY 1 (RR1 from now on) or in the worst case scenario even to injury, so please make
sure that anybody that will use this 3D printer knows and understands the contents of this
manual well enough to be able to use the printer RR1 safely and optimally.
Conditions or methods used for manipulation, storage, usage or disposal of the product are
not in our control and can be above our knowledge. That said, we will not be held
accountable for any related loss, injury, damage or charges as a result of manipulation,
storage, usage or disposal of the product.
The information in this document was acquired from trusted sources and we believe it to be
reliable. As far as the correctness of the information goes, we provide this information without
a warrant.
Safety instructions
Only well informed individuals should work with the printer.
The printer needs to be supervised at all times. In case of a
malfunction, stop the print and switch off the printer.
The printer contains parts and surfaces that reach dangerous
temperatures (up to 300°C) which can stay hot after the printer is
switched off. Burn injury hazard!
The printer is powered by high voltage. Always switch off and
plug the printer out of the wall socket before working with the
power supply.
The printer contains moving parts. Don’t interact with the
printing volume during printing. The printer can make a move
even without warning beforehand. Injury hazard.

1.9.2020 3/19 V1.0
Content
Safety instructions 2
Content 3
About READY REBEL 1 (RR1) 4
3D printer specifications 5
Basic description of the printer 6
Menu LCD 8
Main menu 8
Print menu - media selection 9
Print menu - gcode selection 9
Print menu 10
Menu 11
Submenu “Movement” 12
Enter the menu of manual movements of the axes Move 12
Enter the leveling menu - no need to control here, controlled by gcod !!! 12
Enter the menu of manual washer alignment - unused function !!! 12
Enter the BabyStep menu to fine-tune the first layer 12
Menu “BabyStep” 13
Increase the print height by the selected height step (Z feed) 13
Save settings 13
Selection of the feed step Z in steps of 0.01, 0.1 and 1 mm 13
Menu “Heat” 14
Menu for manual extrusion and filament exchange - Extrude 15
Submenu “Move” 16
Preparing to print 17
Turn on the printer for the first time 17
Printing area 17
Removing a printout 17
Inserting / removing / replacing the filament 18

1.9.2020 4/19 V1.0
About READY REBEL 1 (RR1)
For the RR1, speed and accuracy are a matter of course!
The printer achieves high accuracy thanks to precise branded linear guides and high-quality
belt drives. In addition to accuracy, it is also very fast compared to other RR1 machines,
while maintaining excellent quality thanks to sufficiently dimensioned drives and light moving
parts. Treat yourself to first-class printing!
Rigid construction is a sign of stability.
The solid construction of the RR1 ensures excellent stability in all printing conditions, which
increases print quality.
Maximum lightweight direct drive printhead with dual-drive
the drive and transmission system is tuned to easily reach the speed and acceleration of
Bowden lightweight extruders (without motor on the platform) while maintaining top print
quality.
Large print space to implement your ideas
You have a large print space for printing even the most demanding models with a floor plan
of 235x235mm and 300mm print height! Implement your ideas and turn them into printed
facts.
Hotend is the foundation
We use combinations of extruder parts and hot ends with components of the highest quality
manufacturers available for our printers. The main elements of the hotend are compatible
with E3D in the highest quality. They can print virtually all available print materials, which
means complete freedom for you to choose them. PLA, ABS, HIPS, ASA, PET, nylon,
polycarbonate, flexible materials, filled or highly abrasive filaments. Hotend handles material
printing up to 300°C.
Automatic axial calibration
The design of the printers is strong and accurate enough that no special calibration is
required. The only way to align the Z axis is to use a digital scan sensor (BL-TOUCH), which
allows the printer to automatically compare the Z axis using a pad, even if it is replaced by a
different surface thickness (PEI, PET, GLASS ... ..) and therefore flawless first layer - the
basis for successful model printing.
Quality printing pad
On the RR1 printer, we use a high-quality removable printing pad with powerful and even
heating. The actual printing surface then forms polyetherimide (PEI). It fastens practically all
commonly used printing materials, is maintenance-free and very durable.
PC-free printing

1.9.2020 5/19 V1.0
You do not need a computer connected to the printer to print. Thanks to the LCD display with
SD card reader or USB flash drive, everything is simpler. The model can be easily loaded on
one of the media and the printer then prints directly from it. Simple, reliable.
Resuming after an unexpected print interruption
The control system is equipped with the function of resuming printing after a power failure, so
it is possible to resume printing where it left off when printing is interrupted. The system is
functional, but not 100% reliable in all circumstances, so we recommend installing a suitable
UPS to eliminate interruption of printing due to loss of power.
Calm and quiet operation
Although it is a printer with a relatively high power drive system, it can be described as
relatively quiet, mainly due to the combination of massive construction, precise linear guides
and quality control of stepper motors.
3D printer specifications
3D Printing Technology: Fused Deposition Modeling (FDM)
Print space: 235x235x300mm (X, Y, Z)
X / Y axis resolution: 0.025mm
Z axis resolution: 0.0025mm
Max. nozzle temperature: 300°C
Max. substrate temperature: 115°C
Heated bed: magnetic with removable foil and PEI surface
Ovládání a rozhraní: 5 ”touch LCD display with SD card reader and USB flash
drives, integrated WiFi for basic printer control and
monitoring. USB interface for printing from a PC or
OctoPrint print server (Wifi, Ethernet), RepetierServer, etc.
Supported print formats: STL, gcode; Standard slicers such as Simplify3D, Cura,
Slic3r etc.
Dimensions: 43x45x54cm
Weight: 14kg
Mains voltage: 100-240VAC
Printer power supply: 24VDC system, 350W

1.9.2020 6/19 V1.0
Basic description of the printer
1. Tensioner X
2. Leveling sensor
3. Cooling the printout
4. Operating switch
5. SD card reader
6. LCD control
7. Belt X
8. Extruder pressure
extruderu
9. Printing plate
10. Lighting switch
11. Rotary knob
12. USB for flash
drive
13. Reset button
14. Tensioner Y
15. USB connector
16. Power connector
230VAC
17. Fuse
18. Main switch

1.9.2020 7/19 V1.0
19. Filament spool
holder
20. Trapezoidal
screws Z
21. Filament input
22. Hotend radiator
fan
23. Belt Y

1.9.2020 8/19 V1.0
Menu LCD
The printer is controlled by a 5 ”touch LCD display, which provides high comfort and ease of
use. Most square information icons serve as a direct entry to the menu for changing a given
quantity. The individual menus described here are those that are important for the operation
of the printers. We do not recommend using other items not listed here if you are unsure of
their functions and impact on machine operation and printing !!!
Main menu
Ready
X: 0.00 Y: 10.00 Z: 15.00
Menu
Print
Enter the Heat menu and set the nozzle temperature with the current / set
temperature displayed
Enter the Heat menu and set the bed temperature with the current / set
temperature displayed
Enter the Fan menu and set the fan speed.
Enter the Flow and Speed menu for global speed correction or material flow
adjustment
Information panel where notifications from the printer are
displayed. After pressing it, a chronological list of the latest
operating messages can be displayed.

1.9.2020 9/19 V1.0
Enter the Control and Settings submenu to set and control other functions
Enter the Print Menu to select a file and start printing
Print menu - media selection
TFT SD
USB Disk
Back
Touch to select the media you want to print from, or return to the main menu
Print menu - gcode selection
SD:
3DBenchy-PETG.gcode
3DBenchy-PLA.gcode
Helsinki-cathedral-PLA.gcode
Eifel-PLA.gcode
Fan_mount_RII-ABS.gcode
Touch the file named gcode to select it and confirm or cancel printing in the following dialog
box.
1.9.2020 10/19 V1.0
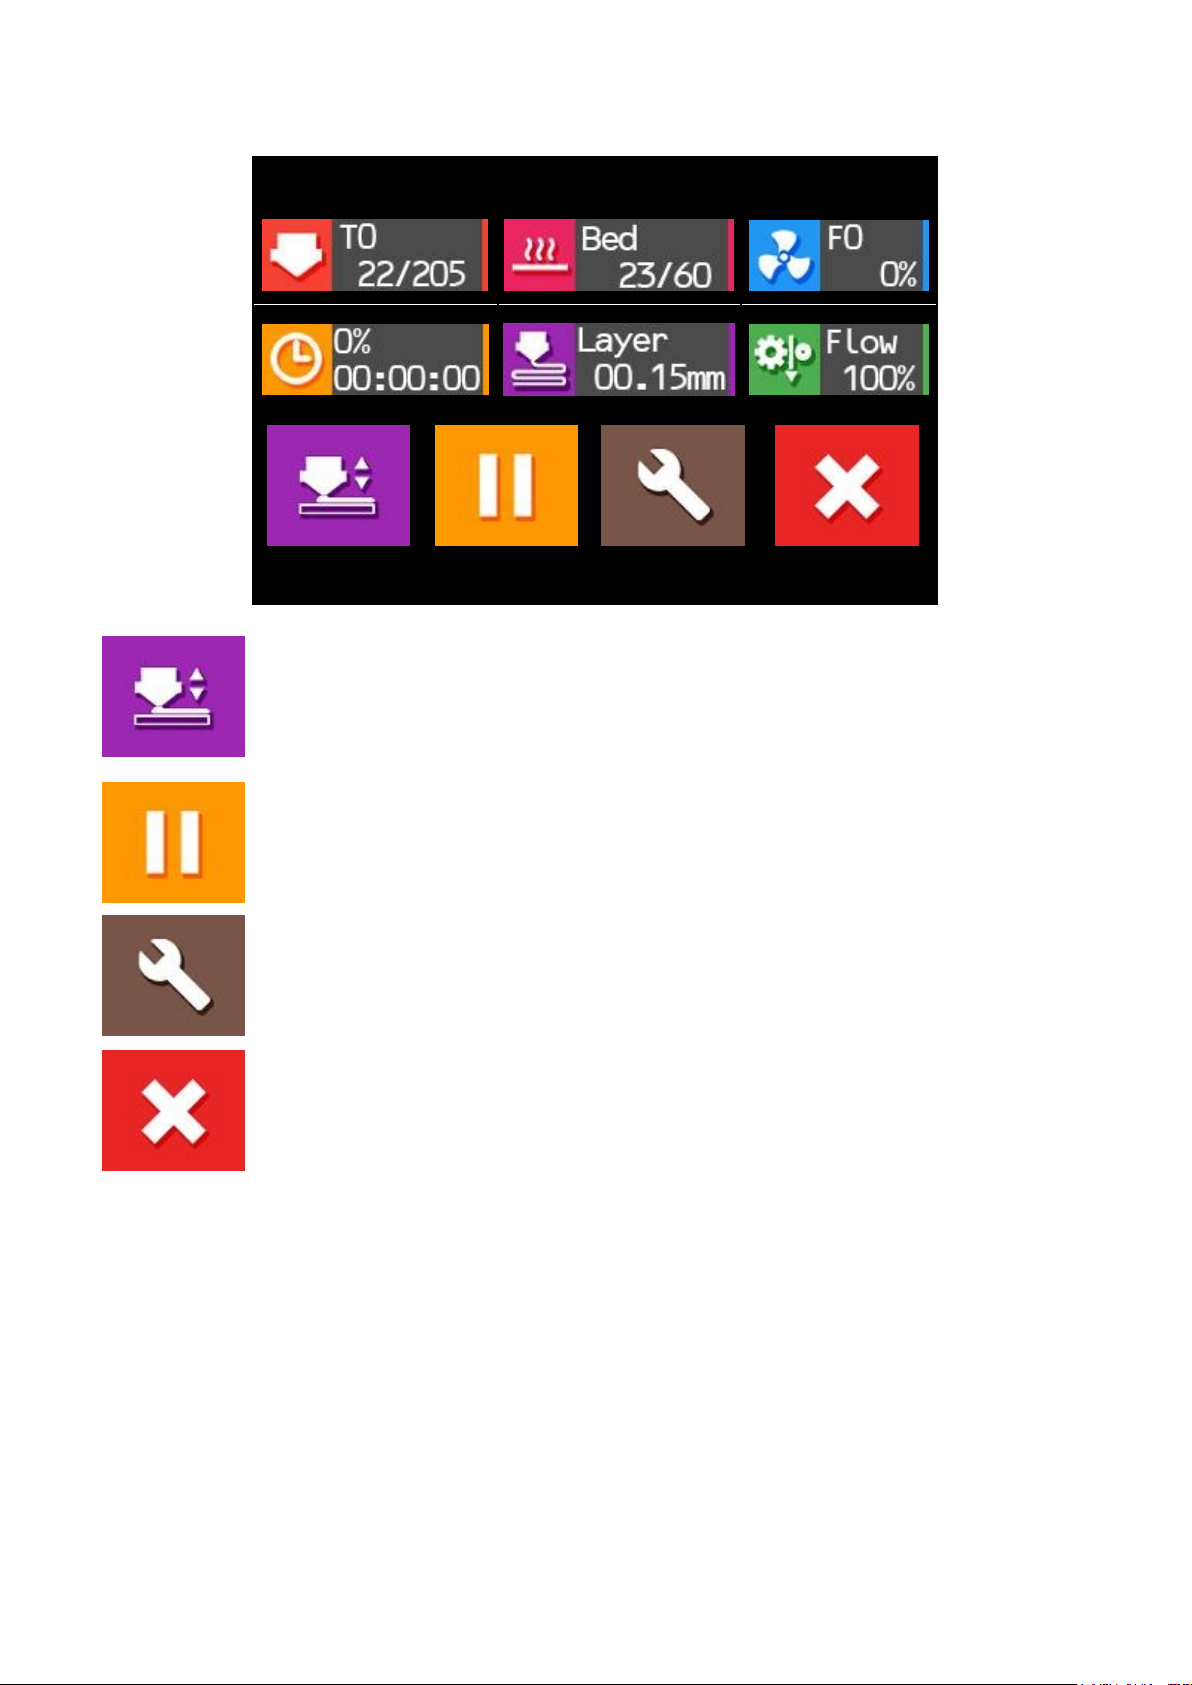
Print menu
3DBenchy-PLA.gcode
BabyStep
Pause
More
Stop
Enter the Print menu to adjust the Z offset to fine-tune the ideal first print
layer
Pause printing
Enter the Print Tuning Menu
Stop printing
The first 6 panels provide information on temperatures, cooling capacity, print length, height
of the current printed layer, and flow rate / global percentage rate settings.
Indice


