Sparkfun Electronics RedBoard Manuale utente
IOREF
RE SE T
RESET
7-15V
SCL
SDA
AREF
GND
13
12
~11
~10
~9
8
7
~6
~5
4
~3
2
1
0
TX
RX
13
3.3V
5V
GND
GND
VIN
A0
A1
A2
A3
A4
A5
POWER ANALOG IN
DIGITAL (PWM~)
ON
ISP
TX
RX
LEARN. SHARE. HACK.
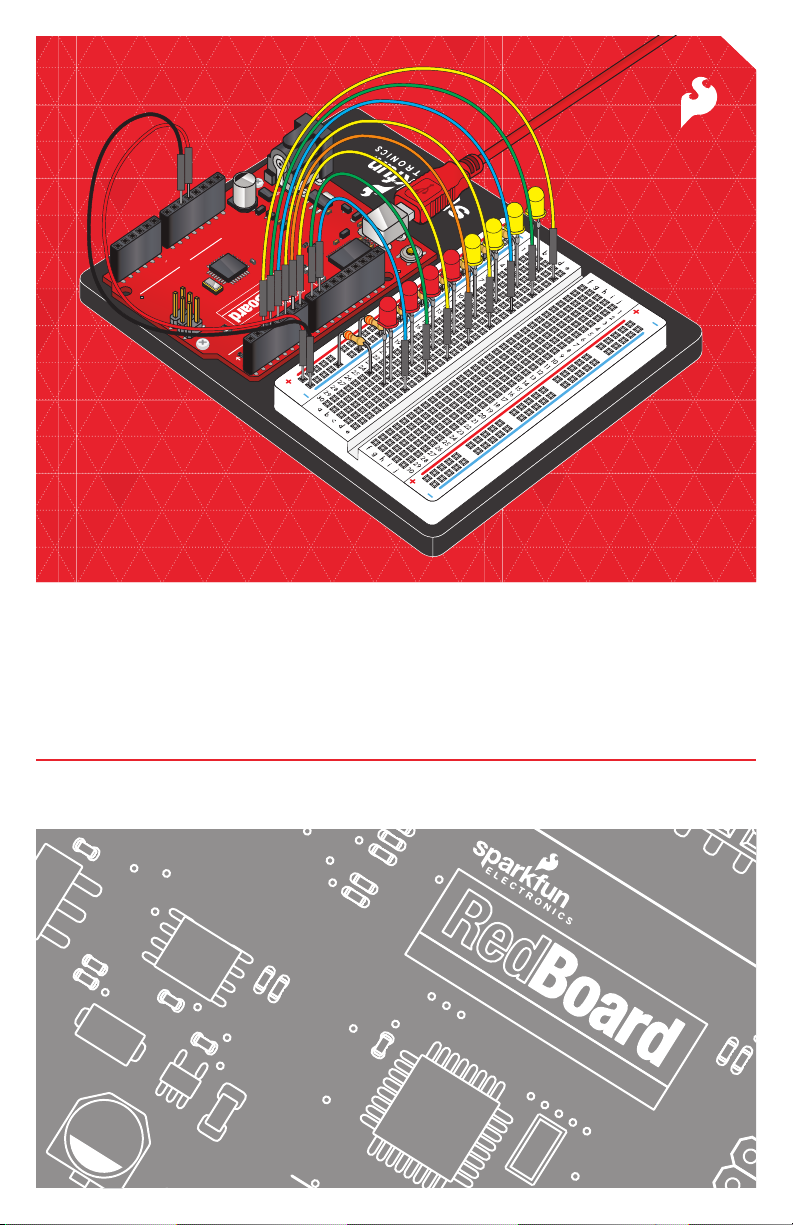
SIK GUIDE
Your guide to the SparkFun Inventor’s Kit for the SparkFun RedBoard
IOREF
RESET
RESET
7-15V
SCL
SCA
AREF
GND
13
12
~11
~10
~9
8
7
~6
~5
4
~3
2
1
0
TX
RX
13
3.3V
5V
GND
GND
VIN
A0
A1
A2
A3
A4
A5
POWER ANALOG IN
DIGITAL (PWM~)
ON
ISP
TX
RX
ARDUINO LANGUAGE DEVELOPMENT PLATFORM
Version 3.2

e SparkFun Inventor's Guide is your map for navigating the
waters of beginning embedded electronics. is booklet contains
all the information you will need to explore the 16 circuits of the
SparkFun Inventor's Kit for Educators. At the center of this
manual is one core philosophy - that anyone can (and should)
play around with electronics. When you're done with this guide,
you'll have the know-how to start creating your own projects and
experiments. Now enough talking - let's get inventing!
www.sparkfun.com
Welcome to the SparkFun Inventor’s Guide
Table of Contents
What is the RedBoard platform? 2
Download Arduino Software (IDE) 4
Install Drivers 5
Select your board: Arduino Uno 8
Download “SIK Guide Code” 9
The World Runs on Circuits 10
Inventory of Parts 12
14
16
18
25
29
33
37
41
45
49
53
Section 2: Getting Started with Circuits
Section 1: Getting Started
RedBoard
Breadboard
Circuit #1 - Your First Circuit: Blinking a LED
Circuit #3 - RGB LED
Circuit #4 - Multiple LEDs
Circuit #5 - Push Buttons
Circuit #6 - Photo Resistor
Circuit #7 - Temperature Sensor
Circuit #8 - A Single Servo
Circuit #9 - Flex Sensor
57Circuit #10 - Soft Potentiometer
61Circuit #11 - Piezo Buzzer
65Circuit #12 - Spinning a Motor
69Circuit #13 - Relay
73Circuit #14 - Shift Register
77Circuit #15 - LCD
81Circuit #16 - Simon Says
Circuit #2 - Potentiometer
Page 1
We live in a unique time where we have access to resources
that allow us to create our own solutions and inventions. e
DIY revolution is composed of hobbyists, tinkerers and
inventors who would rather craft their own projects than let
someone do it for them.
www.sparkfun.com
The DIY Revolution
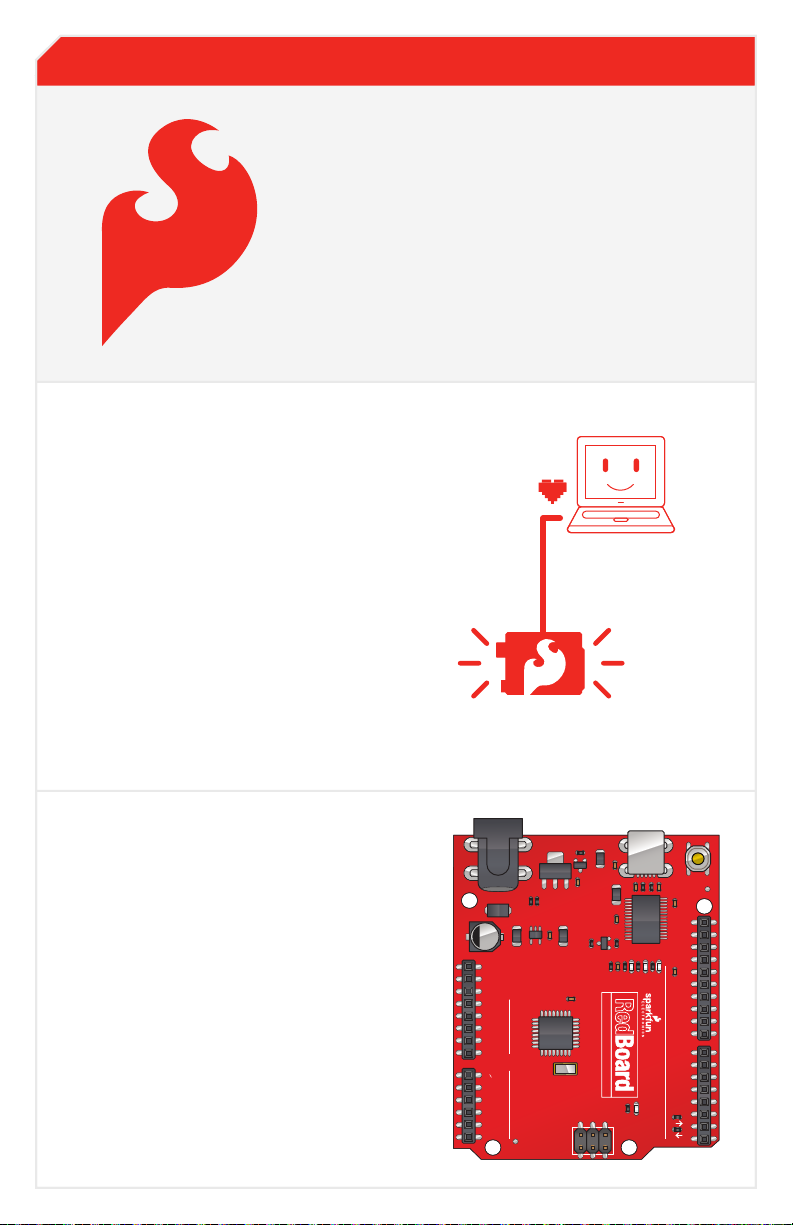
What is the RedBoard platform?
FPO
FPO
e RedBoard in your hand (or on your desk) is your
development platform. At its roots, the RedBoard is
essentially a small portable computer. It is capable of
taking inputs (such as the push of a button or a reading
from a light sensor) and interpreting that information to
control various outputs (like a blinking LED light or an
electric motor).
at's where the term "physical computing" is born -
this board is capable of taking the world of electronics
and relating it to the physical world in a real and tangible
way. Trust us - this will all make more sense soon.
A Computer for the Physical World
RedBoard
// SparkFun RedBoard
e SparkFun RedBoard is one of a multitude of
development boards based on the ATmega328. It has 14
digital input/output pins (6 of which can be PWM
outputs), 6 analog inputs, a 16 MHz crystal oscillator, a
USB connection, a power jack, an ISP header, and a reset
button. Don’t worry, you’ll learn about all these later.
Page 2
IOREF
RESET
RESET
7-15V
SCL
SDA
AREF
GND
13
12
~11
~10
~9
8
7
~6
~5
4
~3
2
1
0
TX
RX
13
3.3V
5V
GND
GND
VIN
A0
A1
A2
A3
A4
A5
POWER ANALOG IN
DIGITAL (PWM~)
ON
ISP
TX
RX
LEARN. SHARE. HACK.
c
b
a
d
e
f
g
h
c
b
a
f
e
d
h
g
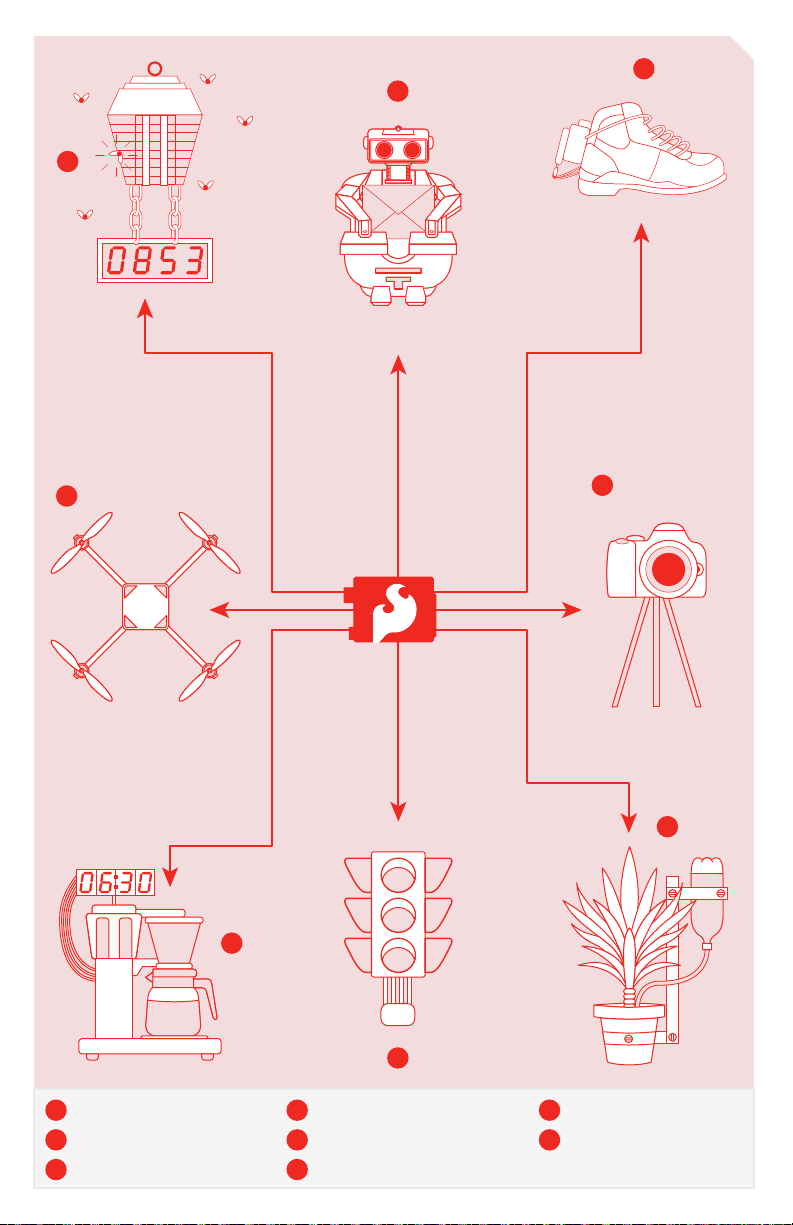
Power-Lacing High Tops
Old Toy Email Notifer
Bug Zapper Counter
Re-Programmed Traffic Light
Auto-Plant Watering
Camera Time-lapse operation
Quadcopter
Auto-Coffee Maker
RedBoard
Page 3
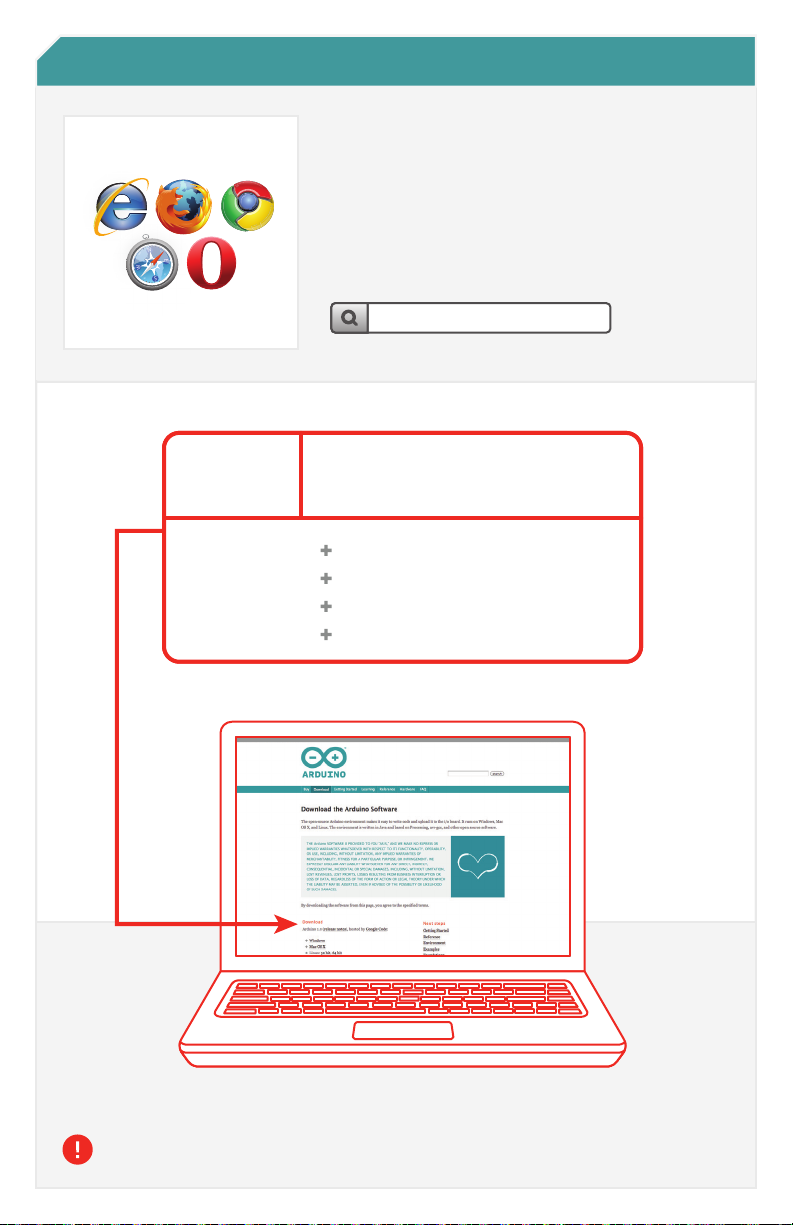
In order to get your RedBoard up and running, you'll need to
download the newest version of the Arduino software rst from
www.arduino.cc (it's free!). is software, known as the Arduino
IDE, will allow you to program the board to do exactly what you
want. It’s like a word processor for writing programs. With an
internet-capable computer, open up your favorite browser and
type in the following URL into the address bar:
Access the Internet
Download the Arduino IDE (Integrated Development Environment)
user
•••••••••
Windows
Mac OS X
Linux: 32 bit, 64 bit
N
W
S
E
NW
SW
SE
NE
arduino.cc/en/main/software
Choose the appropriate Operating System installation package for your computer.
Download Click on your appropriate computer
operating system next to the “ + ” sign.
Windows
Mac OS X
source
Linux: 32 bit, 64 bit
1
Page 4
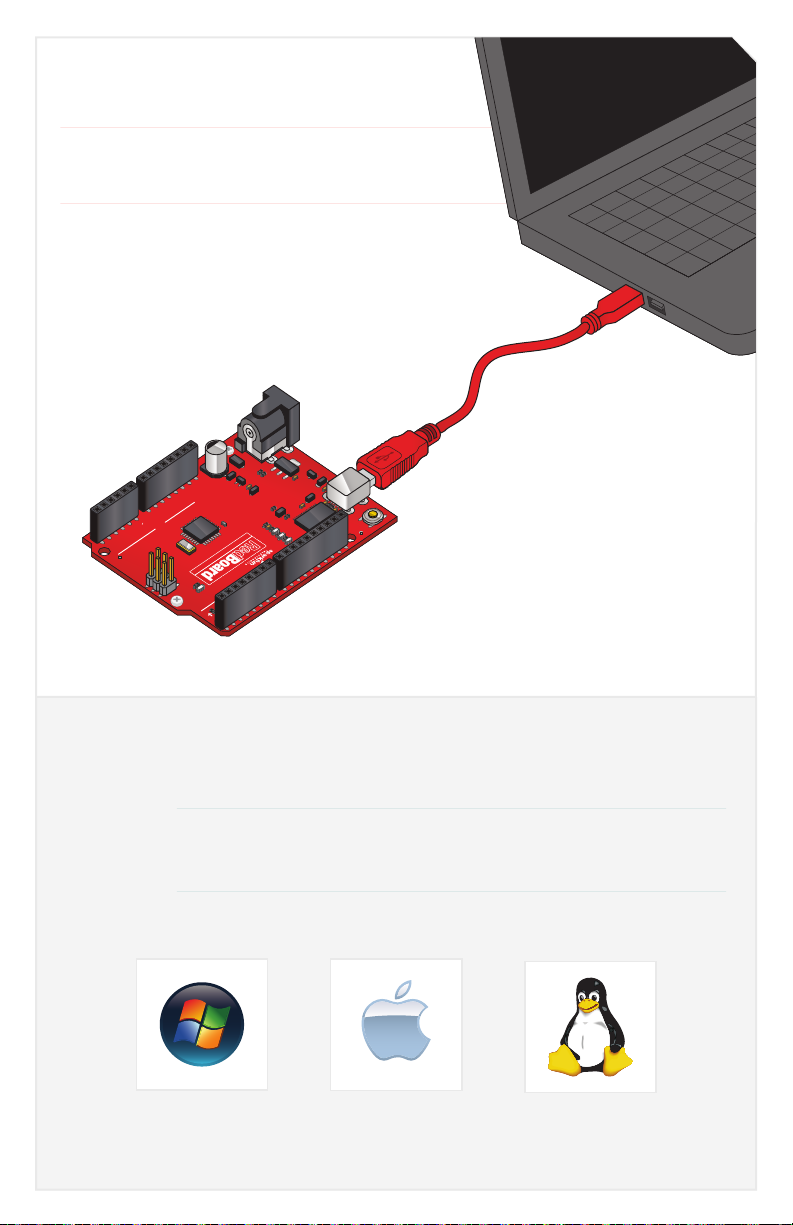
// Connect your RedBoard to your Computer
Use the USB cable provided in the SIK kit to connect the RedBoard to
one of your computer’s USB inputs.
// Install Arduino Drivers
Depending on your computer’s operating system, you will need to follow specic
instructions. Please go to www.sparkfun.com/FTDI for specic instructions on how to
install the FTDI drivers onto your RedBoard.
2
3
IOREF
RESET
RESET
7-15V
SCL
SDA
AREF
GND
13
12
~11
~10
~9
8
7
~6
~5
4
~3
2
1
0
TX
RX
13
3.3V
5V
GND
GND
VIN
A0
A1
A2
A3
A4
A5
POWER ANALOG IN
DIGITAL (PWM~)
ON
ISP
TX
RX
LEARN. SHARE. HACK.
Page 5
1
2
356
7
8
9
4
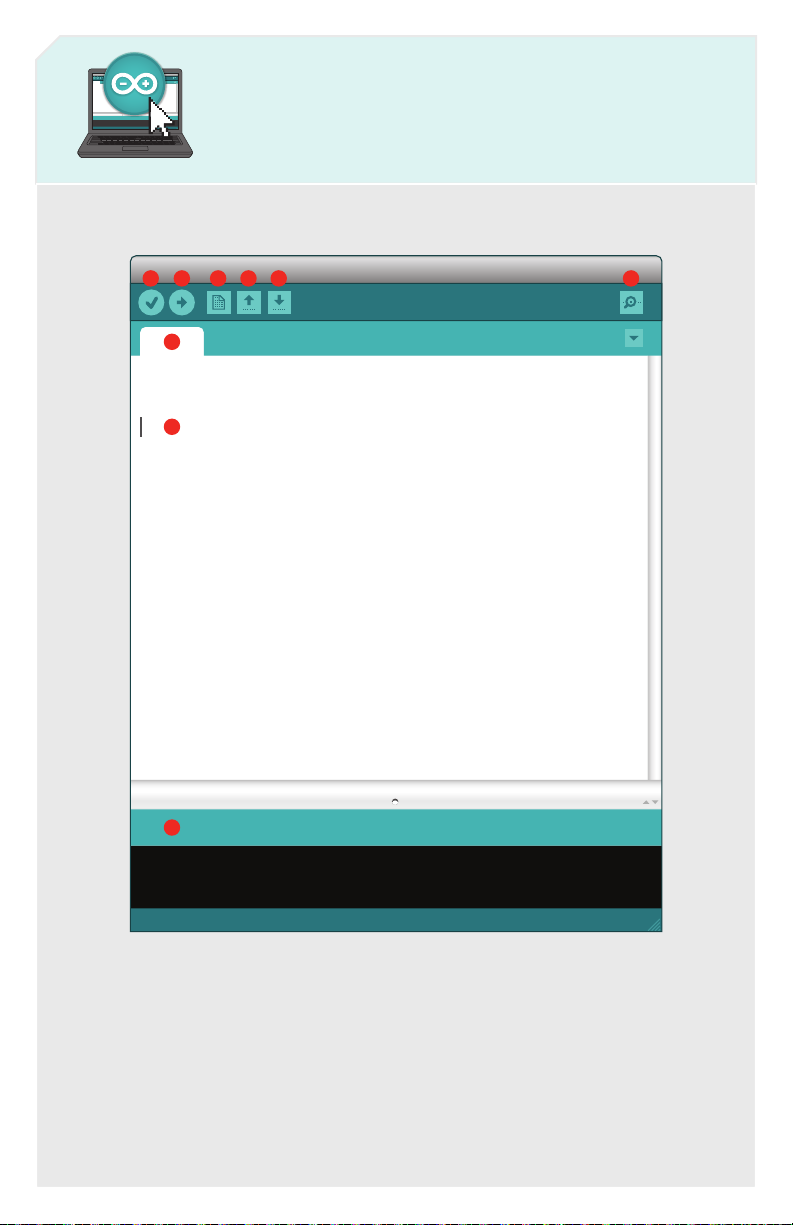
Open the Arduino IDE software on your computer. Poke around and get to know
the interface. We aren’t going to code right away, this is just an introduction. is
step is to set your IDE to identify your RedBoard.
// Open the Arduino IDE:
Page 6
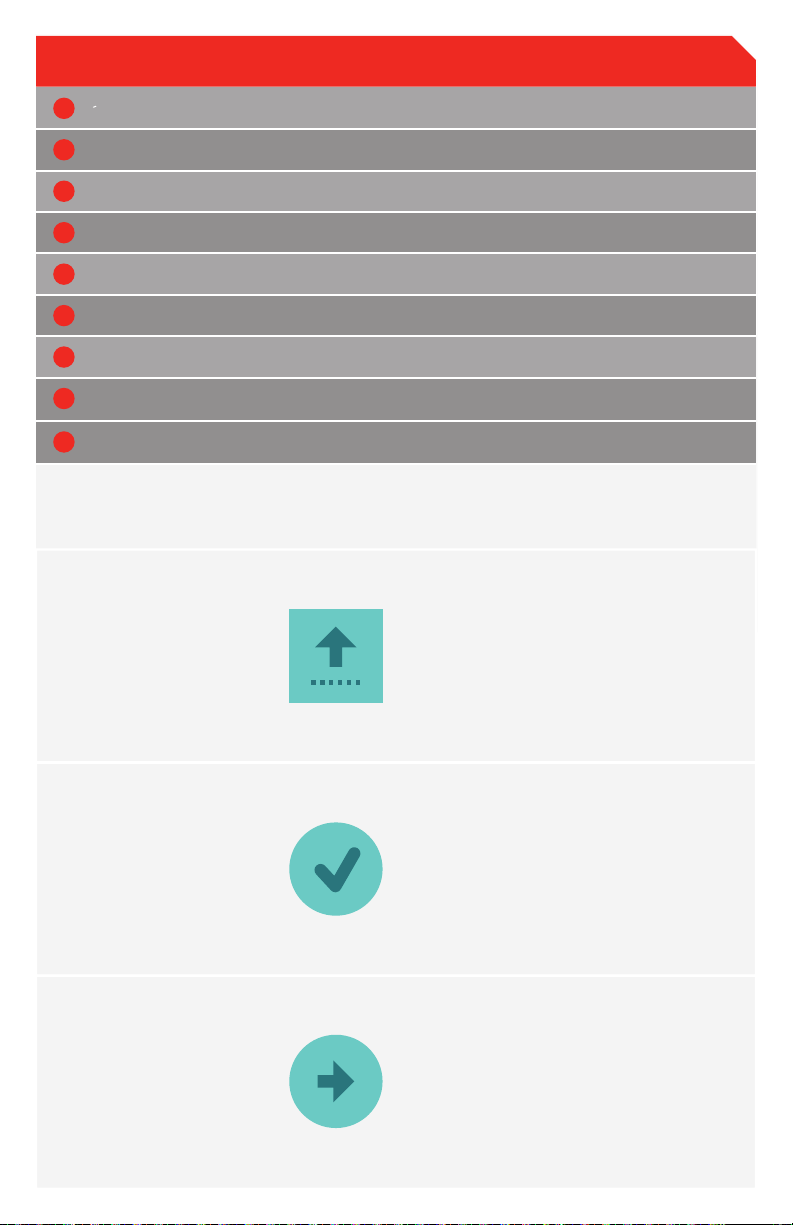
// The three most important commands for this guide are seen below:
GUI (Graphical User Interface)
Verify: Compiles and approves your code. It will catch errors in syntax (like missing semi-colons or parenthesis). // See Diagram Below
1
Upload: Sends your code to the RedBoard. When you click it, you should see the lights on your board blink rapidly. // See Diagram Below
2
New: This buttons opens up a new code window tab.
3
Open: This button will let you open up an existing sketch. // See Diagram Below
4
Save: This saves the currently active sketch.
5
Serial Monitor: This will open a window that displays any serial information your RedBoard is transmitting. It is very useful for debugging.
6
Code Area: This is the area where you compose the code for your sketch.
8
Message Area: This is where the IDE tells you if there were any errors in your code.
9
Sketch Name: This shows the name of the sketch you are currently working on.
7
Verify
Upload
Open
Page 7
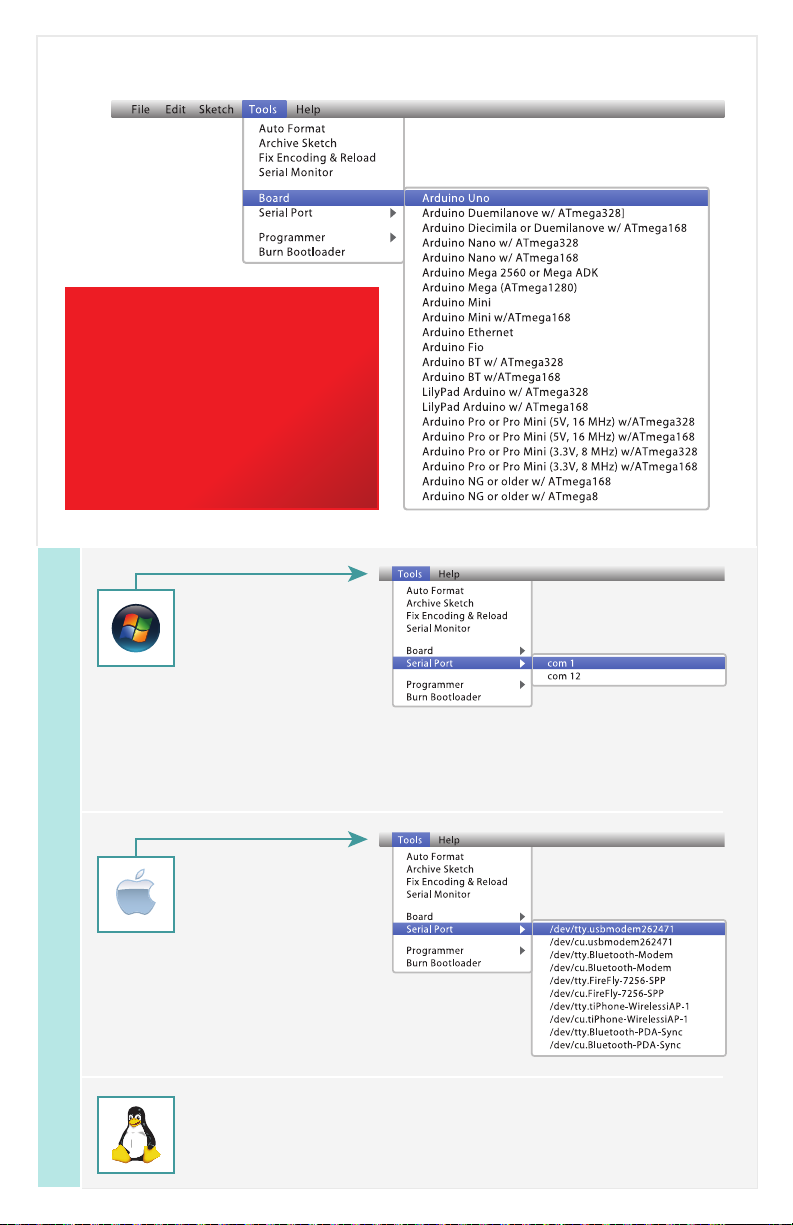
// Select your board: Arduino Uno
Select the serial device of the RedBoard from the Tools |
Serial Port menu. is is likely to be com3 or higher
(COM1 and COM2 are usually reserved for hardware
serial ports). To nd out, you can disconnect your
RedBoard and re-open the menu; the entry that
disappears should be the RedBoard. Reconnect the
board and select that serial port.
Select the serial device of the RedBoard from the Tools
> Serial Port menu. On the Mac, this should be
something with /dev/tty.usbmodem or
/dev/tty.usbserial in it.
http://www.arduino.cc/playground/Learning/Linux
// Select your Serial Device
4
Note:
Your SparkFun RedBoard and the
Arduino UNO are interchangeable
but you won’t find the RedBoard
listed in the Arduino Software.
Select “Arduino UNO” instead.
Page 8
Questo manuale è adatto per i seguenti modelli
1
Altri manuali Sparkfun Electronics Scheda madre


Manuali Scheda madre popolari di altre marche


Telit Wireless Solutions
Telit Wireless Solutions SL869-3DR Manuale utente

Gigabyte
Gigabyte GA-9IVDT Manuale utente

Texas Instruments
Texas Instruments ADS8372EVM Manuale utente

Commell
Commell MS-C73 Manuale utente

IBT Technologies
IBT Technologies MB860 Manuale utente

Nvidia
Nvidia TEGRA DG-04927-001_V01 Manuale utente


