
Taga Harmony TRS Series Manuale utente

TRS Series
GARDEN RAINPROOF SPEAKERS
Instruction Manual

2
Introduction
Thank you for purchasing this TAGA Harmony speakers.
Garden series speakers are designed for installation in gardens, patios, terraces
and other outdoor open spaces. Durable housing with natural and non-intrusive
appearance allows TAGA Harmony speakers to perfectly adapt in the architecture of
the environment.
This instruction manual provides all of the information that you need to know about
your TAGA Harmony TRS speaker. Please read it carefully before you start using the
unit.
Specications
Full technical specications are available on the www.taga-audio.com website.
3
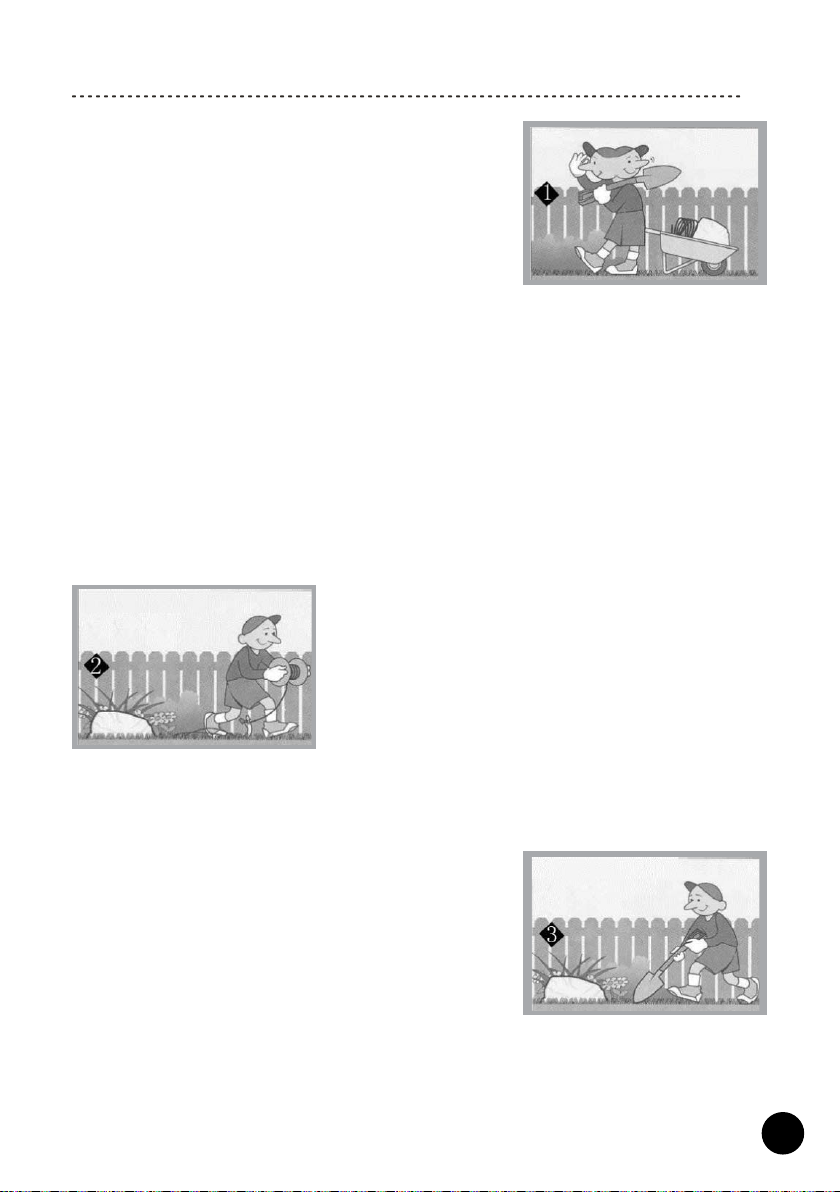
Speaker Placement and Set-up
1. Select location
It is advisable to plan all aspects of installation before
starting the setup.
Great care should be taken to ensure that all local
building and legal regulations are followed. In case
of any doubt contact a professional TAGA Harmony
installer or dealer.
When placing the speaker, nd the position oering the
best sound coverage throughout the listening area.
When installing more than 1 speaker make sure the speakers are placed at least 2
meters (6.6 feet) from each other what usually gives the best sound eects.
Avoid placing the speaker in a direct path of water sprinklers or where it will be
continually exposed to chlorinated solvents from a pool or spa.
For stereo eect you have to use 2 mono speakers for a single stereo audio source.
The SM (stereo / mono) models ensure high quality, dual-channel sound from a single
speaker. The SM models can provide much wider dispersion than traditional speakers
as well as eliminate sound imbalances which can be heard once listeners move around
the area.
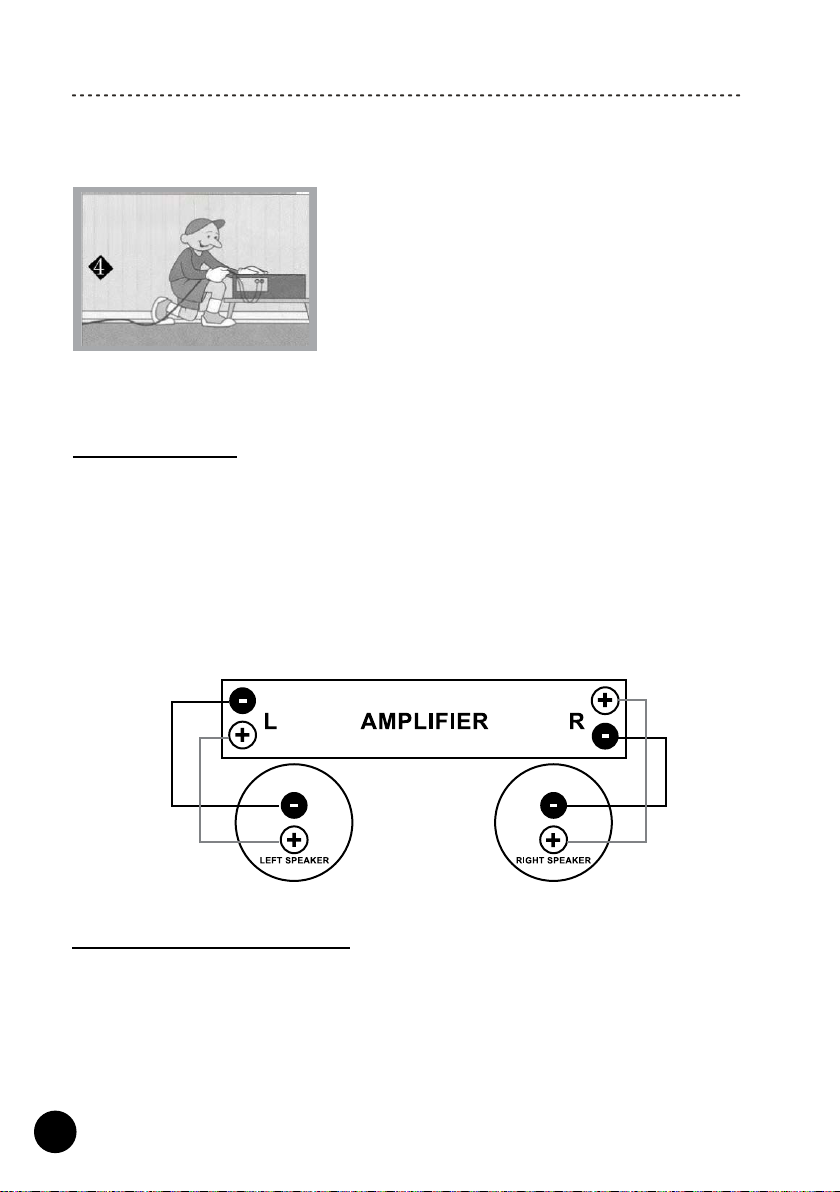
2. Run the speaker cable
Before hiding the cable (digging in etc.), run the
speaker cable from the speaker to the sound source
(amplier, receiver etc.). Ensure to avoid any obstacles
such as walls, electrical cables, water sprinklers and
pipes.
If you use the speaker in the outdoor environment
make sure to use a speaker cable for the outdoor use.
The speaker cable is not supplied with this product.
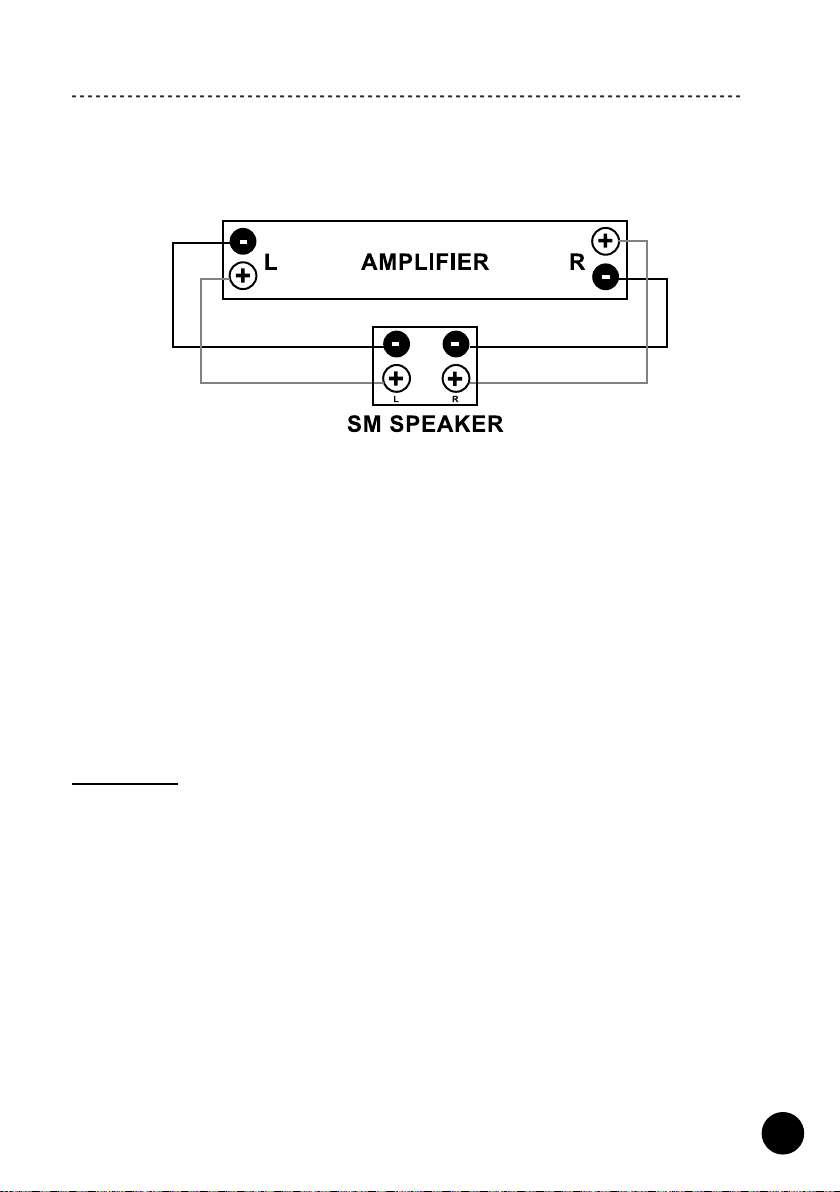
3. Hide the speaker cable
To avoid accidental interruption or disconnection of the
speaker cable it is recommended to place the cable
approximately 10 cm (0.33 feet) in the ground or x it
to the ground with U type clamps (not supplied with this
product).
To further secure the cable in the ground we
recommend to place it in a PVC / Nylon conduit tube
(not supplied with this product).
4
Speaker Placement and Set-up
4. Connect the sound source
(for TRS L models check point 5)
Before connecting the speaker make sure that your
audio source (amplier, receiver etc.) is switched o.
Connect the speaker cable to the speaker and
amplier.
Pay attention to connecting the polarity of the speaker
correctly with the amplier speaker output terminals.
Each channel of your amplier has 2 speaker output
terminals: one is + (usually RED color) and one is -
(usually BLACK color). Please refer to your amplier’s
instruction manual for more information.
Mono TRS Speaker
A pair of short speaker cables is located at the bottom of your TRS speaker (protected
by an external black sleeve): one cable is + (RED color) and one is - (BLACK color).
Use a speaker cable to connect TRS speaker cables with your amplier.
Each channel of your amplier should be connected to a single speaker. The amplier
output speaker terminal marked with + should be connected with + (RED color)
speaker cable of your TRS speaker and the one marked with – should be connected
with – (BLACK color) speaker cable of your TRS speaker.
SM (stereo / mono) TRS Speaker
2 pairs of short speaker cables are located at the bottom of your TRS SM speaker
(each pair is protected by an external black sleeve). The pair for Left channel is marked
with L on the speaker’s cabinet, the pair for Right channel is marked with R on the
speaker’s cabinet. For each channel: one cable is + (RED color) and one is - (BLACK
color). Use a speaker cable to connect TRS speaker cables with your amplier.
Both channels of your amplier can be connected to a single SM speaker.
The amplier Left output speaker terminal marked with + should be connected with Left
5
Speaker Placement and Set-up
+ (RED color) speaker cable of your TRS SM speaker, and the amplier Left output
speaker terminal marked with - should be connected with Left - (BLACK color) speaker
cable of your TRS SM speaker. The same should be done for the Right channel.
If your speaker is wired incorrectly it will be out of phase and it will sound indistinctly
and with a weak bass. Re-check your connections and correct the polarity by reversing
the connections.
NOTE! Make sure to securely connect the speaker cables with the cables of your TRS
speaker.
WARNING! Check whether your amplier may work with impedance of your TAGA
Harmony speaker. Otherwise you may burn the amplier and damage the speakers - it
may void your warranty.
5. TRS L models
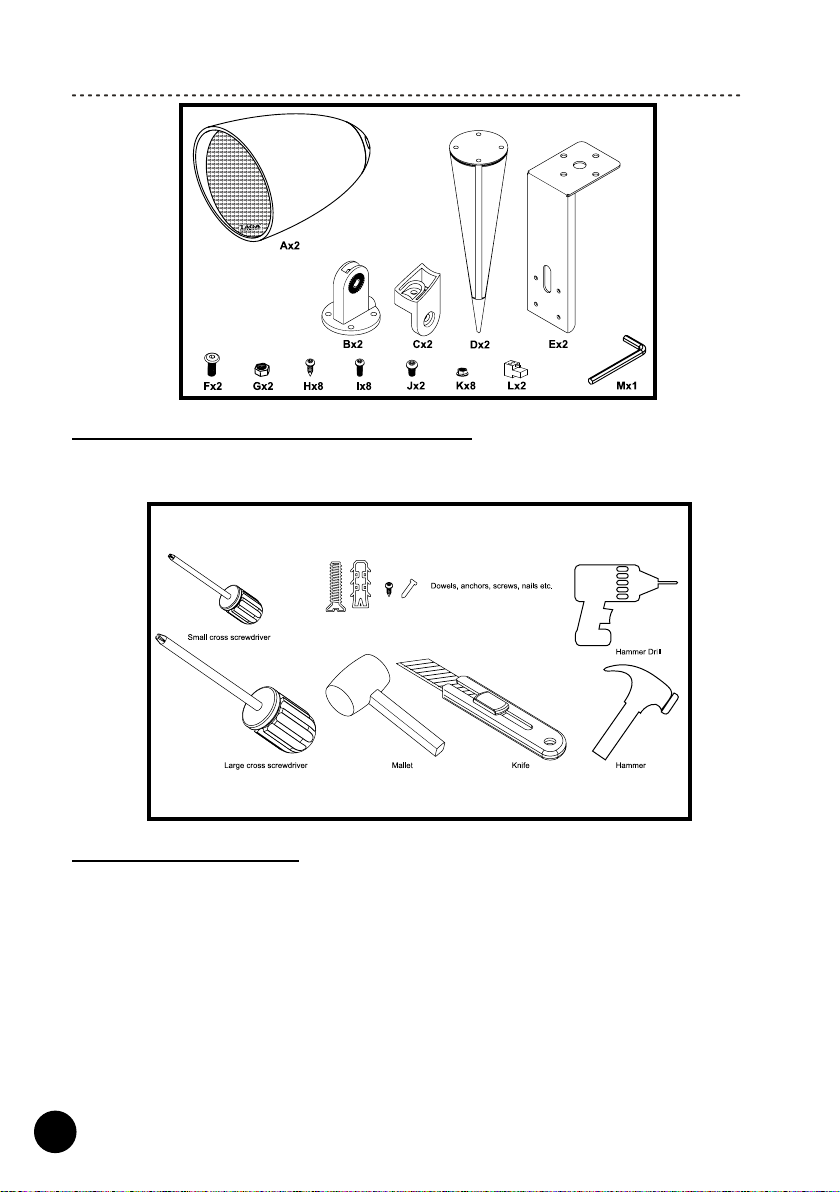
Accessories
Contents of 1 packaging:
A. Speaker x 2 pieces
B. Surface Mount x 2 pieces
C. Mount Arm x 2 pieces
D. Ground Stake x 2 pieces
E. Ceiling-Wall Mount x 2 pieces
F. Hex Socket Head Screw x 2 pieces [to attach the Mount Arm to the Surface Mount]
G. Nut x 2 pieces [to attach the Mount Arm to the Surface Mount]
H. Self-Tapping Screw x 8 pieces [to attach the Surface Mount to the Ground Stake]
I. Screw x 8 pieces [to attach the Surface Mount to the Ceiling-Wall Mount]
J. Screw x 2 pieces [to attach the Mount Arm to the Speaker]
K. Nut x 8 pieces [to attach the Surface Mount to the Ceiling-Wall Mount]
L. Quick Speaker Connector – Terminal Block x 2 pieces
M. Internal Hex Wrench x 1 piece
6
Speaker Placement and Set-up
Required tools (not supplied with this product)
Depending on the mounting surface and option prepare some of the following tools:
Connect the sound source
Make sure that your sound source (amplier, receiver etc.) is switched o.
1. Depending on the installation option (check “Installation options” for more details)
run the speaker cable properly through the Surface Mount and the Mount Arm.
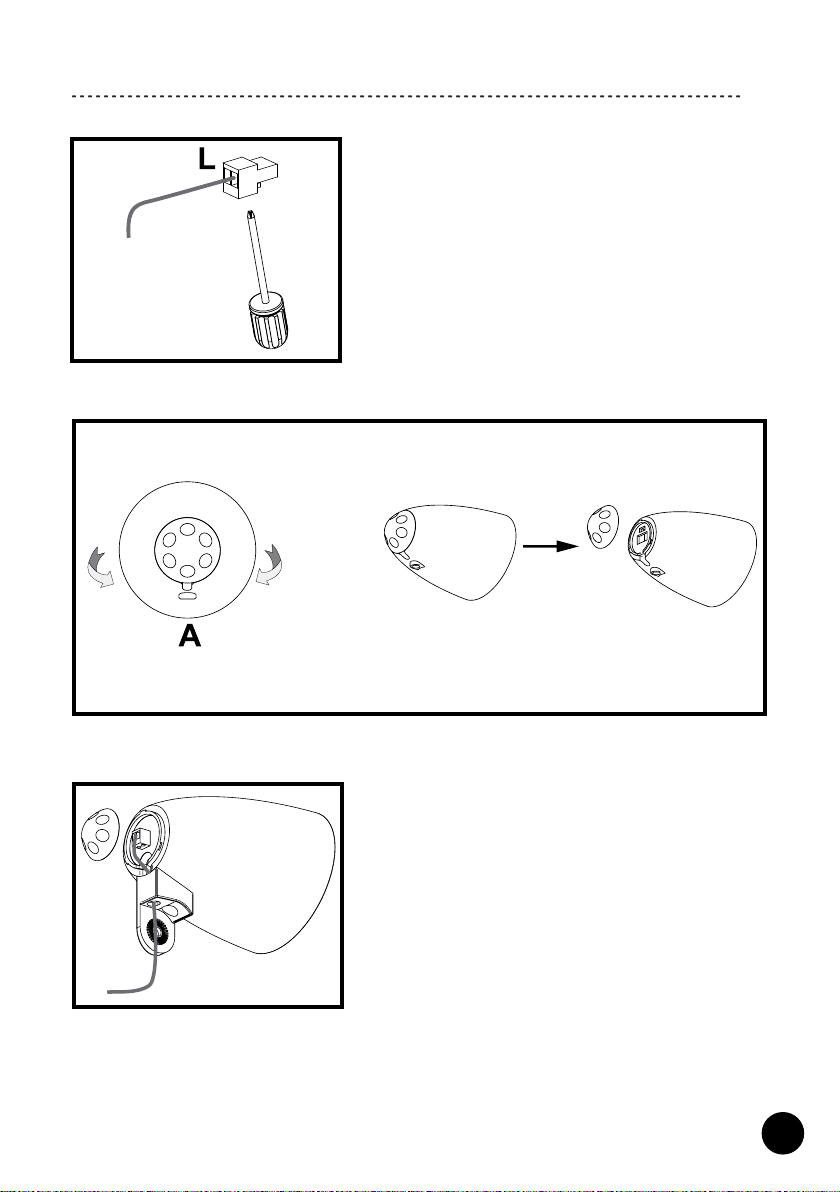
2. Using a screwdriver unscrew the connectors on the Quick Speaker Connector –
Terminal Block and connect the bare speaker cable.
Each channel of your amplier should be connected to a single speaker. The amplier
output speaker terminal marked with + (RED color) should be connected to the +
terminal connector of your TRS L speaker and the one marked with – (BLACK color)
with - terminal connector of your TRS L speaker.
Follow the same for the other speaker channel.
7
Speaker Placement and Set-up
3. Firmly screw in the connectors.
4. Remove the seal cap which is located on the rear of the Speaker (twist to open and
close).
5. Plug in the Quick Speaker Connector – Terminal Block to the terminal socket which
is located under the seal cap.
6. Firmly mount the seal cap back to the Speaker.
8
Speaker Placement and Set-up
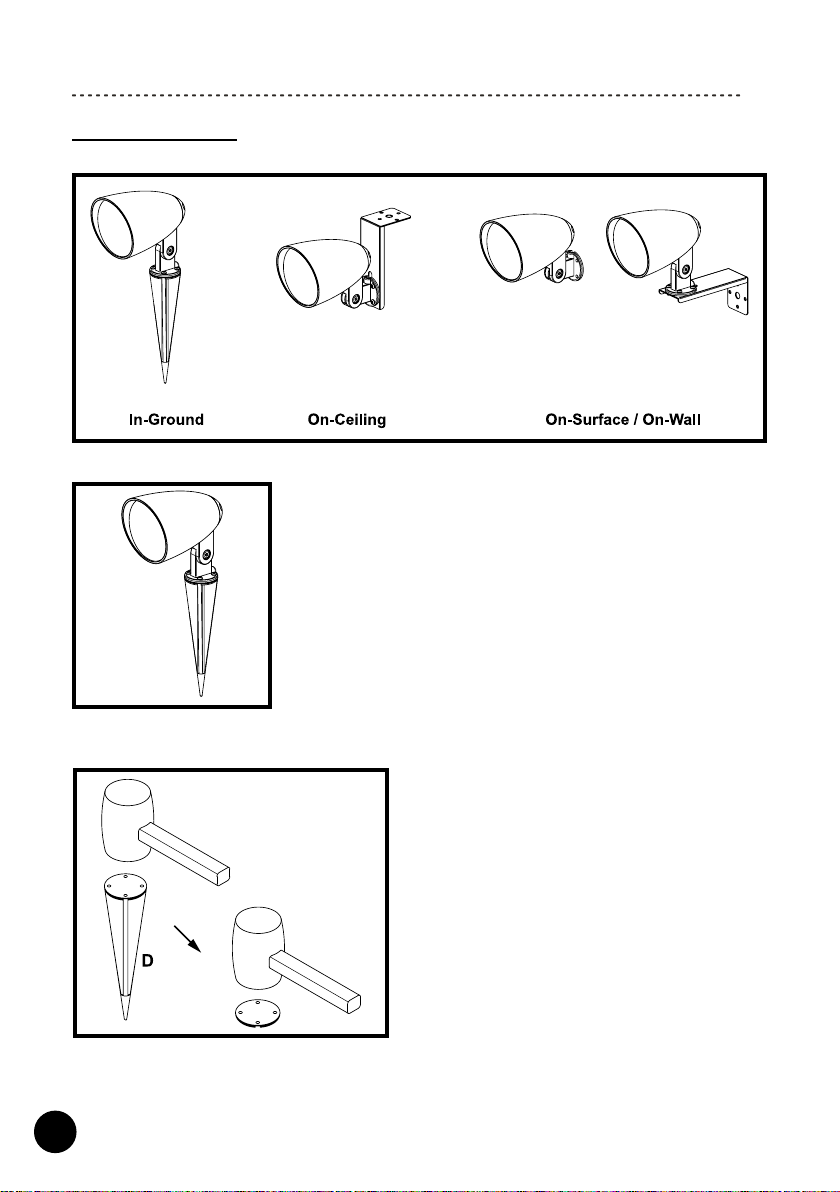
Installation options
The TRS L models oer a choice of installation options:
In-Ground
1. Using a mallet pound the Ground Stake into the ground. You can use a wooden
block to protect the top part of the Ground Stake.
9
Speaker Placement and Set-up
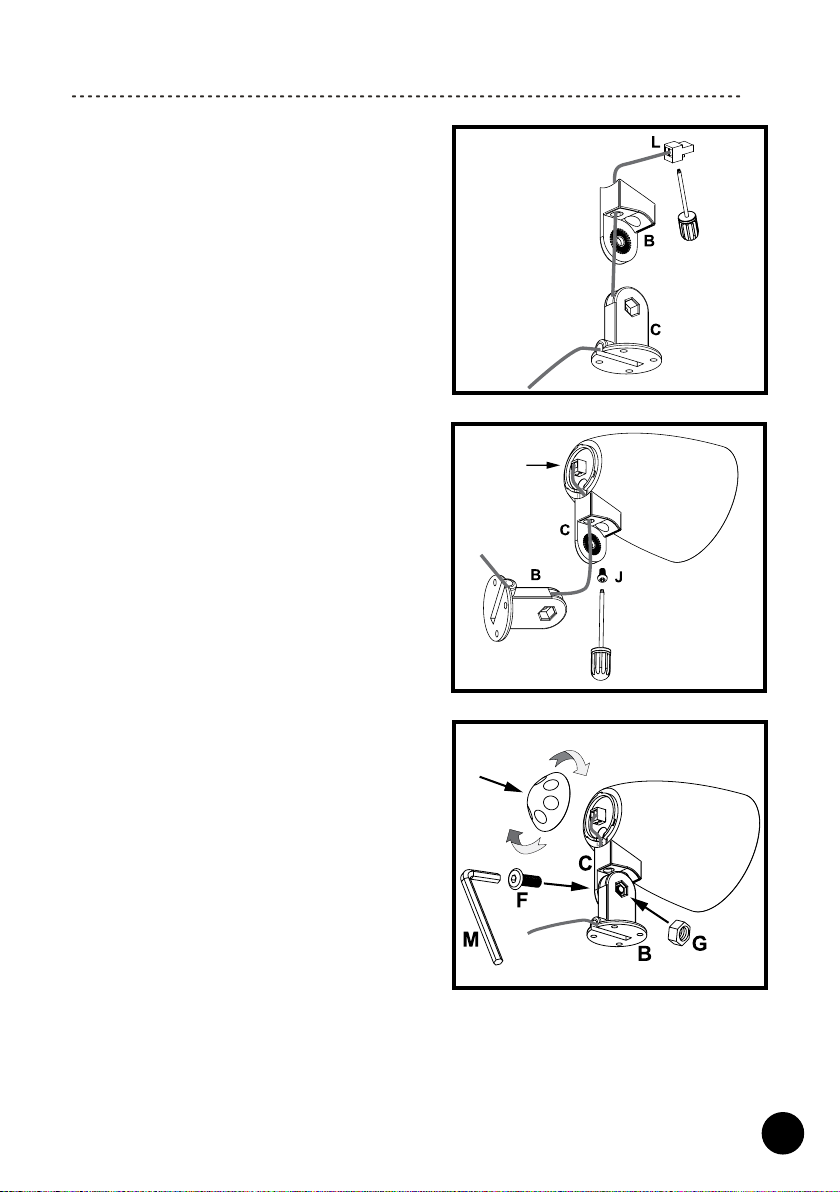
2. Run the speaker cable through the Surface
Mount and the Mount Arm and connect it to
the the Quick Speaker Connector – Terminal
Block (check “Connect the sound source” for
more details).
3. Plug in the Quick Speaker Connector –
Terminal Block to the terminal socket (check
“Connect the sound source” for more details).
Using a screwdriver attach the Mount Arm to
the Speaker.
4. Firmly mount the seal cap back to the
Speaker.
Using the Internal Hex Wrench attach the
Surface Mount to the Mount Arm.
Note: Do not tighten the Hex Screw too rmly.
10
Speaker Placement and Set-up
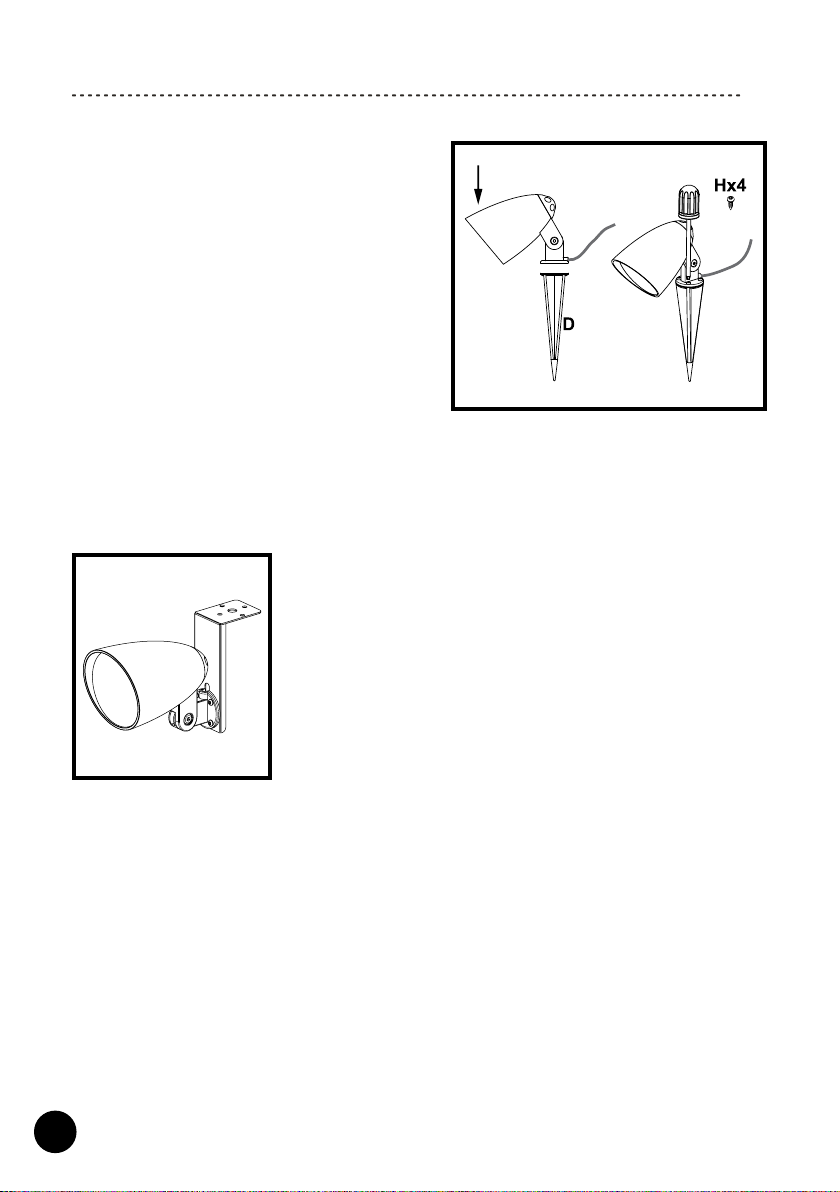
5. Set the speaker in the down position.
Using a screwdriver attach the Surface Mount
to the Ground Stake.
Note: Make sure not to damage the speaker
cable.
6. Set the required Speaker position and tighten the Hex Socket Head Screw (check
“Vertical angle regulation” for more details).
Note: Make sure to tighten the Hex Screw rmly but be cautious not to break the
thread or the mounts.
On-ceiling
WARNING! Depending on the ceiling type, use an appropriate xing system (ask your
local dealer or installer for advice).
We recommend to use the xing system which is able to keep the weight at least 20%
higher than the actual weight of your TRS L speaker together with the Ceiling-Wall
mount.
Using improper installation accessories may result in serious injury and Speaker
damage.
Note: Screws, anchors / dowels are not included with your TRS L speaker.
The below installation guide is shown for the wooden ceiling.
Altri manuali per TRS Series
1
Indice
Altri manuali Taga Harmony Altoparlanti

Taga Harmony
Taga Harmony TAV-500B Manuale utente

Taga Harmony
Taga Harmony TRS Series Manuale utente

Taga Harmony
Taga Harmony Diamond Series Manuale utente

Taga Harmony
Taga Harmony Platinum F-90 SL v.2 Manuale utente

Taga Harmony
Taga Harmony TOS Series Manuale utente

Taga Harmony
Taga Harmony Platinum IW LCRS Series Manuale utente

Taga Harmony
Taga Harmony Pro Audio PSL Manuale utente

Taga Harmony
Taga Harmony TCW Series Manuale utente

Taga Harmony
Taga Harmony iMPACT 2.0 Manuale di riferimento


