Titanium 19000 Manuale utente

1
Table of Contents
Safety Precaution ........................................................................................................2
1. Reference
1.1 General Features ...................................................................................................3
1.2 Accessories ............................................................................................................4
2. Basic Function
2.1 Front Panel .............................................................................................................5
2.2 Rear Panel .............................................................................................................6
2.3 Remote Control Unit ...............................................................................................7
3. Installation and Connection
3.1 Connecting to Dish LNB and TV .............................................................................9
4. Installation and Operation
4.1 Installation…………..............................................................................................10
4.2 Edit Channel………...............................................................................................15
4.3 Setting ……….......................................................................................................17
4.4 Times…………………….............................................................................………19
4.5 Expansion…..........................................................................................................20
4.6 Other Useful Information ......................................................................................22
5. Additional Information
5.1 Trouble Shooting..................................................................................................25
5.2 Technical Specifications………………….……………………………………………26
5.3 Glossary ..............................................................................................................27

2
Safety Precaution
This STB has been designed and manufactured to satisfy the international safety
standards. Please read the following safety precautions carefully before operating this
receiver.
Main Supply:
Before operating, please check the units operating voltage is 100~240V AC
50/60Hz.
Overload:
Do not overload a wall outlet, extension cord or adapter, neither use damaged power
cord or touch it with wet hand as this may result in electric shock.
Liquid:
The receiver shall not be exposed to dripping or splashing water, and that no objects
filled with liquids, such as base, shall be placed on the apparatus.
Ventilation:
Keep the slots on top of the receiver uncover to allow sufficient airflow to the unit. Do
not put the receiver on soft furnishings or carpets. Do not expose the receiver to direct
light or do not place it near a heater or in humid conditions. Do not stack other
electronic equipments on top of the receiver.
Cleaning:
Plug out the receiver from the wall outlet before cleaning. Clean the receiver by a soft
cloth or mild solution of washing-up liquid (no solvents).
Connection:
Disconnect the receiver from the mains when you connect it to satellite LNB or
disconnect it from LNB. Failure would possibly cause damage to the LNB.
Location:
Put the receiver indoor in order to avoid lightening, raining or sunlight.
Uncover:
Do not remove the cover, to reduce the risk of electric shock. Contact qualified and
licensed service personnel to repair the receiver, or contact your dealer.

3
1. Reference
1.1 General Features
DVB-S/DVB-S2 Satellite Compliant (MPEG-II/ MPEG-IV/ H.264).
DiSEqC 1.0, 1.1, 1.2 & 1.3 (USALS) Compatible.
SCPC & MCPC Receivable from C/Ku Band Satellites LNB Supported.
Universal, Single, Single S & C Band Wide band LNB.
Sensitive Tuner with Loop-Through.
PAL / NTSC Conversion.
Variable Aspect Ratio (4:3, 16:9) with Pan Vector or Letter Box.
Output Resolution: 576p & 576i, 720p & 1080i.
HDMI with Upscale to Improve Picture Quality.
4 Favorite Groups and Parental Lock Function.
5 Kinds of Sort Function for Channels.
On-screen Display with True Full Color Resolution.
Teletext and Subtitle Supported (OSD).
7 days EPG (Electronic Program Guide) for On-Screen Channel Information.
Multi Language Menu.
Capacity for Sorting Multi Channel.

4
1.2 Accessories
Unpack the unit and check to make sure that all of the following accessories are
included in the packaging.
1 x User manual
1 x Remote Control Unit (RCU)
2 x AAA Batteries
1 X AV CABLE
5
2. Basic Function
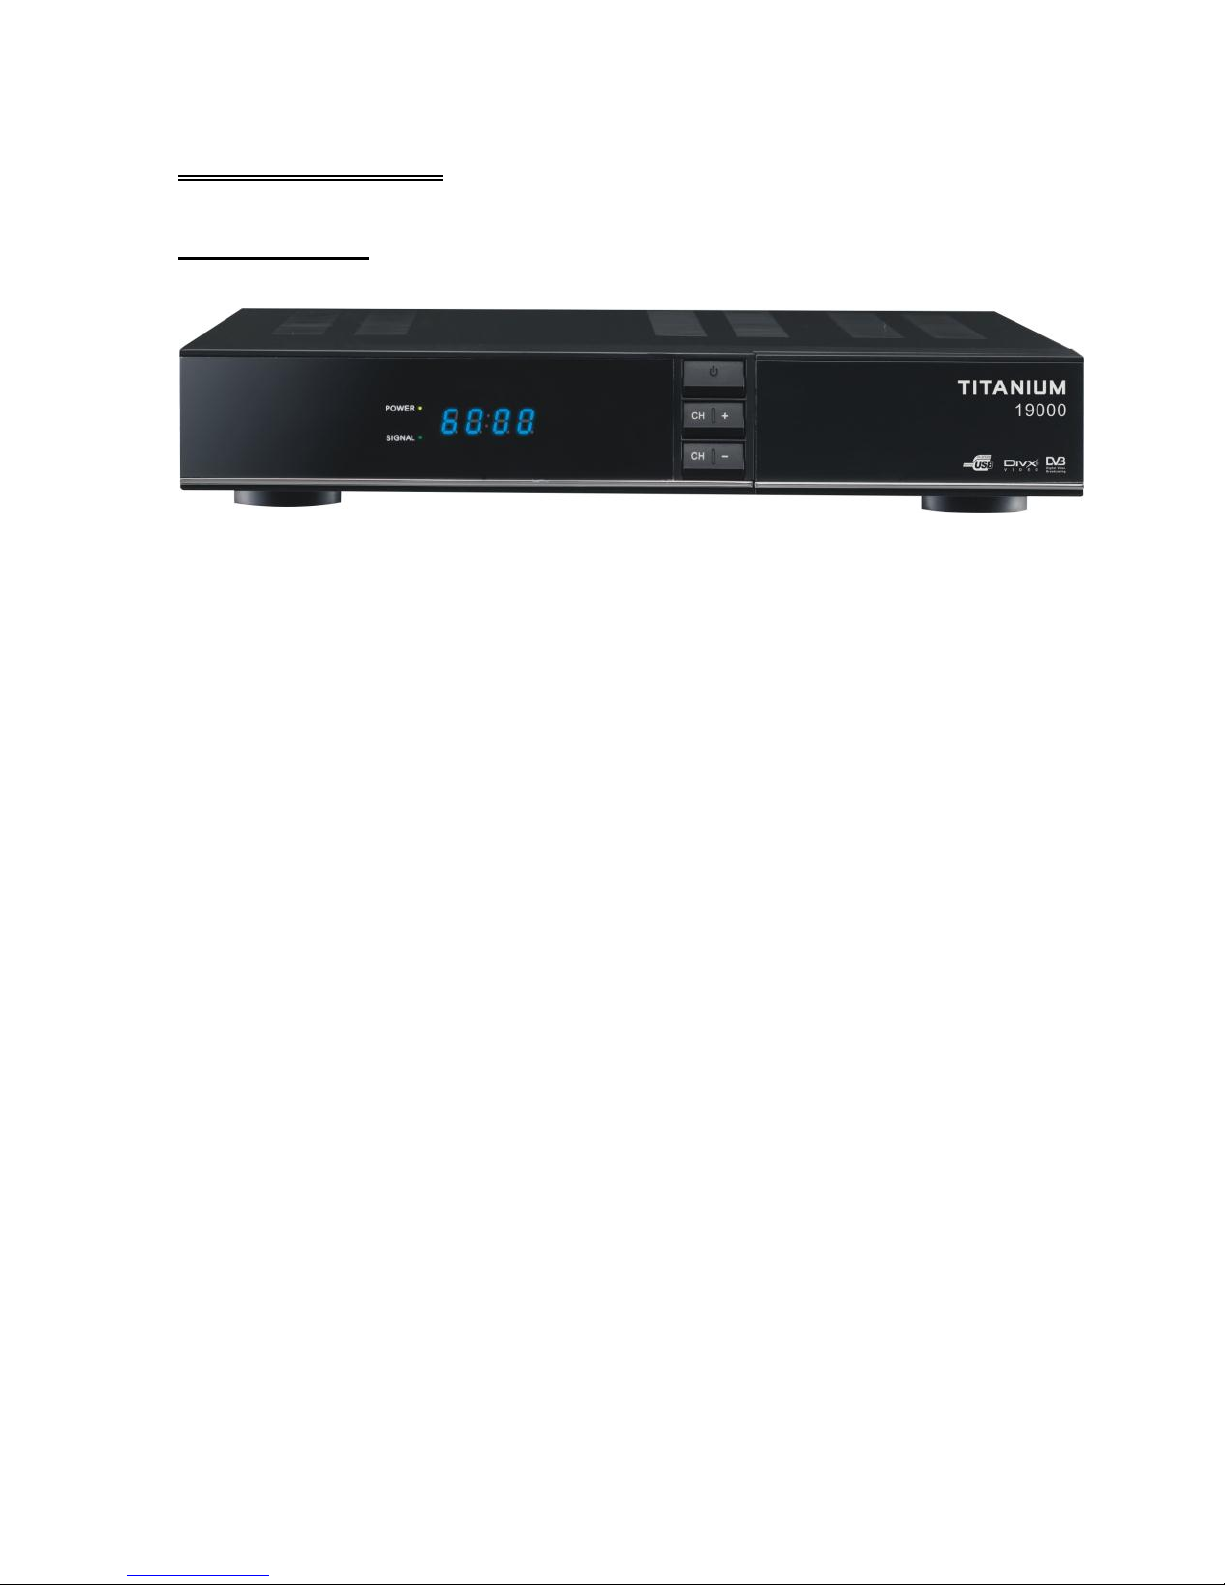
2.1 Front Panel
1. Display(4-digi 7-segment)
4-digi displays channel information.
2. Power Button
The POWER button is used to turn the power on or to make it on Standby Mode.
3. CH Buttons
Change channels or items from top to bottom on the menus.
4. Smart Card Slot
Socket for a TV operator Smart Card.
6
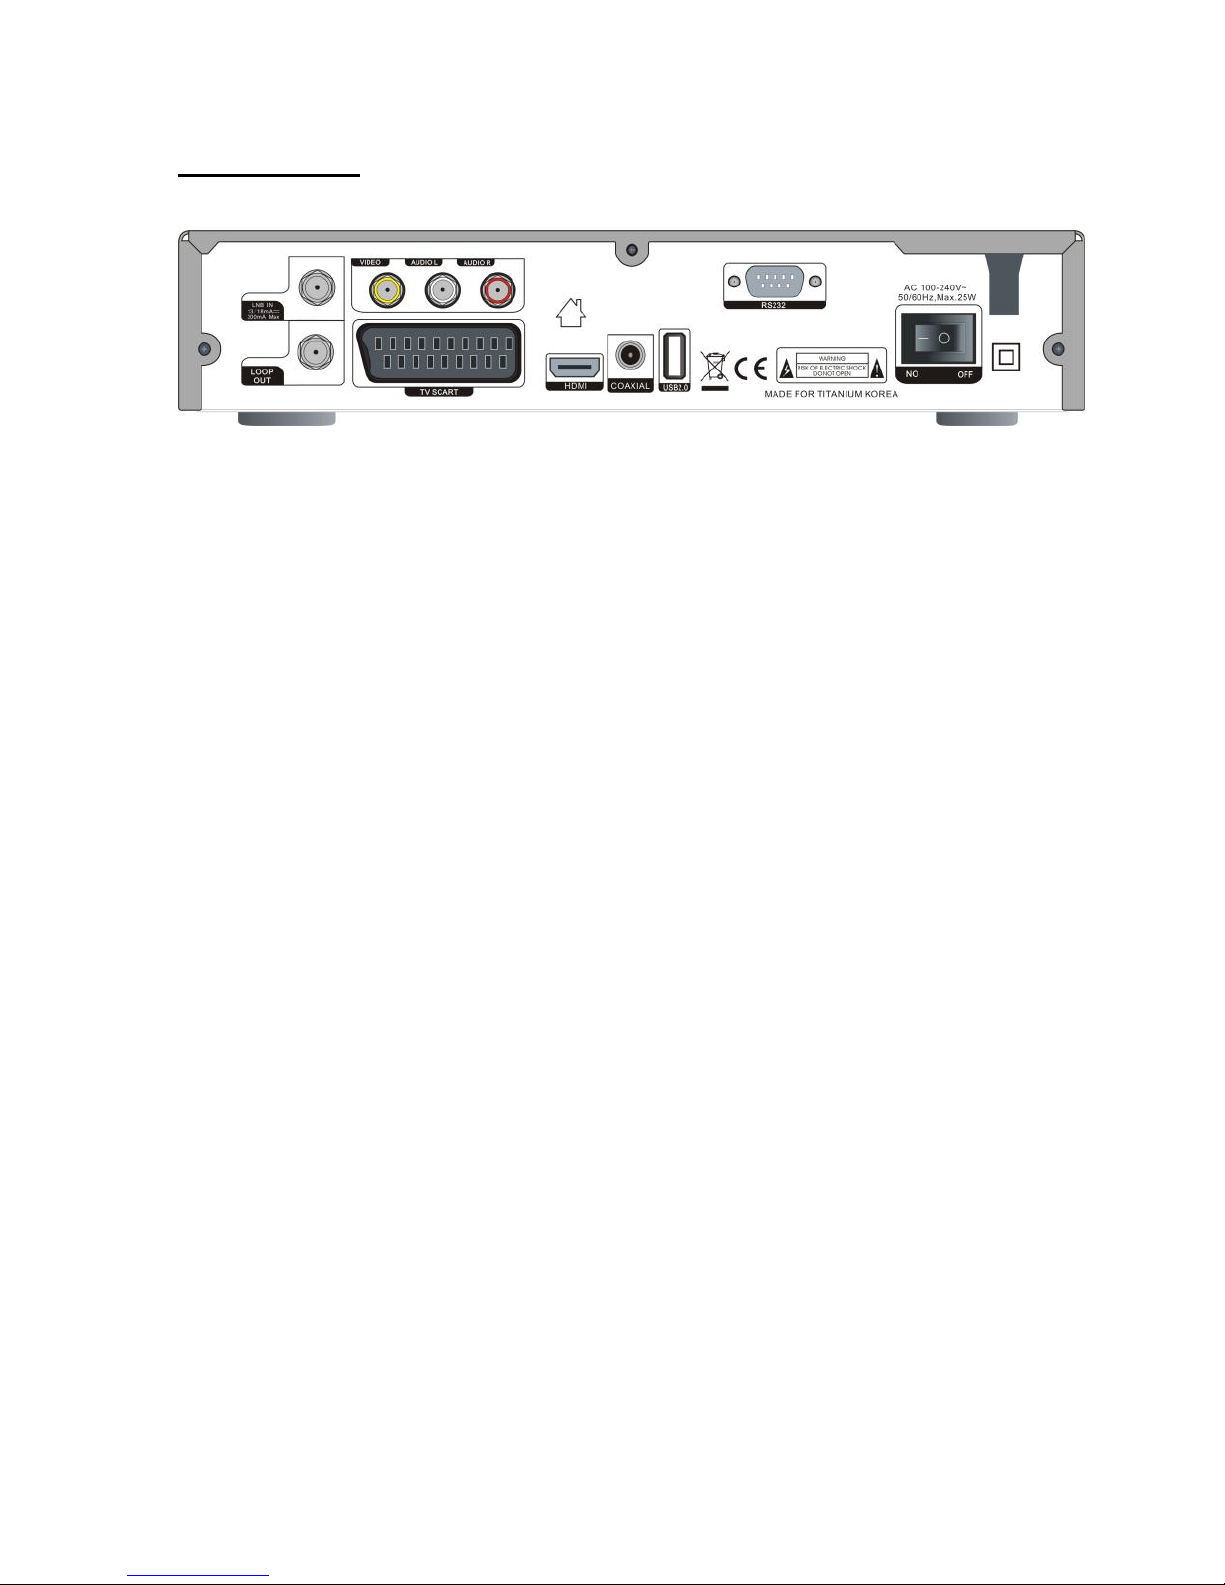
2.2 Rear Panel
1. LNB IN 13/18V 500mA Max
Connect the Satellite Dish LNB.
2. LNB OUT
Output the Dish LNB IN signal.
3. VIDEO/AUDIO
RCA output for CVBS format.
4. DV-OUT
HDMI signal output
5. USB
USB 2.0 Host Port.
6. COAXIAL
Digital Audio output
7. RS-232
Connect to serial port of PC for software upgrade.
8. Power Switch
To Turn ON or OFF the main power of this STB.
7
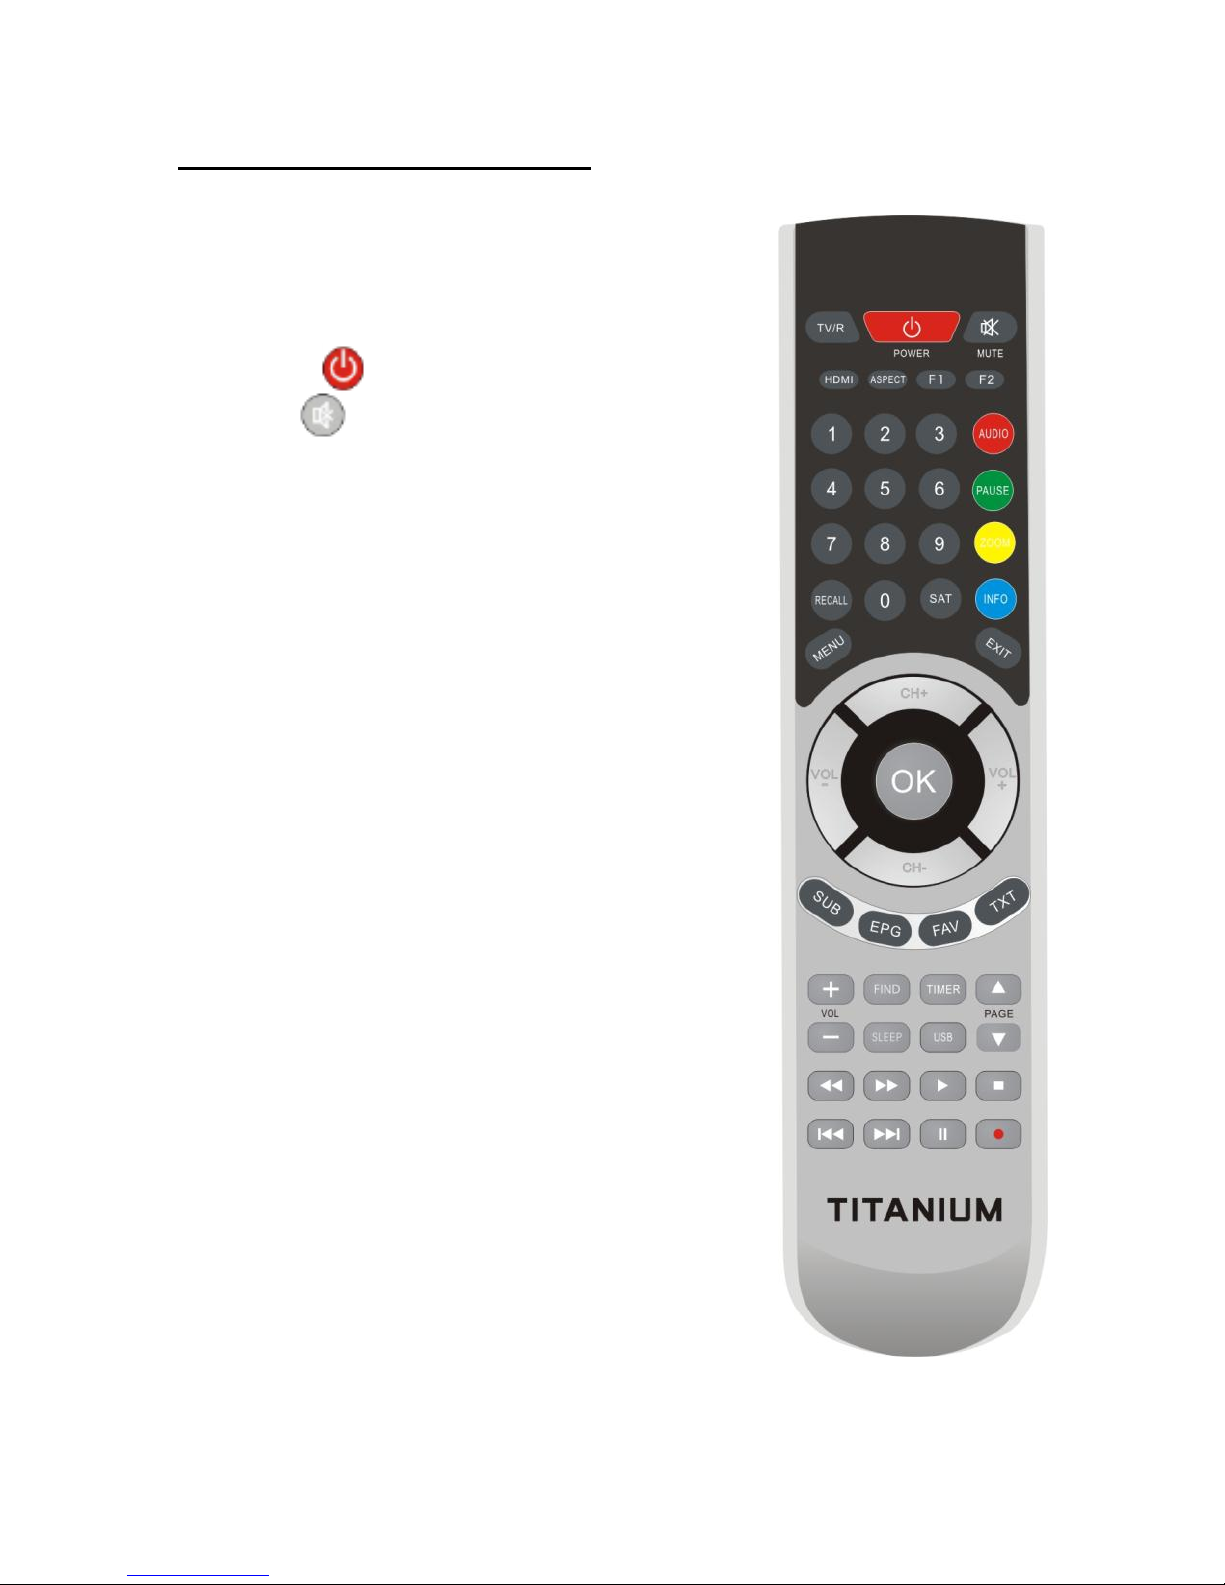
2.3 Remote Control Unit (RCU)
You can control this receiver by this remote controller
with full function.
1.TV/R: Switch between TV and RADIO.
2. POWER: Switch the receiver on or off.
3. MUTE: Turn the sound On/Off.
4. HDMI: Switch the HDMI resolution type
5. ASPECT: Switch the aspect of TV screen
6. TIMER: Setup event timer.
7. SLEEP: Setting the time for turning the receiver off
8. NUMERIC KEY (0~9): Change program or input
number.
9: SUB: Showing Subtitle information if the channels
contains.
10. EPG (Electronic Program Guide): Show the
TV/Radio electronic program guide, some channels
may not available due to no such service from TV
provider.
12. FAV: Press to display favorite channel list you set
before.
13. TXT: Press to Display the current channel’s
TELETEXT information, TXT may not available to all
TV channels, if no such data inside live stream.
14. RECALL: Press to show the previous viewed
channel.
15. SAT: Show the scanned satellite list.

8
16. MENU: Press to enter main menu or exit to live channel.
17. EXIT: Exit current menu step by step.
18. CH/: Change TV Channels.
19. VOL/: Change volume in viewing mode.
20. OK: Confirm the highlighted menu item, Open the program list.
21. AUDIO : Select or change the Audio.
22. PAUSE: Pause and Freeze the picture.
23. ZOOM: Zoom in current TV channel
24. INFO: Show the information of the current channel.
25. VOL +/-: Change volume in viewing mode.
26. FIND: Quickly find channels
27. F2: Function Key
28. PAGE+/-: Page up/down on menu.
29. F1: Function key.
30. USB : Enter into USB menu, USB Device must be connected
30.:Fast forward.
31.:Fast backward.
32. : Start playing / Release pause.
33. ■ : Stop recording.
34. I : Play previous item.
35. I : Play next item.
36. I I : Pause/time shift.
37. ●: Start recording.
9
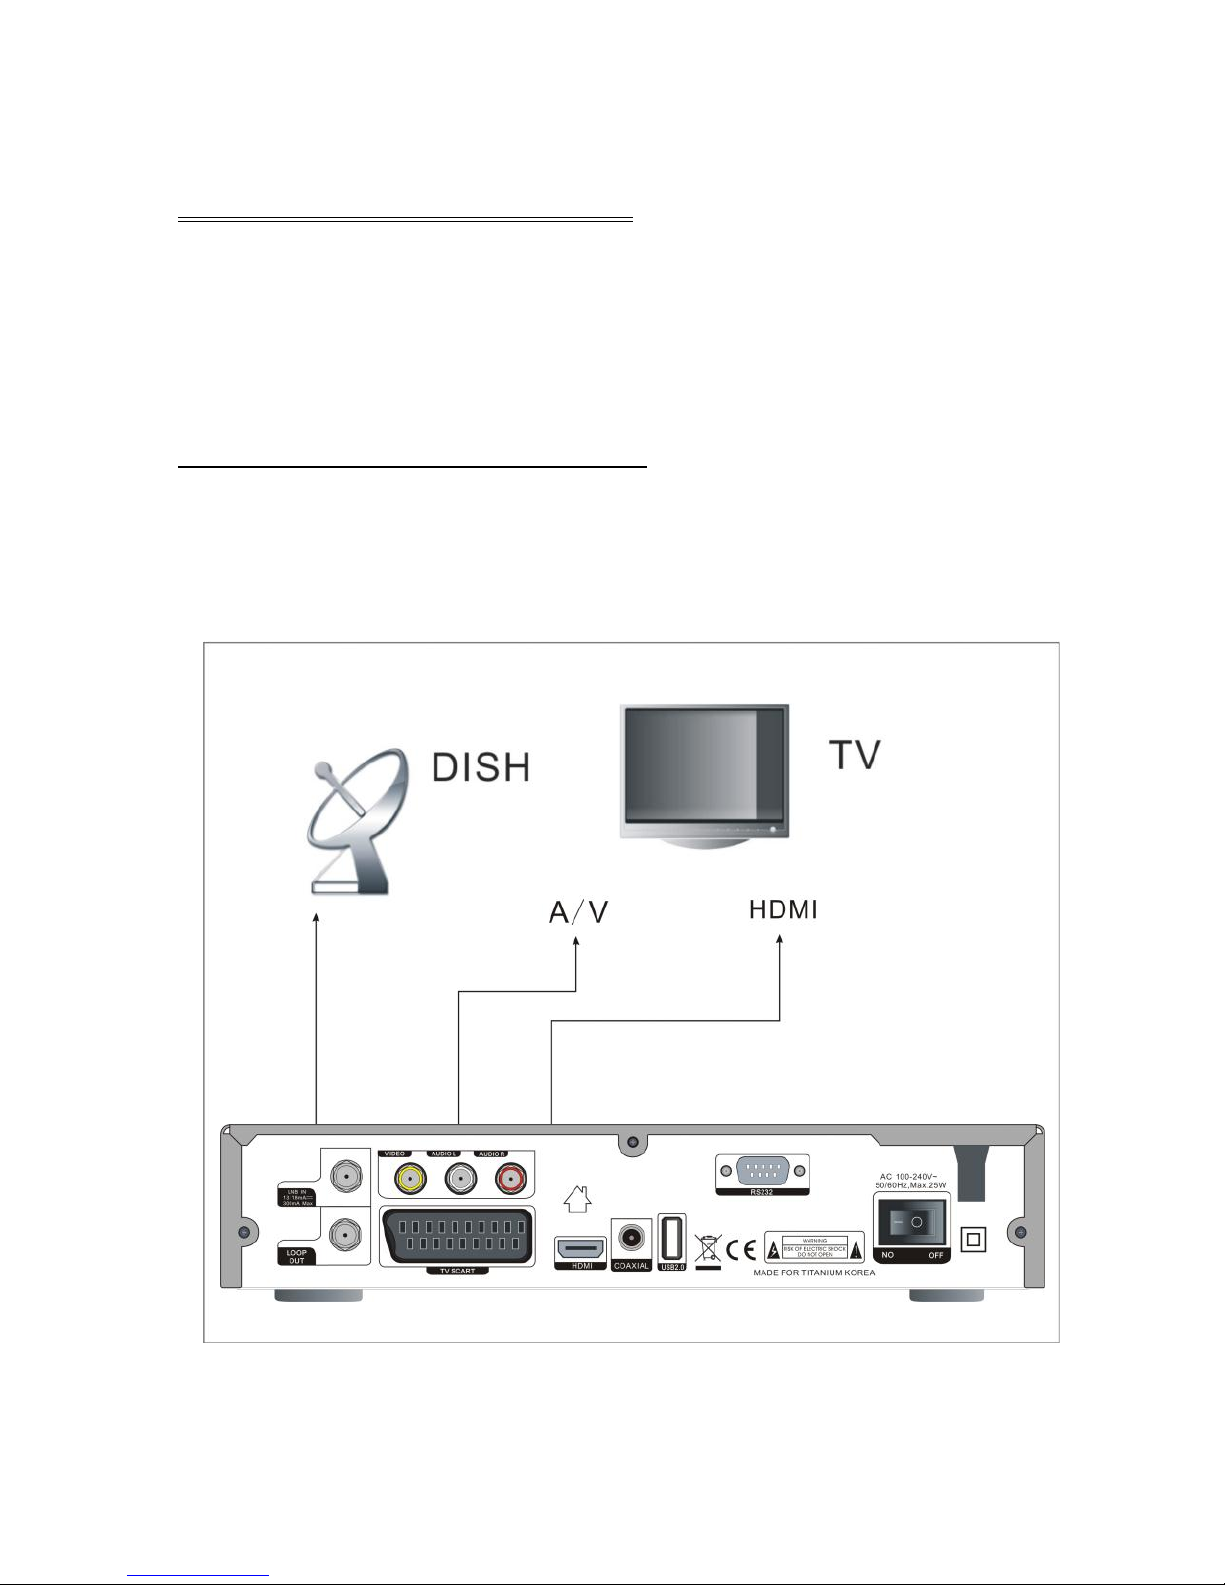
3. Installation and Connection
The following diagram shows you how to connect the HD receiver, TV, LNB and other
equipment, please read this first if you are not sure about the connection, and it will
guide you to the correct connection.
3.1 Connecting to Dish LNB and TV
You can connect one fixed dish LNB directly to the LNB IN, or connect at
least two dish LNB by DiSEqC Switch, you can also connect to HH mount
dish LNB.
10
4. Installation and Operation
After connecting the receiver to other required equipment, turn on the receiver,
there should be no channel information available at first. You need to follow the
procedure to setup your receiver to search the channel.
Main Menu
Press MENU button to activate main menu, main menu consists of Installation,
Service organization, Output, System, Timer, USB.
Use UP/DOWN button to select your subject and press OK to confirm your selection
and enter that sub menu, press EXIT button you can return to the previous menu
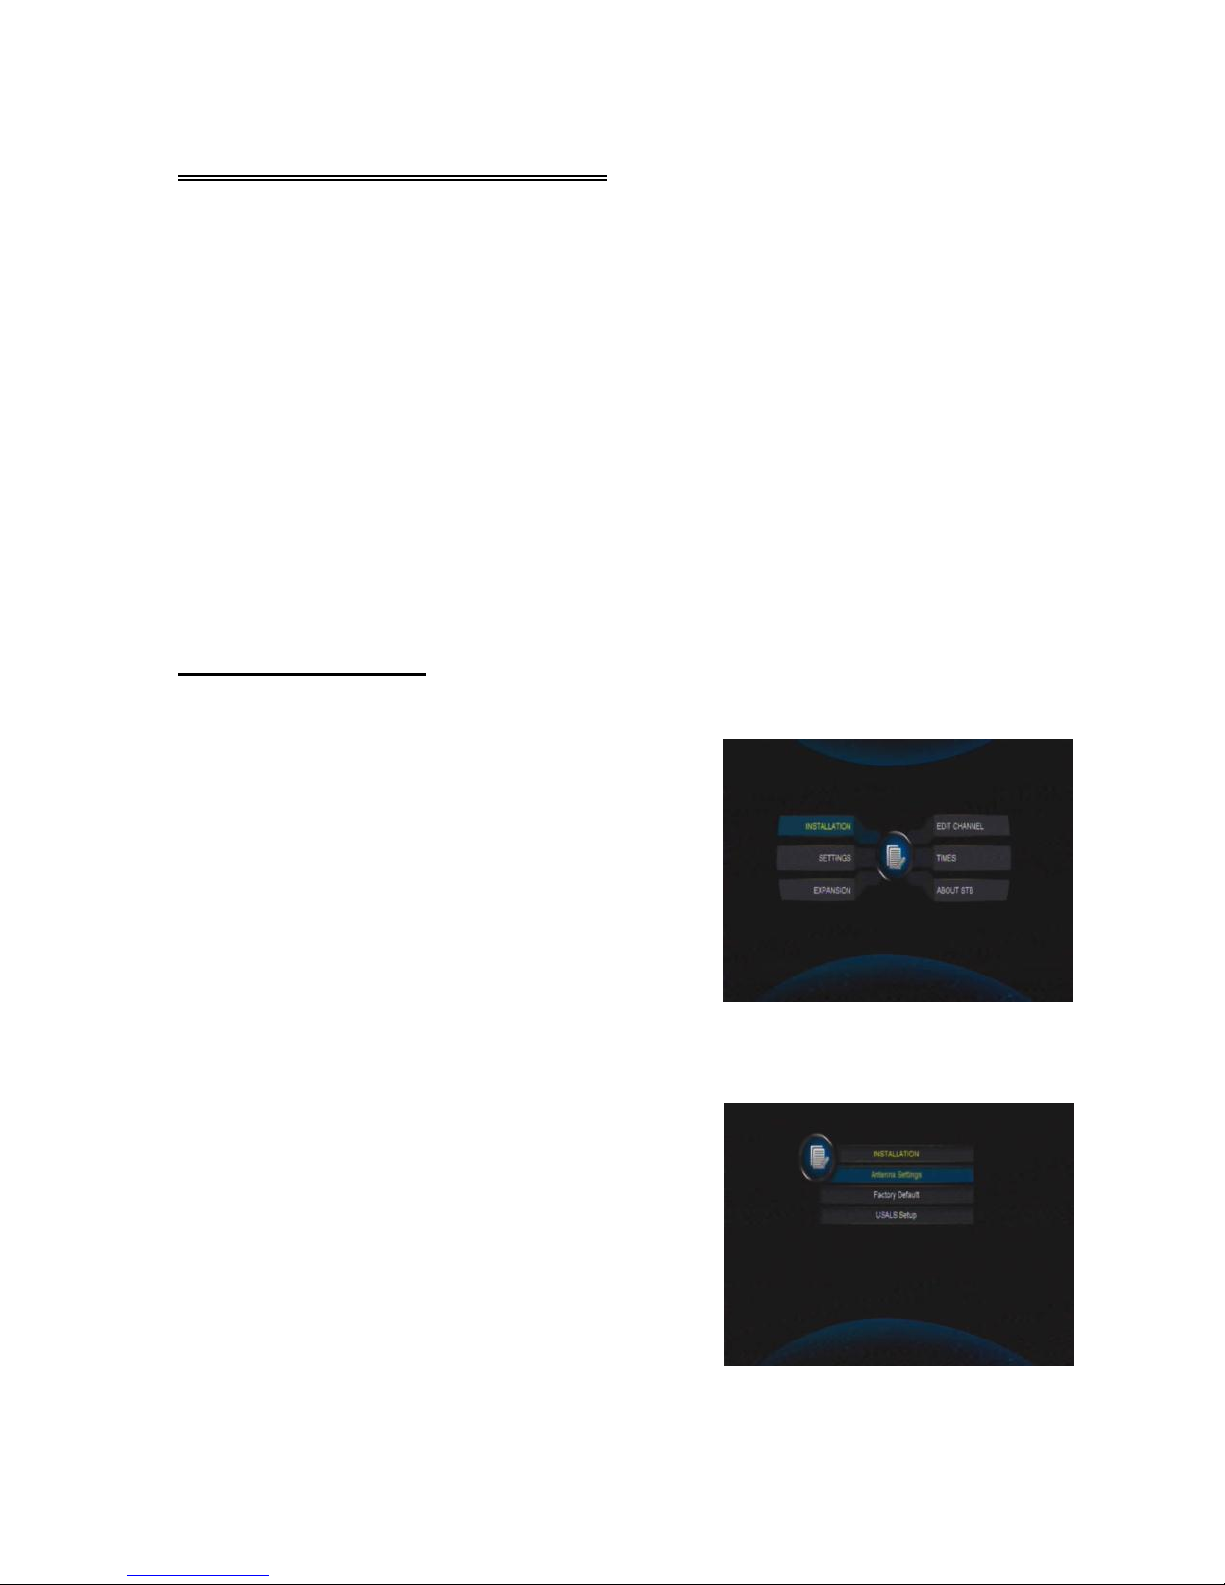
4.1 INSTALLATION
Select Installation, the picture will be displayed
like this, here you can do Dish setup, Restore
Factory Default, Software Update, Save or Load
STB data
Antenna Settings
Press OK to Enter Dish setup, here you can make Satellite Scan, Satellite Edit, TP
Search, TP Edit and other related Functions.
A: Satellite List
This window shows the pre-stored satellite list, in
this menu, you can Add, Edit, Delete, Satellites.
Add
Indice


