Velleman CAMCOLVC20 Manuale utente

CAMCOLVC20
FULL HD CAR CAPTURE
COLOUR CAMERA
FULL HD
-
KLEURENCAMERA VOOR G
EBRUIK IN DE AUTO
CAMÉRA COULEUR FULL
HD POUR VOITURE
CÁMARA FULL HD A COL
OR PARA USO EN EL CO
CHE
FULL HD
-
FARBKAMERA FÜR GEBRA
UCH IM
AUTO
CÂMARA HD A CORES PA
RA USAR NO AUTOMÓVEL
KOLOROWA KAMERA SAMO
CHODOWA FULL HD
USER MANUAL
3
GEBRUIKERSHANDLEIDING 13
MODE D'EMPLOI 24
MANUAL DEL USUARIO 34
BEDIENUNGSANLEITUNG 45
MANUAL DO UTILIZADOR 56
INSTRUKCJA OBSŁUGI 67

CAMCOLVC20
V 01 – 09/10/2014 2 ©Velleman nv

CAMCOLVC20
V 01 – 09/10/2014 3 ©Velleman nv
USER MANUAL
1 Introduction
To all residents of the European Union
Important environmental information about this product
This symbol on the device or the package indicates that disposal of
the device after its lifecycle could harm the environment Do not
dispose of the unit (or batteries) as unsorted municipal waste; it
should be taken to a specialized company for recycling This device
should be returned to your distributor or to a local recycling
service Respect the local environmental rules
If in doubt, contact your local waste disposal authorities
Thank you for choosing Velleman! Please read the manual thoroughly before
bringing this device into service If the device was damaged in transit, don't
install or use it and contact your dealer
Package contents
•camera
•HDMI cable
•USB cable
•car plug cable
•window bracket
2 Safety Instructions
Keep the device away from children and unauthorised users
Mount the device in such a way that it does not distract the driver
3 General Guidelines
Refer to the Velleman® Service and Quality Warranty on the last pages
of this manual
Indoor use only Keep this device away from rain, moisture,
splashing and dripping liquids Never put objects filled with liquid
on top
Keep this device away from dust and extreme temperatures
Protect this device from shocks and abuse Avoid brute force
when operating the device

CAMCOLVC20
V 01 – 09/10/2014 4 ©Velleman nv
•Familiarise yourself with the functions of the device before actually
using it
•All modifications of the device are forbidden for safety reasons Damage
caused by user modifications to the device is not covered by the
warranty
•Only use the device for its intended purpose Using the device in an
unauthorised way will void the warranty
•Damage caused by disregard of certain guidelines in this manual is not
covered by the warranty and the dealer will not accept responsibility for
any ensuing defects or problems
•There are no user-serviceable parts inside the device Refer to an
authorized dealer for service and/or spare parts
•DO NOT use this product to violate privacy laws or perform other illegal
activities
4 Features
•portable camera with vacuum cup bracket
•the video capture camera records images on micro-SD card (not
included)
•records full HD video
•built-in microphone
•auto-record function when the device detects power on the car plug
•user-friendly setup via push buttons
•2 7" TFT colour screen
•G-sensor function
5 Overview
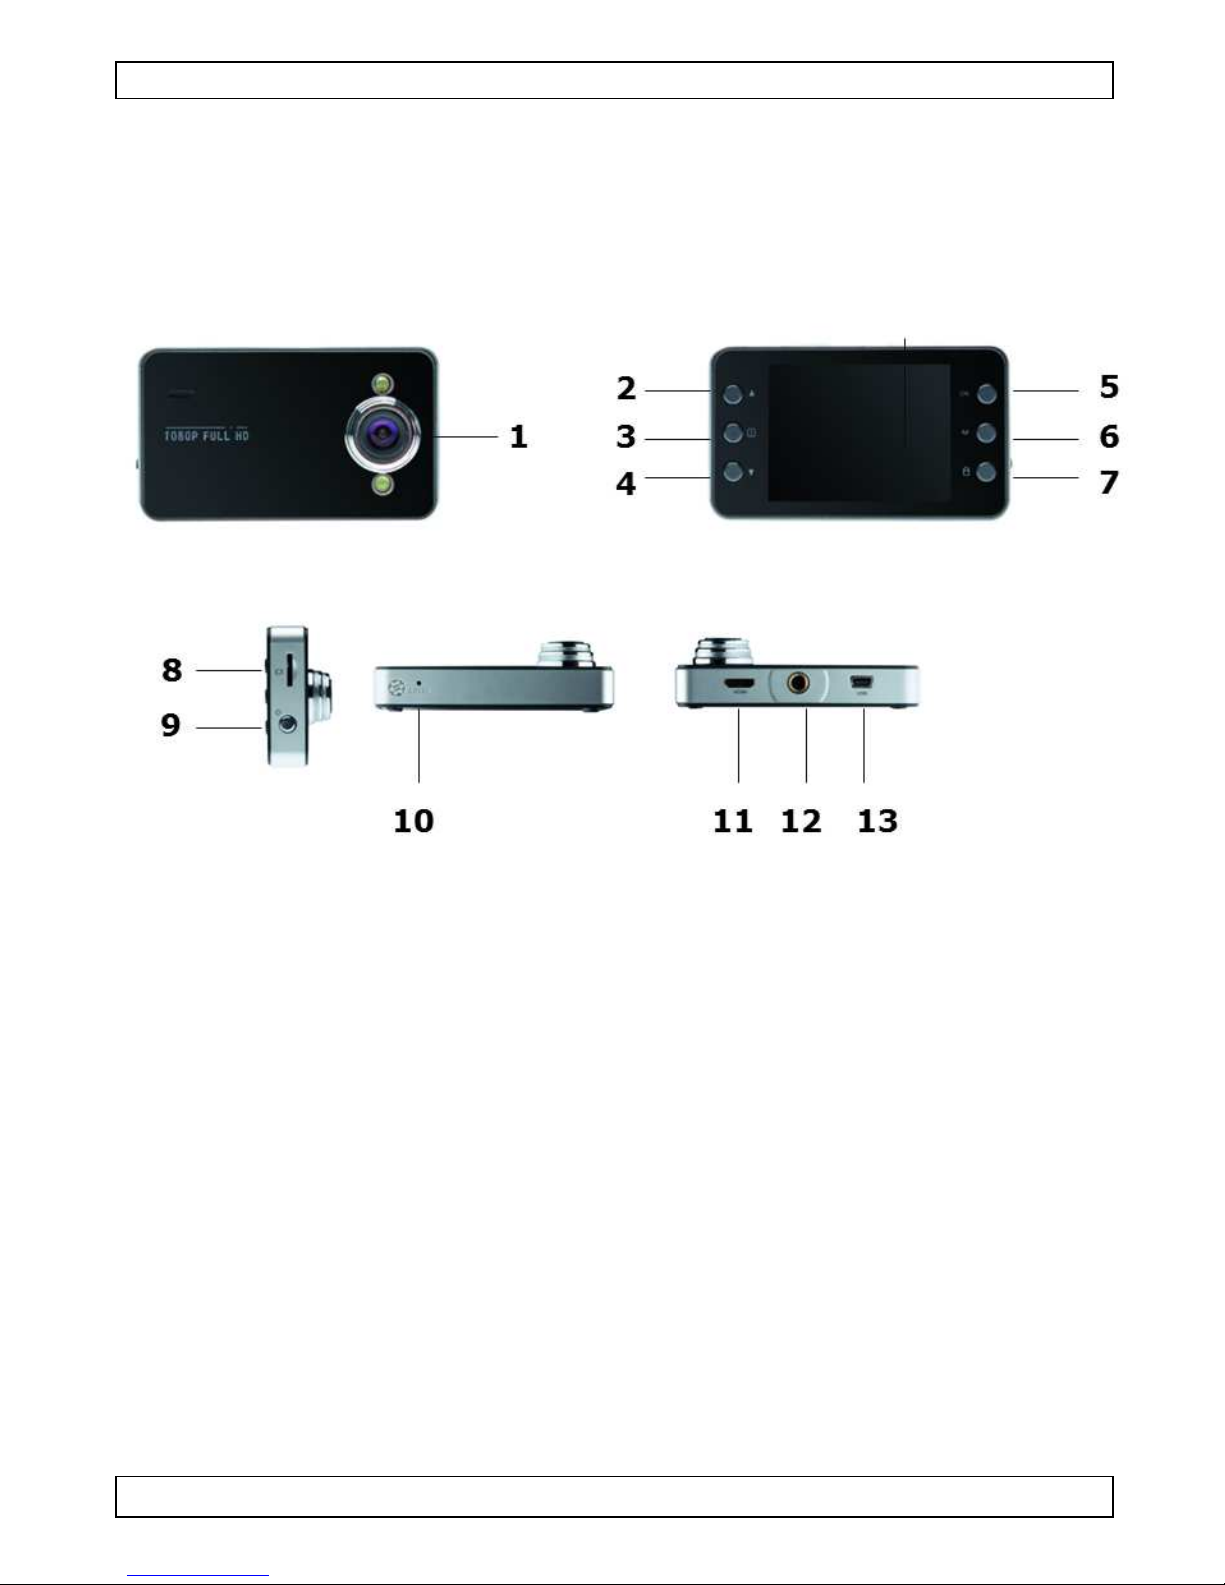
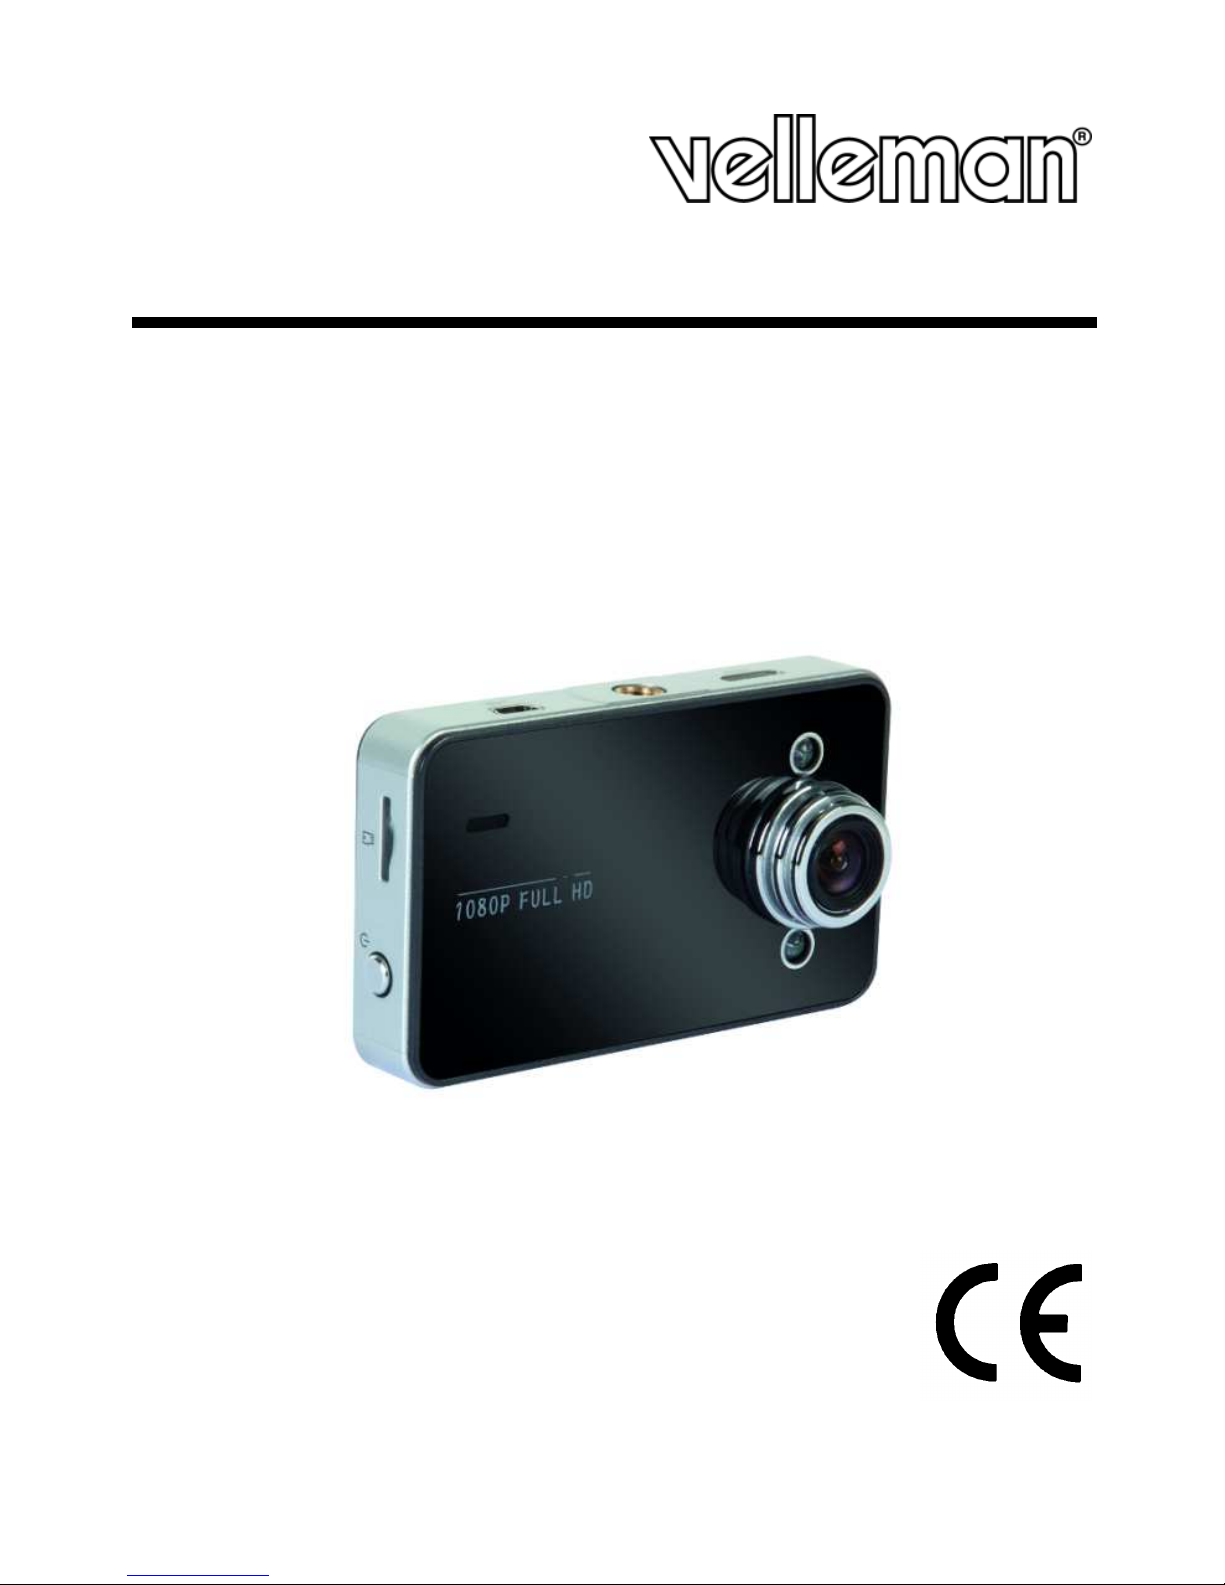
Refer to the illustrations on page 2 of this manual
1 lens 8 SD card slot
2 up button 9 on/off button
3 menu button 10 reset button
4 down button 11 HDMI output
5 OK button 12 bracket mounting hole
6 mode selection button 13 USB port
7 lock video button
6 Getting started
Inserting an SD card
The camera cannot record video or take pictures without an SD card inside
Insert an SD card before using the camera

CAMCOLVC20
V 01 – 09/10/2014 5 ©Velleman nv
First use
•Press the on/off button on the side of the camera to turn it on
The blue indicator will light up
By default, the camera starts in video mode For details about modes,
see section Camera modes below
•To turn the camera off, press and hold the on/off button
Setting the time
1 Press the Menu button twice
2 Use the down arrow to go to Set Date/Time and press the button OK
3 Use the up and down buttons to set the date and time and press OK
You need to press the button OK to confirm each setting
4 You can also set the date format (for example YY/MM/DD or
DD/MM/YY)
5 Press the button OK to confirm
6 Press the Menu button to quit the menu
7 Operation
7 1 Camera modes
The camera has 3 modes: video, picture and playback
To switch between modes, press the button M on the back of the camera
7 2 Recording video
1 With the camera on, press the button M to set it to video mode
(a video icon appears in the top left corner of the display)
2 You can zoom in or out with the up and down buttons
3 To start recording, press the button OK
4 To stop recording, press the button OK again
oThe camera saves the video
oTo view a video, see section Viewing video or pictures below
Note - Locking a video
•You can lock a video to prevent it from being deleted
•To do so, while the camera is recording, press the button Lock video
•For details, see section Locking video below
7 3 Taking a picture
1 With the camera on, press the button M to set it to picture mode
(a camera icon appears in the top left corner of the display)
2 You can zoom in or out with the up and down buttons
3 To take a picture, press the button OK

CAMCOLVC20
V 01 – 09/10/2014 6 ©Velleman nv
oThe camera saves the picture
oTo view a picture, see section Viewing video or pictures below
7 4 Viewing video or pictures
1 With the camera on, press the button M to set it to playback mode
oThe file type icon appears in the top left corner of the display
oThe display shows the most recent video or picture
2 Use the up and down buttons to select the file you want to view
3 For video, press the button OK to play and pause the video
Note - Viewing files on your computer
You can also view video or pictures from your computer For details, see
section File management on your computer below
8 File management on the camera
On the camera, you can
•delete files
•lock and unlock files
(for example to protect them from accidental deletion)
8 1 Deleting files
You can delete a specific file or all files at once
1 Press the button M to set the camera to playback mode
oThe file type icon appears in the top left corner of the display
oThe display shows the most recent video or picture
2 Press the Menu button , select Delete and press OK
3 Select the option you want (Delete Current or Delete All) and press
OK
4 Select OK and press the button OK to confirm
5 The camera will delete the file or files (except protected files, see next
section)
8 2 Locking and unlocking files
•To prevent a file from being accidentally deleted, you can lock it
•When in playback mode, the display will show a key icon for a locked
file
•A locked file cannot be deleted unless you unlock it first
Locking pictures
Pictures can be locked by using the Protect function in the camera menu

CAMCOLVC20
V 01 – 09/10/2014 7 ©Velleman nv
You can lock or unlock a specific file or all files at once
1 Press the button M to set the camera to playback mode
oThe file type icon appears in the top left corner of the display
oThe display shows the most recent video or picture
2 Select the option you want (Lock Current - Unlock Current - Lock All -
Unlock All) and press OK
3 Select OK and press the button OK to confirm
Locking video
You can lock a video directly while recording, as follows:
1 While the camera is recording, press the button Lock video
2 When you stop recording, the camera will save the video as a
protected file
You can also lock a video through the Protect function in the camera menu
(see section Locking pictures above to see how)
9 File management on your computer
While the camera is connected to your computer with the USB cable, you
can view and manage files from your computer
9 1 Connect the camera to your computer
1 Use the included USB cable to connect the camera to your computer
2 Select Mass Storage and press the button OK
3 On first use, your computer will install the appropriate drivers
4 You can now access the video and pictures on the SD card through
your computer’s file management system
5 All video and pictures are in the folder \DCIM on the SD card
Note: you cannot use the camera functions while the camera is connected to
your computer
9 2 View files
You can view video or pictures as any other media file on your computer
9 3 Delete files
•You can delete files directly from the SD card

CAMCOLVC20
V 01 – 09/10/2014 8 ©Velleman nv
•The lock function (see section Locking and unlocking files above)
does not apply when you are accessing the SD card from your
computer
9 4 Safely remove the camera from your computer
Windows®
When finished, it is recommended to safely remove the camera:
1 Click the icon Safely Remove Hardware in the notification area at
the right of the taskbar and click the device that you want to remove
Windows will display a notification telling you it's safe to remove the
device
2 Unplug the device from the USB port
Mac OS®
1 In the Finder, click the Eject icon next to the device
2 Unplug the device from the USB port
10 Using the camera as a webcam
You can use the camera as a webcam, as follows:
1 Use the included USB cable to connect the camera to your computer
2 Select PC Camera and press the button OK
3 On first use, your computer will install the appropriate drivers
4 You can now use the camera as a webcam, for example together with
the chat software on your computer
11 Camera options
•The camera has menus that contain options for the various modes
(video – picture - playback)
•The contents of the menus varies depending on the mode the camera is
in
•To access the menu for a mode, you need to set the camera in that
mode first
•Apart from these menus, there is a generic Setup menu that can be
accessed from every camera mode
Accessing a menu
1 Press the button M to set the camera mode (video – picture -
playback)

CAMCOLVC20
V 01 – 09/10/2014 9 ©Velleman nv
2 Press the Menu button to open the menu
Selecting a menu item
1 Use the up and down arrows to browse through the menu items
2 Press the button OK to open a menu item
3 Use the up and down arrows to set an option
4 Press the button OK to confirm
5 Press the Menu button to quit the menu
Video mode - menu options
To open the video options, set the camera in video mode and press the
Menu button The menu options are:
Menu item Function
Resolution sets the video resolution (from 1080 full HD to WVGA)
Loop Recording sets the time after which the camera will start
recording a new file
EV sets the exposure compensation
Motion
Detection turns motion detection on or off;
with motion detection turned on, the camera will start
recording as soon as it detects movement
Audio turns audio recording on or off
Date Stamp turns the timestamp function on or off;
with the function turned off, the timestamp will not be
displayed on the video or picture
Gsensor sets or turns off the acceleration from which Gsensor
function starts working (2g – 4g - 8g or off) With this
option set, the camera will save the video as a
protected file
Buttons sound turns button sound on or off
Camera mode – menu options
To open the picture options, set the camera in camera mode and press the
Menu button The menu options are:
Menu item Function
Timer Sets the delay after which the camera will take a
picture (single = no delay, timers of 2, 5 or 10
seconds)
Resolution Sets the image resolution (from 5 to 12 megapixel)
Sequence Sets the number of pictures the camera takes with
one push of the OK button (1 or 2 pictures)
Quality sets image quality (fine – normal – economy)

CAMCOLVC20
V 01 – 09/10/2014 10 ©Velleman nv
Sharpness sets image quality (strong – normal – soft)
White Balance sets white balance (auto – daylight – cloudy –
tungsten – fluorescent)
Color sets image colour (normal – black and white – sepia)
ISO sets ISO sensitivity (auto – 100 – 200 – 400)
EV sets the exposure compensation ( from -1/3 to +2/3)
Anti-Shaking turns image stabilisation on or off
Quick Review turns image preview on or off
Generic setup menu
To open the generic setup menu, press twice on the Menu button The
menu options are:
Menu item Function
Set Date/Time sets the date and time
Auto Power Off sets the auto power off function:
off – 1 minute - 3 minutes
Language sets the language
Light Frequency sets the light frequency to avoid
flickering when recording video
Screen Saver sets the screen saver
(off – 3, 5 or 10 minutes)
Image Rotation rotates the image display
Format formats the SD card
Default Setting resets all settings to factory default
Firmware version displays the firmware version
12 Battery
The battery indicator turns red when battery power is low
Charging the device
You can charge the camera:
•by connecting it to your computer through the included USB cable;
•by connecting it to your car’s charger through the included car plug
cable
When charging, the red indicator will be lit while charging and will turn off
when the camera is fully charged
Altri manuali per CAMCOLVC20
1
Indice
Lingue:
Altri manuali Velleman Telecamera da cruscotto