e Earthlight™ should now be illuminated in wet, microbially active soil.
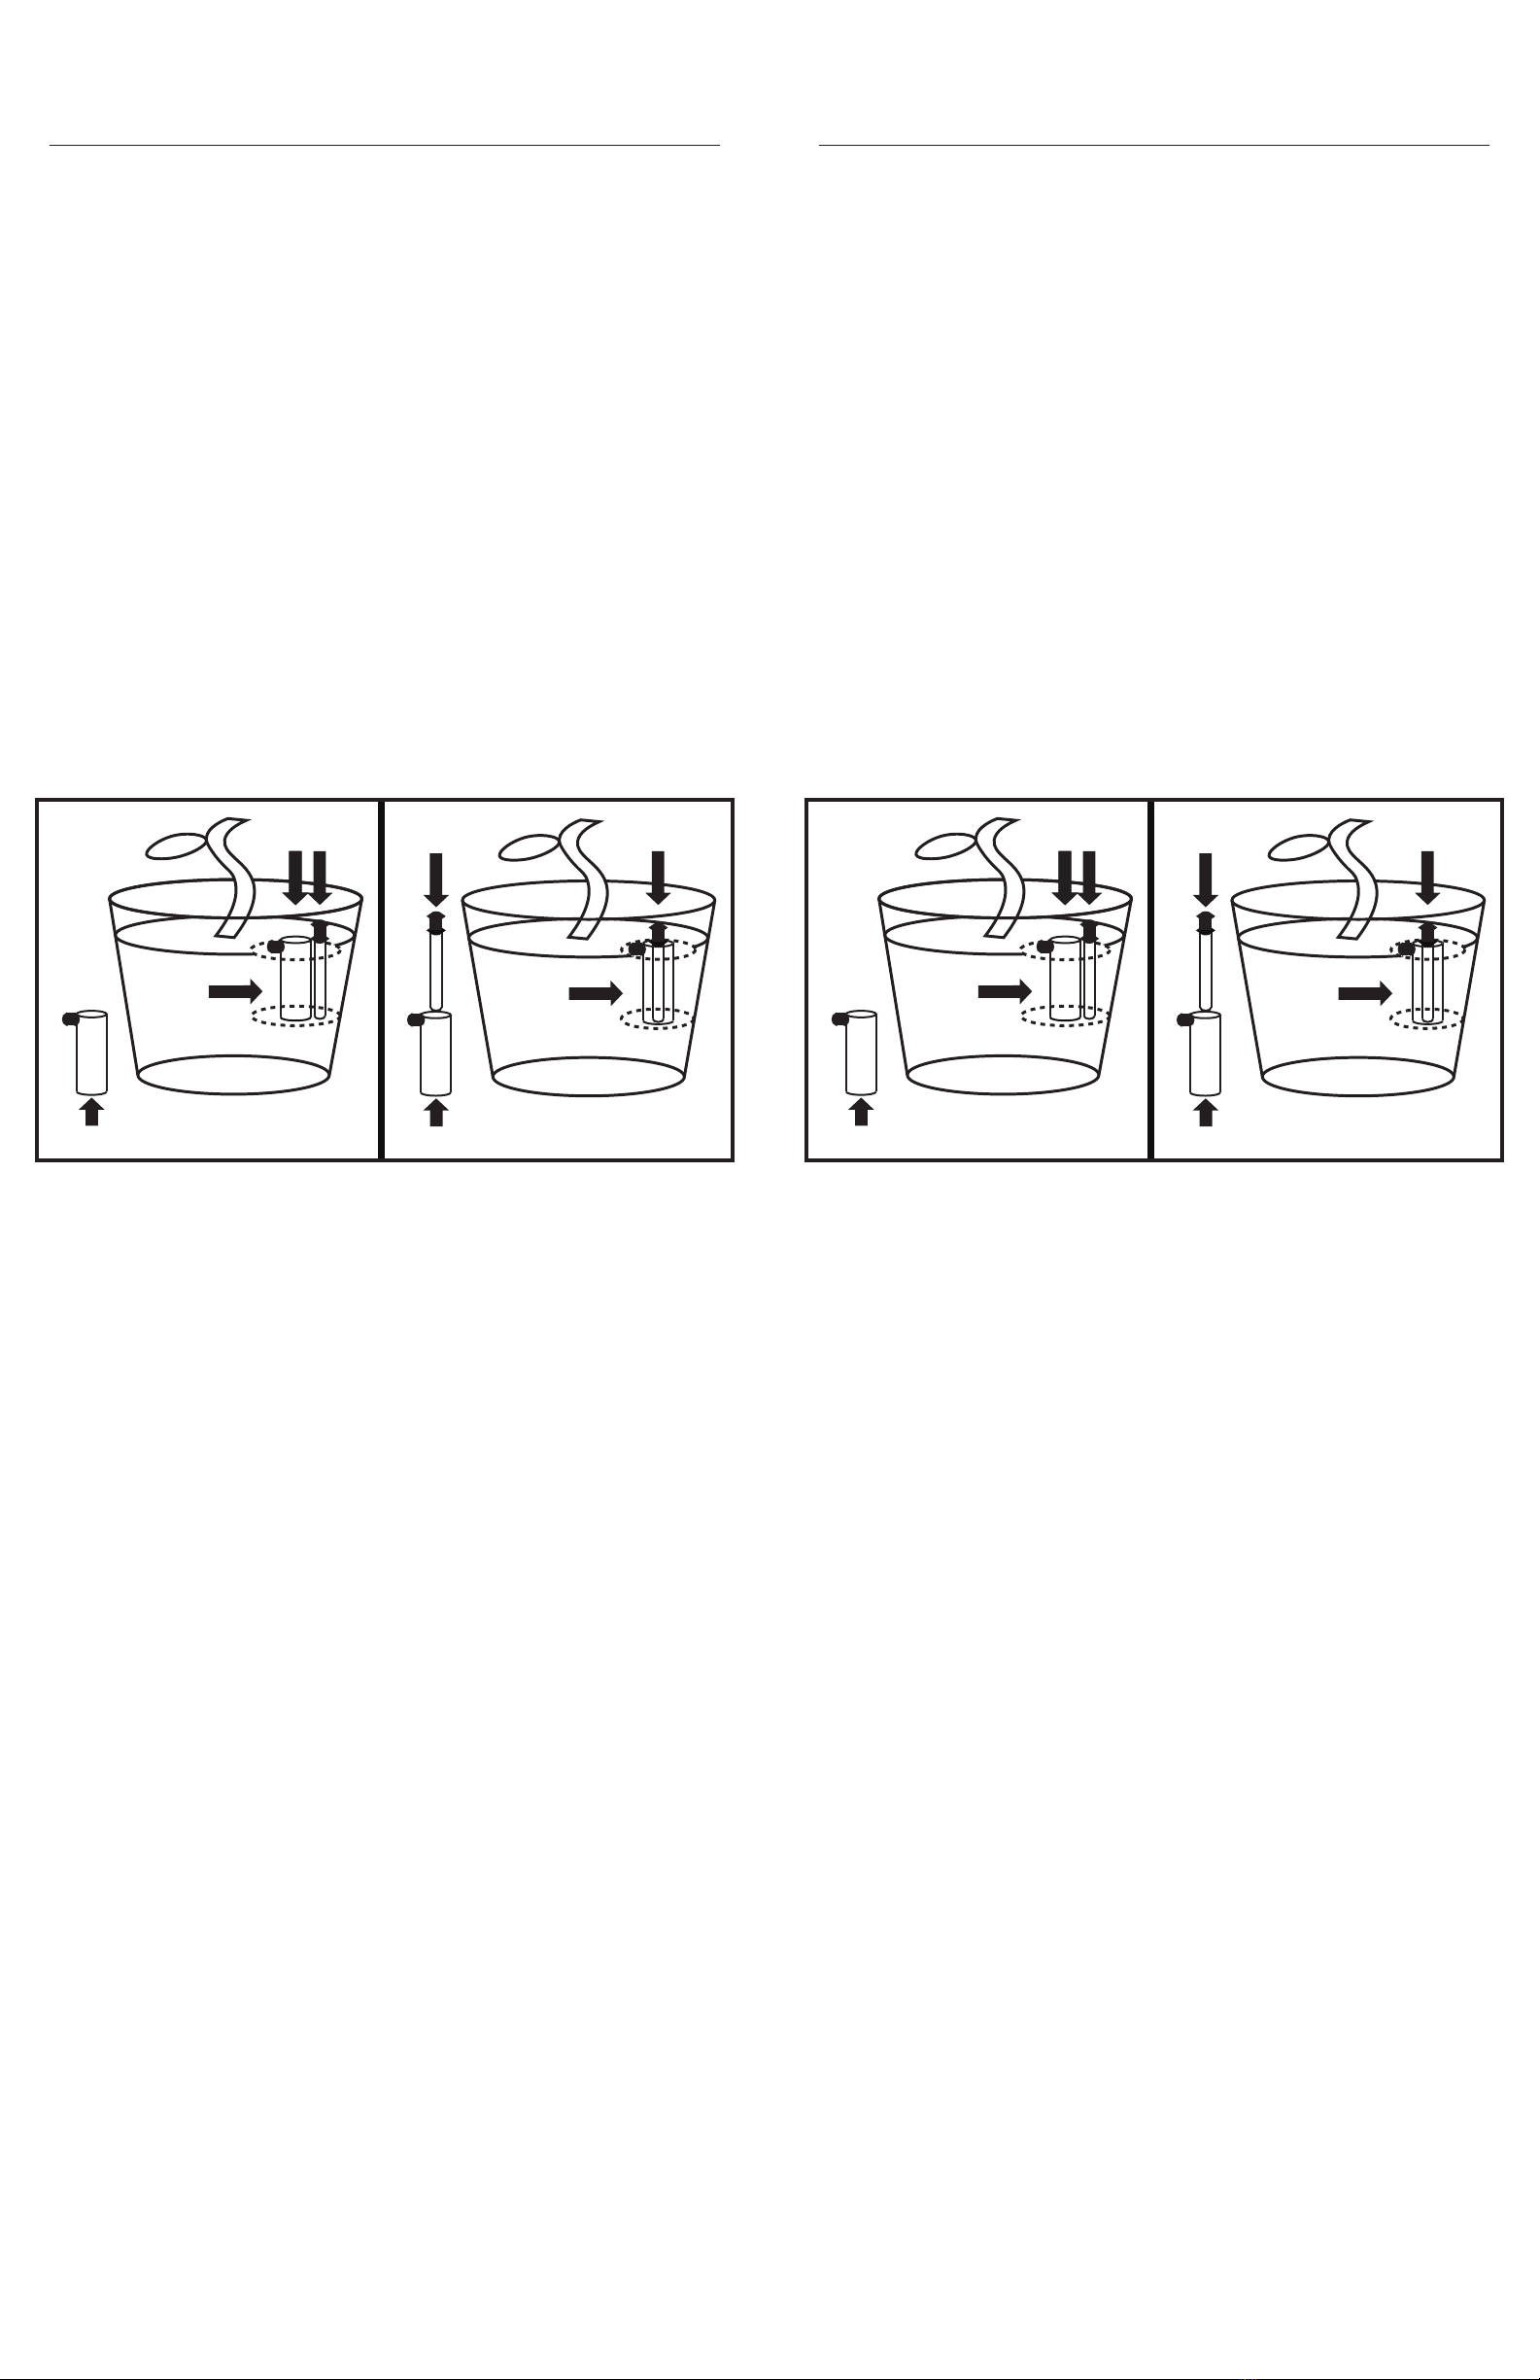
Anywhere in the soil, dig a small hole with your nger about the depth and width of of the
cylinder.
Insert the soil-lled copper cylinder and rod combo into the hole with the plastic cap
facing upward and the top ush with the top of the soil. Compact the soil directly around
the cylinder if it is loose. e cylinder should sit in the soil snugly.
Insert the plastic stake so that the housing is visible and angle the LED as desired.
Add Amendments, then water and watch the green LED. Make sure to wet the entire soil
area evenly, including the area of the copper cylinder and metal rod combo. Make sure
that the rod is not contacting the copper cylinder. A lit LED means microbially active soil.
e Earthlight™ can be used out in the eld to test various soil samples for quality/mi-
crobial activity. Use the above method but do not install into the soil. Wet if necessary. It
can be used as a standalone test cell for short periods of time. Do not leave unknown soils
in this conguration as it may damage the rod.
For easy transportation, slide the cylinder over the stake and insert the rod into the bot-
tom between the cylinder and the stake. e rod and cylinder will now stay in position.
USING THE EARTHLIGHT™
Once the device is setup and installed properly and the soil is watered as normal for your
plant, the bright green LED of the Earthlight™ will gradually start to dim as your soil dries
and turn o when the top 2.5” of your soil has dried completely. An o LED indicates that
it is time to water your plant again. A dimmed LED can also indicate cold temperature
which is temporarily slowing the microbial activity of your soil or a larger microbial de-
cit in your soil. Wait until the soil is at room temperature before reading.
Repeat and water each time the LED turns o. Not all plants require the same watering.
Reduce LED brightness by pulling the rod out of the soil slightly until the desired bright-
ness is reached.
For rooms that need to stay dark at night like bedrooms, use ‘so glow mode’ at night-time.
Remove the rod, take o the plastic cap and place it over the rounded LED housing. Re-
turn the rod to the soil and the plastic cap to its position before watering again.
AMENDMENTS
In order for e Earthlight™ to function, benecial microbes must be present in the soil.
Certain microbes known as “exoelectrogens” will actually emit small amounts of electricity
and are almost always present in a healthy soil biome. Selected amendments contain these
microbes as well as many others which will greatly benet your plant.
Many amendments are possible such as compost teas and homemade bokashi, but we
have selected the following which can be bought at any plant supply or garden store and
are recommended in most soils to maintain a healthy biome. If your Earthlight™ does not
work due to soil quality, amending the soil and using the Earthlight™ as a tool to monitor
the soil will have a lasting positive impact on your plant. Try one or all 3 chosen amend-
ments. e blood meal only enhances the other two amendments and cannot be used alone:
Mycorrhizae: Provides abundance of healthy microbes.
Biochar: Provides abundance of healthy microbes and carbon which helps soil
conductivity.
Blood Meal: Provides iron which helps soil conductivity.
Please follow manufacturer instructions individually for each amendment.
MAINTENANCE AND CONSIDERATIONS
Upkeep and rod replacement is key to long-term operation. Please uninstall and clean o
your rod every 2-3 months or when the device accuracy declines. You may use the edge
of the cylinder, a le or steel wool to scrape the magnesium oxide o. Make sure the rod
is moist when cleaning to avoid airborne dust. Replace the rod aer 3-4 months or when
the device funtion is impaired. Please uninstall and scrub any residue from your copper
cylinder with steel wool or a wire brush inside and out every 2-3 months while wet as well.
New rods can be purchased at your local retailer or eohm.io/shop.
*Use code “EARTH25” for 25% o on your rst 3-pack of rods.
e Earthlight™ puts out very small amounts of magnesium oxide over a long period of
time. is form is commonly found in widely available fertilizers and magnesium is a
vital nutrient for photosynthesis to occur. If your plant is very sensitive to magnesium, or
a noticable yellowing of leaves occurs, discontinue use.
e housing of the device is water-resistant but not waterproof. Please don’t submerge.
If the device ceases to work, check the soil compactness between the rod and cylinder.
Make sure the area is moist. Move the rod to a new spot around the cylinder. Remove both
plastic caps and check the wire connections. Make sure that the nuts are tight. Make sure
that the screws in both the rod and cylinder are tight as well. Return both plastic caps to
their positions. Double check your amendments. If the device still will not work, send an
email
with
the
sub
je
ct
“
replacement
”
to
inf[email protected] to start a replacement or “return” to start a return. You may also call (541) 841-9455 for technical or installation support.
Enjoy your Earthlight™ and let it bring health
and happiness to your plant.
Scan the QR code for additional resources,
tips and videos on our website, eohm.io.
Rev. 12/21
e Earthlight™ should now be illuminated in wet, microbially active soil.
Anywhere in the soil, dig a small hole with your nger about the depth and width of of the
cylinder.
Insert the soil-lled copper cylinder and rod combo into the hole with the plastic cap
facing upward and the top ush with the top of the soil. Compact the soil directly around
the cylinder if it is loose. e cylinder should sit in the soil snugly.
Insert the plastic stake so that the housing is visible and angle the LED as desired.
Add Amendments, then water and watch the green LED. Make sure to wet the entire soil
area evenly, including the area of the copper cylinder and metal rod combo. Make sure
that the rod is not contacting the copper cylinder. A lit LED means microbially active soil.
e Earthlight™ can be used out in the eld to test various soil samples for quality/mi-
crobial activity. Use the above method but do not install into the soil. Wet if necessary. It
can be used as a standalone test cell for short periods of time. Do not leave unknown soils
in this conguration as it may damage the rod.
For easy transportation, slide the cylinder over the stake and insert the rod into the bot-
tom between the cylinder and the stake. e rod and cylinder will now stay in position.
USING THE EARTHLIGHT™
Once the device is setup and installed properly and the soil is watered as normal for your
plant, the bright green LED of the Earthlight™ will gradually start to dim as your soil dries
and turn o when the top 2.5” of your soil has dried completely. An o LED indicates that
it is time to water your plant again. A dimmed LED can also indicate cold temperature
which is temporarily slowing the microbial activity of your soil or a larger microbial de-
cit in your soil. Wait until the soil is at room temperature before reading.
Repeat and water each time the LED turns o. Not all plants require the same watering.
Reduce LED brightness by pulling the rod out of the soil slightly until the desired bright-
ness is reached.
For rooms that need to stay dark at night like bedrooms, use ‘so glow mode’ at night-time.
Remove the rod, take o the plastic cap and place it over the rounded LED housing. Re-
turn the rod to the soil and the plastic cap to its position before watering again.
AMENDMENTS
In order for e Earthlight™ to function, benecial microbes must be present in the soil.
Certain microbes known as “exoelectrogens” will actually emit small amounts of electricity
and are almost always present in a healthy soil biome. Selected amendments contain these
microbes as well as many others which will greatly benet your plant.
Many amendments are possible such as compost teas and homemade bokashi, but we
have selected the following which can be bought at any plant supply or garden store and
are recommended in most soils to maintain a healthy biome. If your Earthlight™ does not
work due to soil quality, amending the soil and using the Earthlight™ as a tool to monitor
the soil will have a lasting positive impact on your plant. Try one or all 3 chosen amend-
ments. e blood meal only enhances the other two amendments and cannot be used alone:
Mycorrhizae: Provides abundance of healthy microbes.
Biochar: Provides abundance of healthy microbes and carbon which helps soil
conductivity.
Blood Meal: Provides iron which helps soil conductivity.
Please follow manufacturer instructions individually for each amendment.
MAINTENANCE AND CONSIDERATIONS
Upkeep and rod replacement is key to long-term operation. Please uninstall and clean o
your rod every 2-3 months or when the device accuracy declines. You may use the edge
of the cylinder, a le or steel wool to scrape the magnesium oxide o. Make sure the rod
is moist when cleaning to avoid airborne dust. Replace the rod aer 3-4 months or when
the device funtion is impaired. Please uninstall and scrub any residue from your copper
cylinder with steel wool or a wire brush inside and out every 2-3 months while wet as well.
New rods can be purchased at your local retailer or eohm.io/shop.
*Use code “EARTH25” for 25% o on your rst 3-pack of rods.
e Earthlight™ puts out very small amounts of magnesium oxide over a long period of
time. is form is commonly found in widely available fertilizers and magnesium is a
vital nutrient for photosynthesis to occur. If your plant is very sensitive to magnesium, or
a noticable yellowing of leaves occurs, discontinue use.
e housing of the device is water-resistant but not waterproof. Please don’t submerge.
If the device ceases to work, check the soil compactness between the rod and cylinder.
Make sure the area is moist. Move the rod to a new spot around the cylinder. Remove both
plastic caps and check the wire connections. Make sure that the nuts are tight. Make sure
that the screws in both the rod and cylinder are tight as well. Return both plastic caps to
their positions. Double check your amendments. If the device still will not work, send an
email
with
the
sub
je
ct
“
replacement
”
to
inf[email protected] to start a replacement or “return” to start a return. You may also call (541) 841-9455 for technical or installation support.
Enjoy your Earthlight™ and let it bring health
and happiness to your plant.
Scan the QR code for additional resources,
tips and videos on our website, eohm.io.
Rev. 12/21