MERLO CDC Manuale utente
MERLO UK
CDC Quick Guide
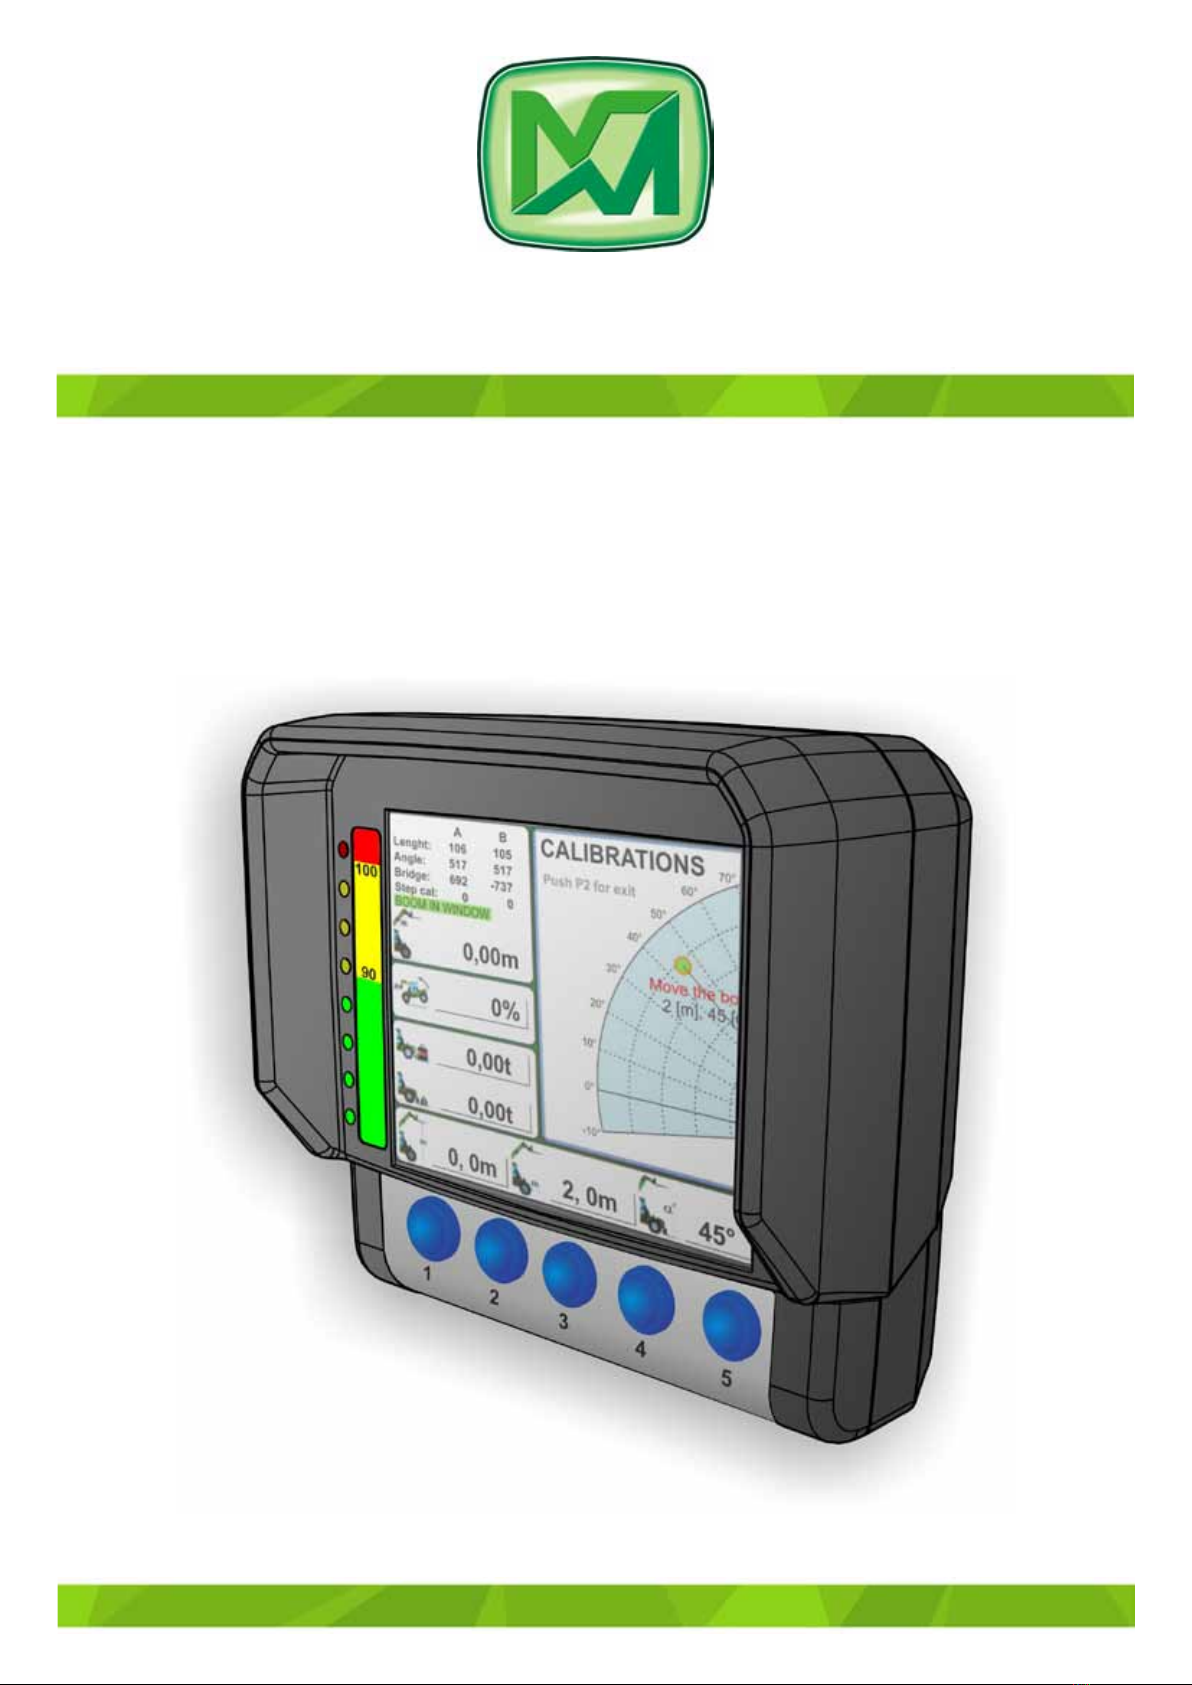
THE DYNAMIC
LOAD CONTROL SYSTEM


OPERATING INSTRUCTIONS (SW Version 2.3)
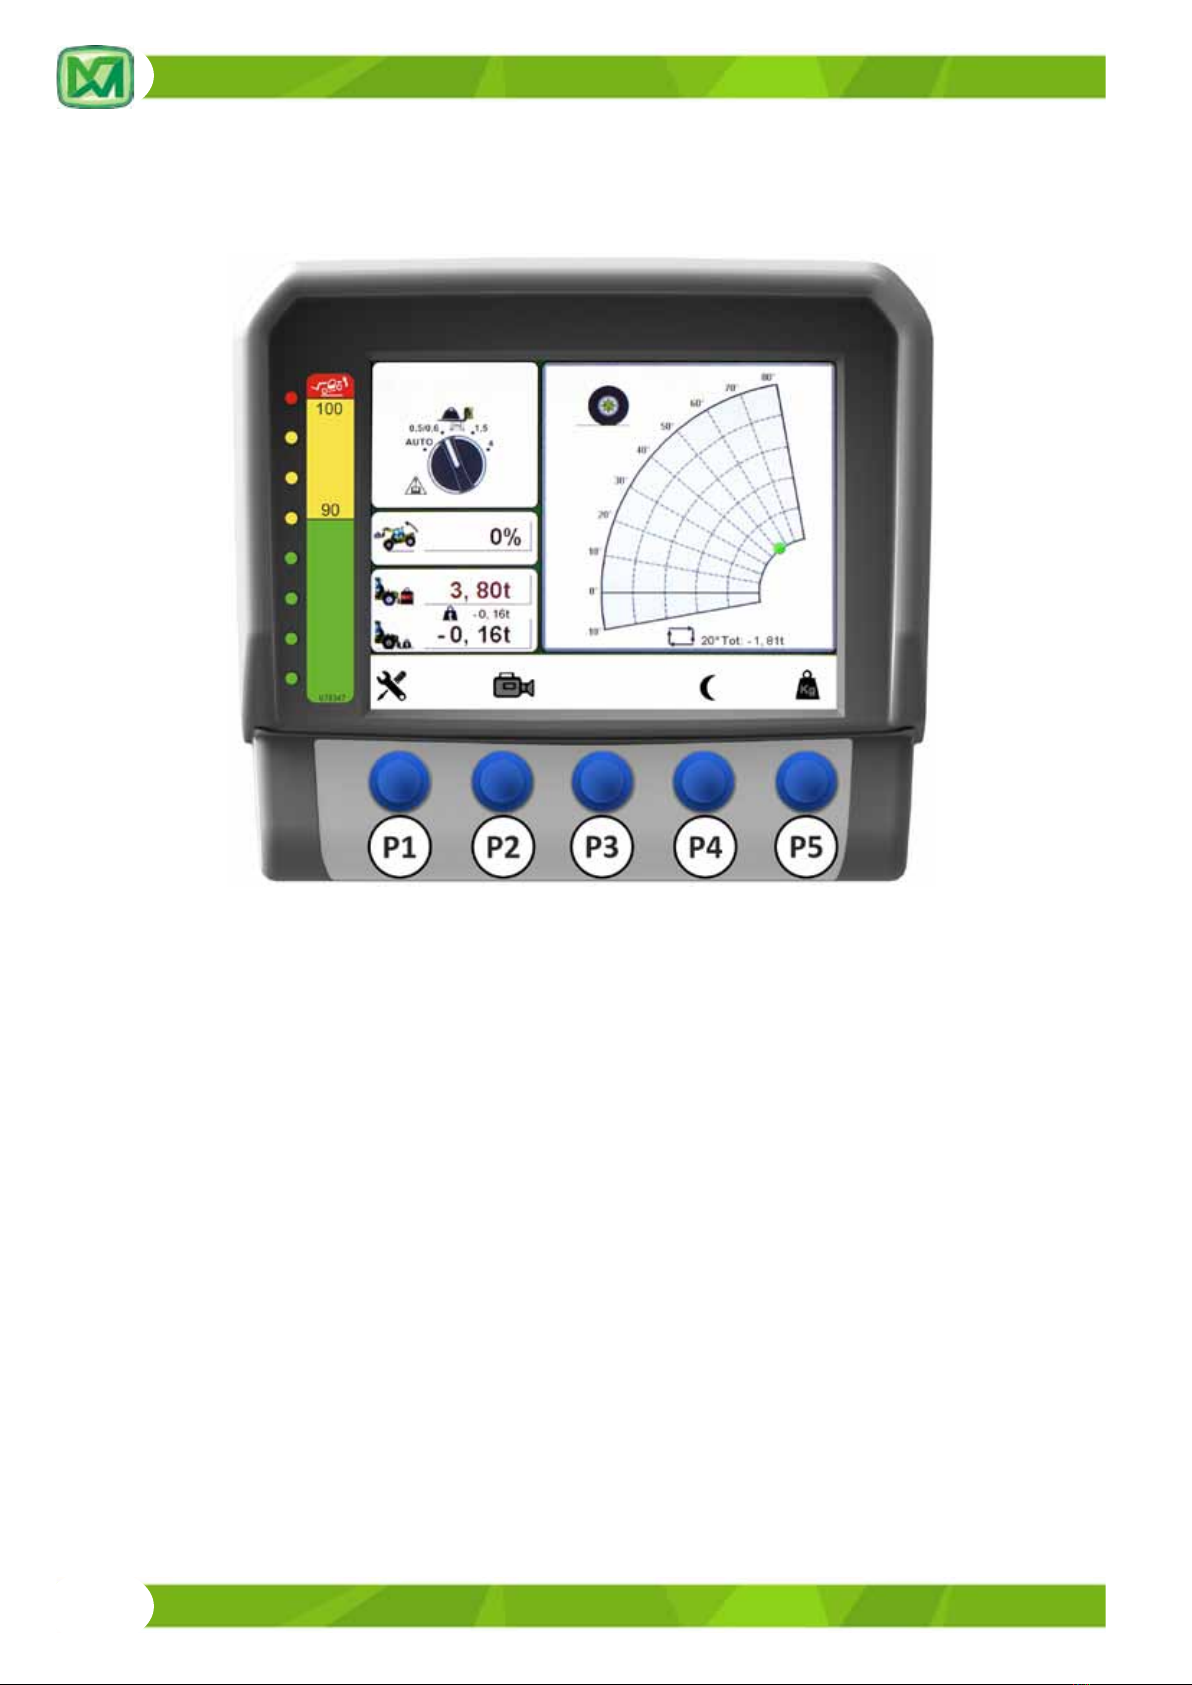
NOMENCLATURE OF DISPLAY
A] Screen
B] Graphic LED bar
C] Keyboard

OPERATING INSTRUCTIONS (SW Version 2.3)
Turn the ignion key to the ‘R’ posion.
SWITCH ON AND MAIN SCREEN
The system displays a screen with the MERLO symbol for 3 seconds and then automacally shis to the main screen.

OPERATING INSTRUCTIONS (SW Version 2.3)
The main screen shows the following informaon:
REF. DESCRIPTION
1 Longitudinal stability limit (percentage)
2Maximum load liable from the spot the telescopic boom is in (shown by the green/amber/red coloured
indicator (9) on the dynamic load chart) depending on the aachment
3Load lied from the spot the telescopic boom is in (shown by the green/amber/red coloured indicator (9) on
the dynamic load chart)
4 Load height from the ground (shown in metres)
5 Distance between the load and the outer limit of tyres shown in metres
6Telescopic boom li angle (shown in degrees)
7Symbol showing the acvaon of the working area for the operaon of the machine as either a telehandler
or a front loader
8Actual working area for the operaon of the machine as either a telehandler or a front loader
9Coloured indicator (green – amber – red) showing the posion of the load lied on the carriage
10 Dynamic load chart depending either on the aachment installed on the carriage (self-idencaon) or on
the posion of selector (D) (manual idencaon)
11 Indicaon that the machine is operang on tyres / stabilizers
12 Image of the aachment installed on the carriage, automacally idened by the system
13 Load being lied net of the tare set by the operator in the WEIGHING SCREEN
14 Informaon on the weighing: operang mode, li angle set by the operator, total weighing
15 In the MAN WEIGHING mode: manual weighing – In the AUTO WEIGHING mode: no command
OPERATING INSTRUCTIONS (SW Version 2.3)
ACTIVATION OF THE GRAPHIC BAR FOR CONTROL SELECTION
Display of the load control system is equipped with a oang bar which shows control buons P1, P2, P3, P4 and P5.
The acvaon of this oang bar depends on the weighing mode selected by the operator:
1) In the ‘AUTO WEIGHING’ mode (see paragraph ‘WEIGHING SCREEN’), when one of the 5 selecon buons (P1, P2,
P3, P4 or P5) is pressed, the system acvates the graphic bar at the boom of display where the executable func-
ons are shown. The operator has 5 seconds to press the buon corresponding to the funcon to be executed. If
no selecon buon is pressed within 5 seconds, the system deacvates the graphic bar.
2) In the 'MAN WEIGHING' mode (see paragraph 'WEIGHING SCREEN'), when one of the 4 selecon buons (P1, P2,
P3 or P4) is pressed, the system acvates the graphic bar at the boom of display where the executable funcons
are shown. The operator has 5 seconds to press the buon corresponding to the funcon to be executed. If no
selecon buon is pressed within 5 seconds, the system deacvates the graphic bar.
If buon P5 is pressed in the manual mode, it does not acvate the graphic bar but it starts a weighing procedure for
the load being lied (see paragraph 'MANUAL WEIGHING' (E)
The funcons corresponding to the selecon buons are the following:
(P1): press buon (P1) to acvate the setup menu for display, where you can adjust both display brightness in the
dayme/night illuminaon mode and the volume of the loudspeaker.
(P2): press buon (P2) to switch on the video camera installed on the machine (available as an opon). Each me
buon (P2) is pressed again, the system goes through all the video cameras available on the machine (check
whether your machine is equipped with oponal video cameras)
(P3): this buon does not acvate any funcon on the machine
(P4): press buon (P3) to acvate the dayme/night illuminaon mode for display
(P5): press buon (P5) to acvate the weighing screen (for further informaon please refer to the instrucons provi-
ded in paragraph 'WEIGHING SCREEN')

OPERATING INSTRUCTIONS (SW Version 2.3)
DISPLAY SETUP (BUTTON P1)
Carry out the following operaons to adjust the brightness
of display (both in a dayme and in a night mode) and the
volume of the loudspeaker:
- acvate the menu bar
- press buon (P1): a screen appears where you can
adjust both display brightness and volume
- press buon (P2) to select the graphic bar correspon-
ding to the seng you need to modify (in this order:
dayme brightness (A), night brightness (B), volume
(C)
- press buons (P3) and (P4) to set the desired values
for both brightness and volume (they can both be ad-
justed from a minimum of 0 to a maximum of 100)
Press buon (P1) to exit the setup screen for display.
SELECTION OF THE VIDEO CAMERA (BUTTON P2)
Carry out the following operaons to view the images from
the video cameras installed on your machine (available as
opons) on the screen of display in the cab:
- acvate the menu bar.
- press buon (P2): the system displays CHANNEL 1.
Press buon (P2) again to change over to CHANNEL 2.
- press buon (P1) to go back to the main screen.
SELECTION OF THE DAYTIME/NIGHT MODE FOR DISPLAY
ILLUMINATION (BUTTON P4)
Carry out the following operaons to select either the day-
me or the night mode for the illuminaon of display:
- acvate the menu bar
- press buon (P4) to change over from the dayme
mode to the night mode for the illuminaon of di-
splay and vice versa.
OPERATING INSTRUCTIONS (SW Version 2.3)
The system informs the operator about the selected mode by displaying either window (dayme mode) or (night
mode) in the middle of display.
dayme mode night mode
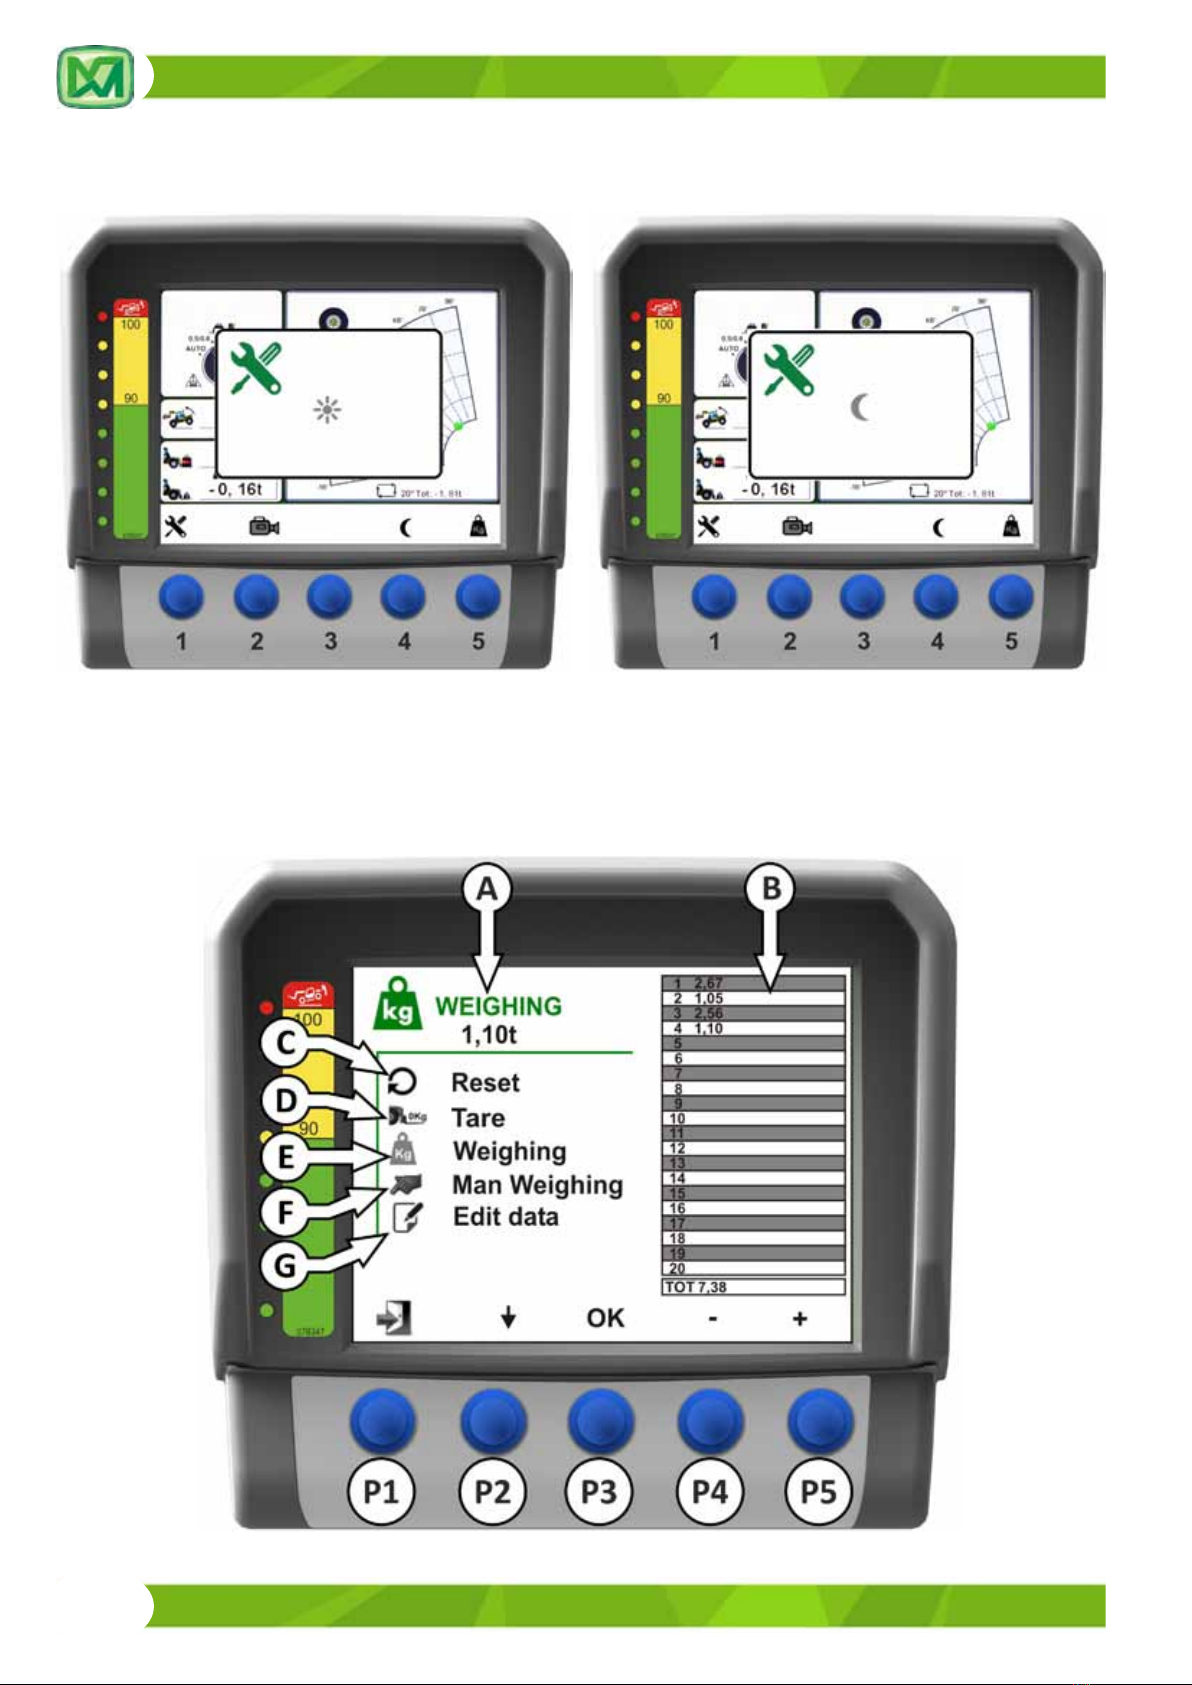
WEIGHING SCREEN (BUTTON P5)
From the main screen, acvate the menu bar, then press buon (P5) to enter the weighing screen, where the following
informaon is shown:

OPERATING INSTRUCTIONS (SW Version 2.3)
REF. DESCRIPTION
ANet weight lied by the aachment installed on the carriage (expressed in tonnes)
BTable showing the latest 20 weighings stored in the system, including the total weight
CDeleon of all weighings stored in the system. The total is set back to zero.
DAachment tare
EManual weighing
FSelecon of the weighing mode: either automac or manual
GModicaon of weighings stored in table 'B'
P1 Buon for exing the weighing screen and going back to the main screen
P2 Buon for scrolling the weighing menu
P3 Buon for conrming the item selected from the menu
P4 Buon for decreasing the angle for automac weighing
P5 Buon for increasing the angle for automac weighing
1) INSTRUCTIONS FOR WEIGHING A LOAD
In order for the weighing to be as accurate as possible, please check that the following condions are met:
1) your machine should always be placed on a at, compact surface
2) your machine should be standing sll, with its wheels aligned with the chassis
3) the telescopic boom should be fully retracted and in a horizontal posion
4) the carriage should be in a vercal posion
5) the recommended weighing mode is the manual one (MANUAL WEIGHING)
In these condions the approximate tolerance of the load readout should be about ±5% of the maximum rated load.
The value of the load being lied is to be considered a mere indicaon for the operator. It has no scal signicance and
it is not a cered weight value.
The following part of this paragraph describes the various funcons of the weighing system.

OPERATING INSTRUCTIONS (SW Version 2.3)
2) RESET (C)
The reset control allows you to delete all the weighing values stored in table 'B'. When all the paral weighing values
are deleted, the overall weighing value is set back to zero too.
To carry out the reset procedure you need to scroll the weighing screen with buon (P2) unl you select 'RESET'. Then
press (P3) to conrm.
The overall weighing value is also shown on the main screen in eld (14). When the RESET command is executed, the
value shown in eld (14) is set back to zero too.
Press buon (P1) to go back to the main screen.


