SciAps X-550 Manuale utente

QuickStart Guide
X-550 and X-505
Handheld XRF Analyzers

SciAps X-550 and X-505 QuickStart Guide
2
Contents
1. Powering up the unit................................................................................................ 3
1.1 Inserting the battery................................................................................................. 3
1.2 Turning on the unit.................................................................................................. 3
2. Logging in ............................................................................................................... 4
3. Calibrating the unit.................................................................................................. 6
4. Taking a test ........................................................................................................... 8
5. Looking at Specifications......................................................................................... 9
6. Compare results to a different grade......................................................................11
7. Taking the next test................................................................................................13
8. Information about the test.......................................................................................15
9. Exporting tests .......................................................................................................16
10. Turning off the Unit.................................................................................................19
11. How to safely use SciAps XRF instruments............................................................20
1. Powering up the unit
1.1 Inserting the battery
The X-550 is battery operated. The battery is part of the bottom of the handle.
The battery is housed in the handle and forms the bottom of the
handle.
Insert the battery into the handle, until the connectors click into
place.
The battery is directional and keyed to only go in one way, so
don’t force it.
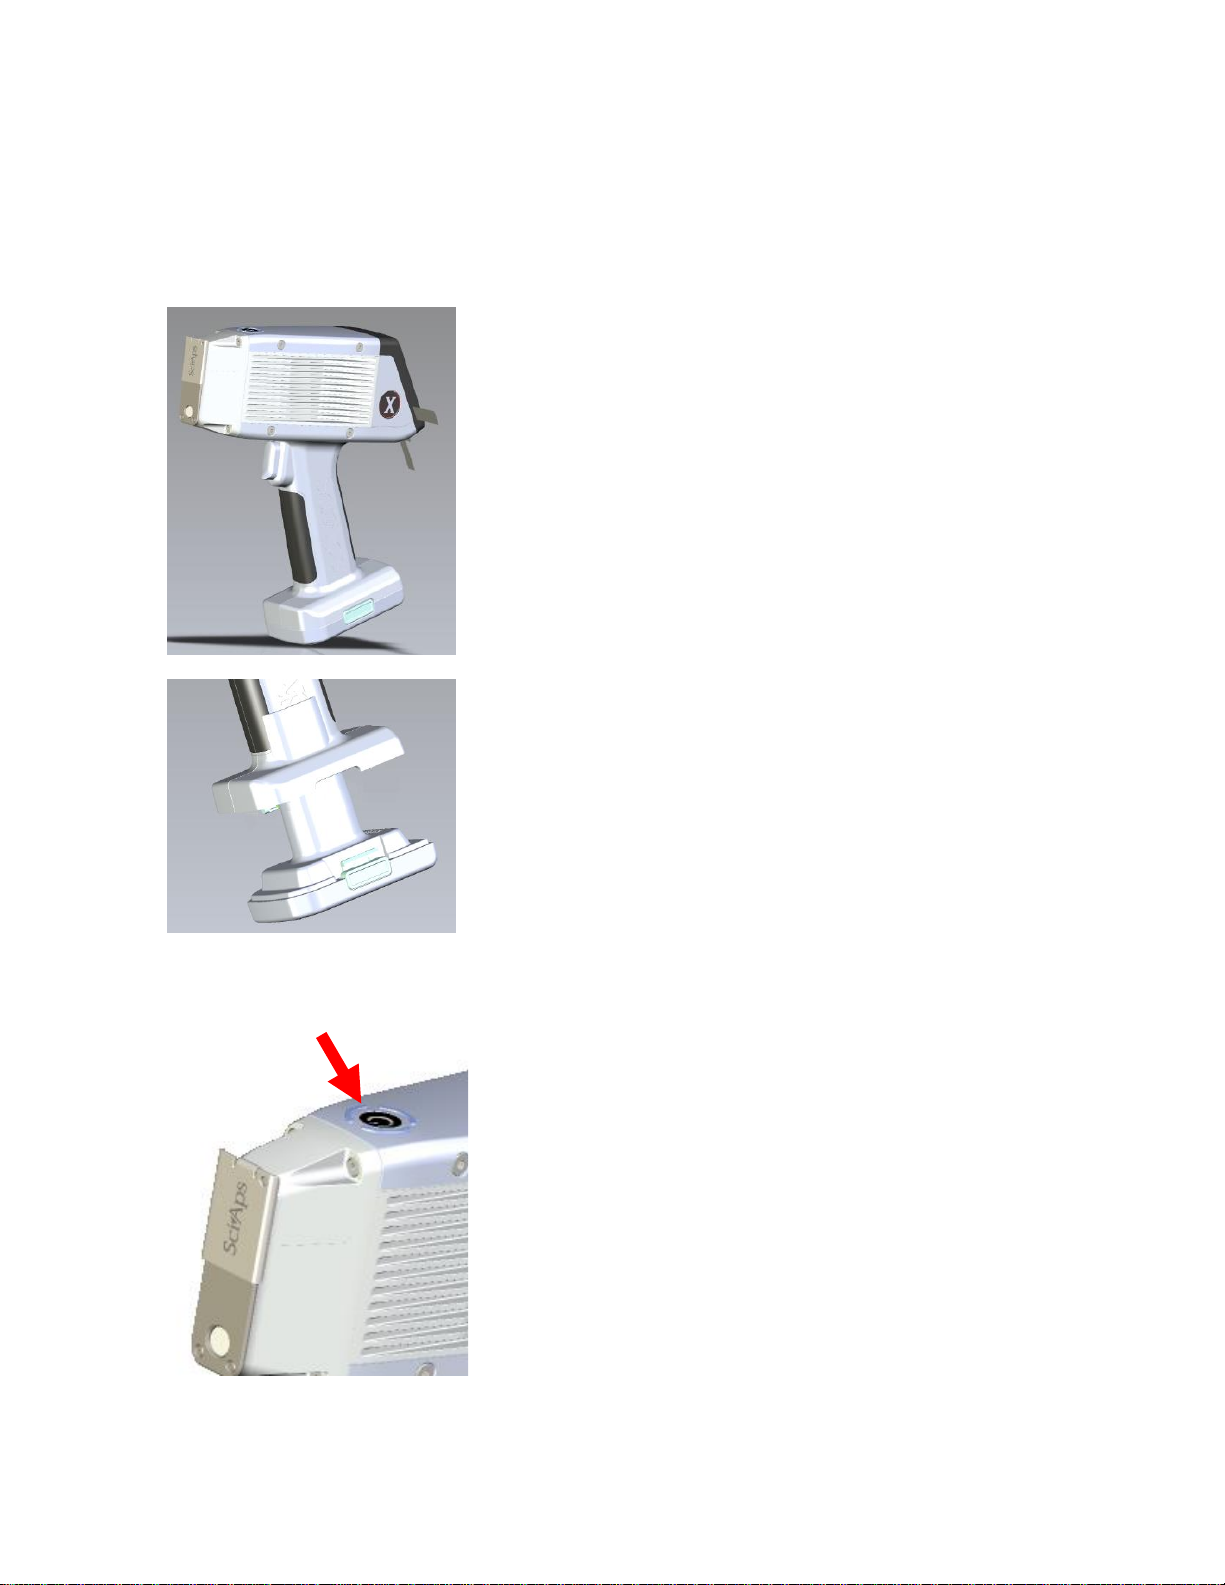
1.2 Turning on the unit
The on/off button is on the top of the unit.
Press it to turn the unit on.
SciAps X-550 and X-505 QuickStart Guide
4
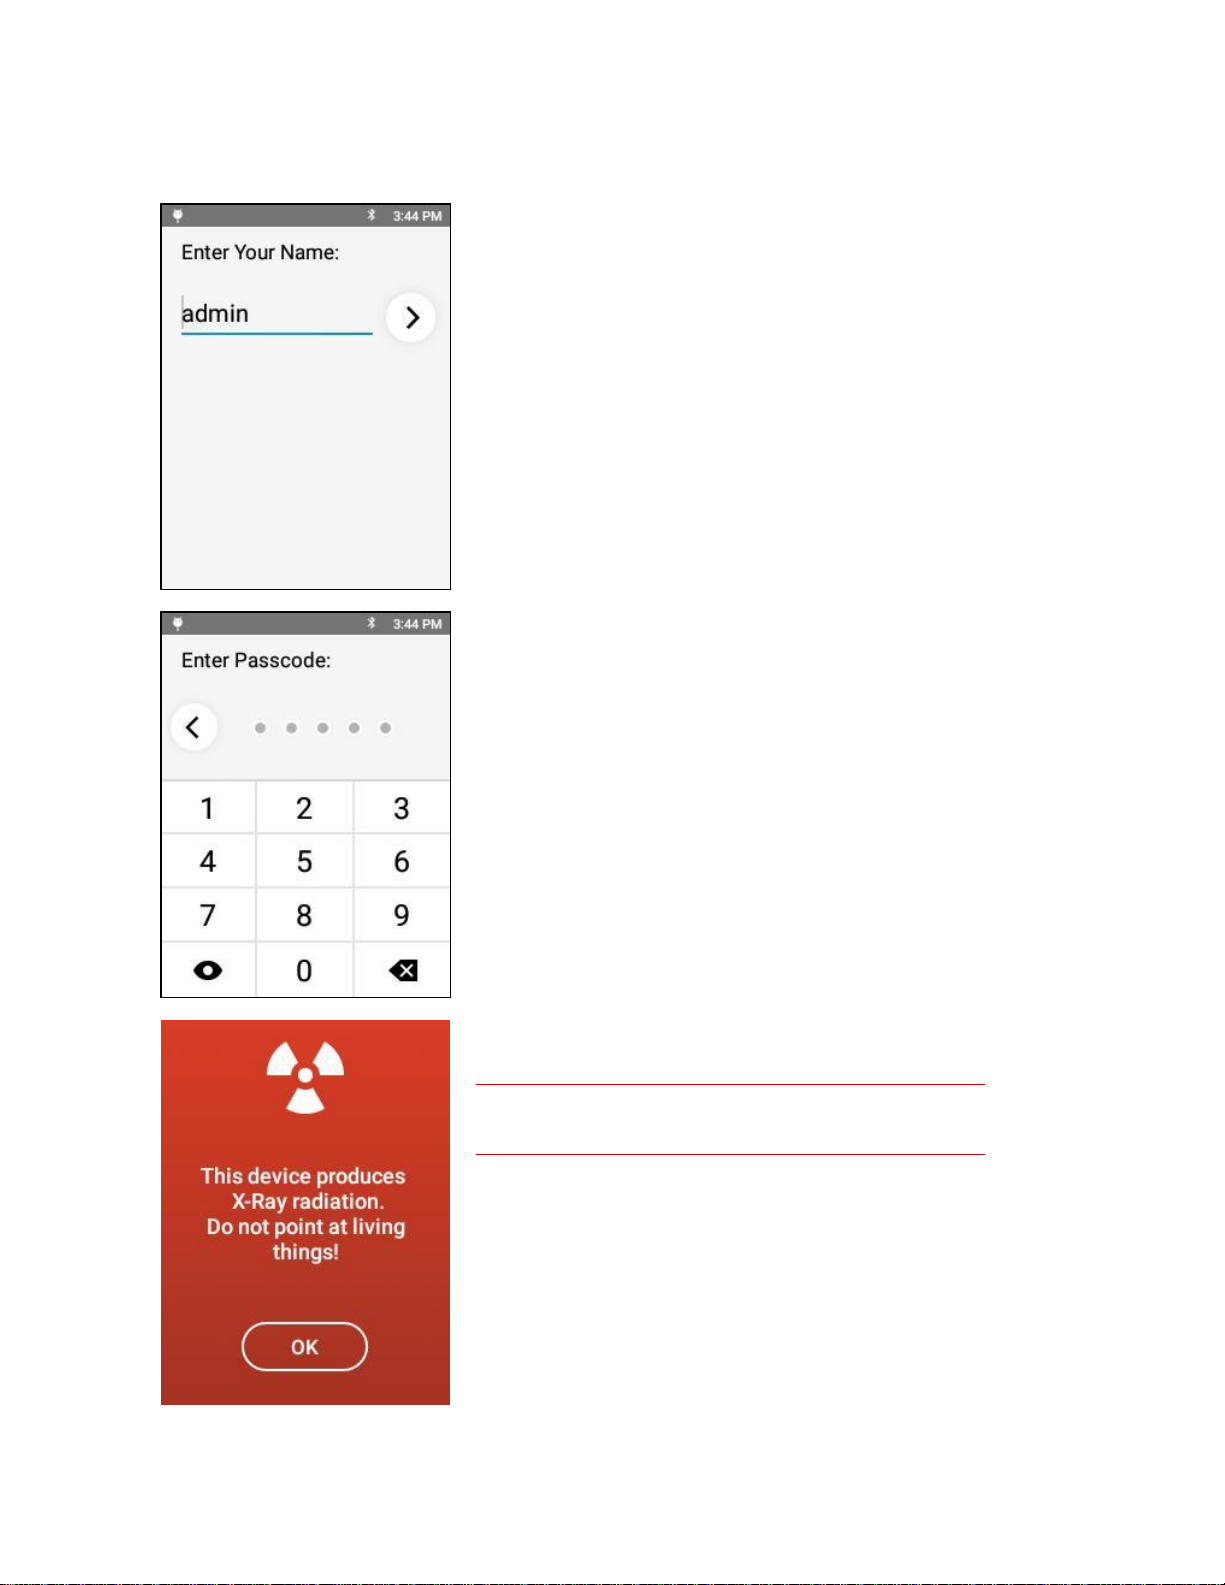
2. Logging in
The factory-set name is admin.
The factory-set passcode is 12345.
The administrator can change this later on.
The X-Ray warning screen appears.
X-Rays can cause serious harm to people and animals!
Tapping OK on this screen means you understand that, and that
you will not use this XRF unit improperly.
SciAps X-550 and X-505 QuickStart Guide
5
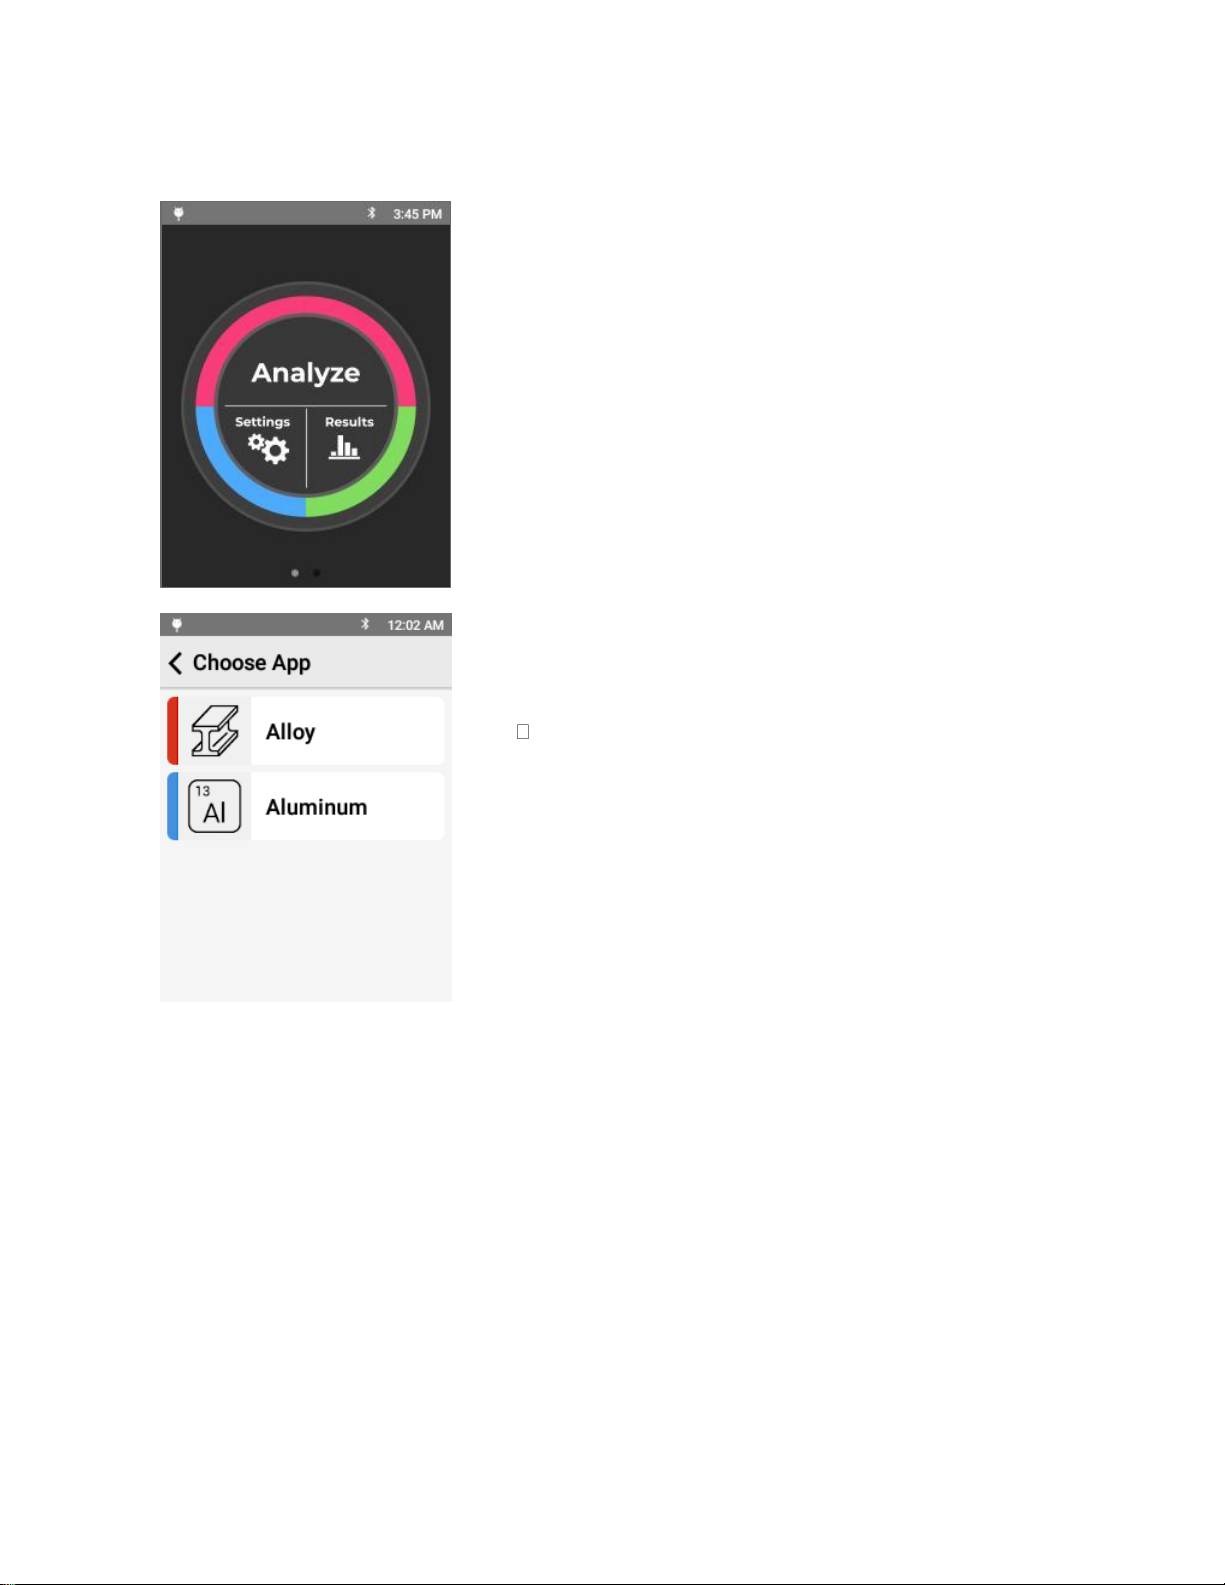
The Analyze screen appears.
Tap Analyze to start your first analysis of a sample.
The screen listing the applications installed on your unit will
appear.
Tap the mode intended for the type of analysis you intend to do.
The rest of the screenshots in this QuickStart are
from the Alloy App.

SciAps X-550 and X-505 QuickStart Guide
6
3. Calibrating the unit
If this is the first time the unit is being used (or the first time the
unit being used for the day), the unit will need calibrating.
If calibration is required, the unit will automatically bring up the
Calibration window.
Place the 316 coupon that came with the unit on the nose.
If the coupon is not available, use a clean, known 316 steel
sample.
Make sure the 316 coupon completely covers the analysis
window
Tap Calibrate to begin the process.
Calibration takes 15 seconds.
1 of 15 means the first second of the 15 seconds of the
calibration.
SciAps X-550 and X-505 QuickStart Guide
7
When the calibration is successful, the Start screen appears.
Remove the coupon from in front of the aperture.
You can now use the instrument to test your samples.
If the calibration fails, an error message will be displayed.
Confirm the piece of 316 coupon is positioned correctly in front
of the window and retry the calibration.
If the calibration continues to fail, please contact SciAps
technical support at +1 339-927-9455

SciAps X-550 and X-505 QuickStart Guide
8
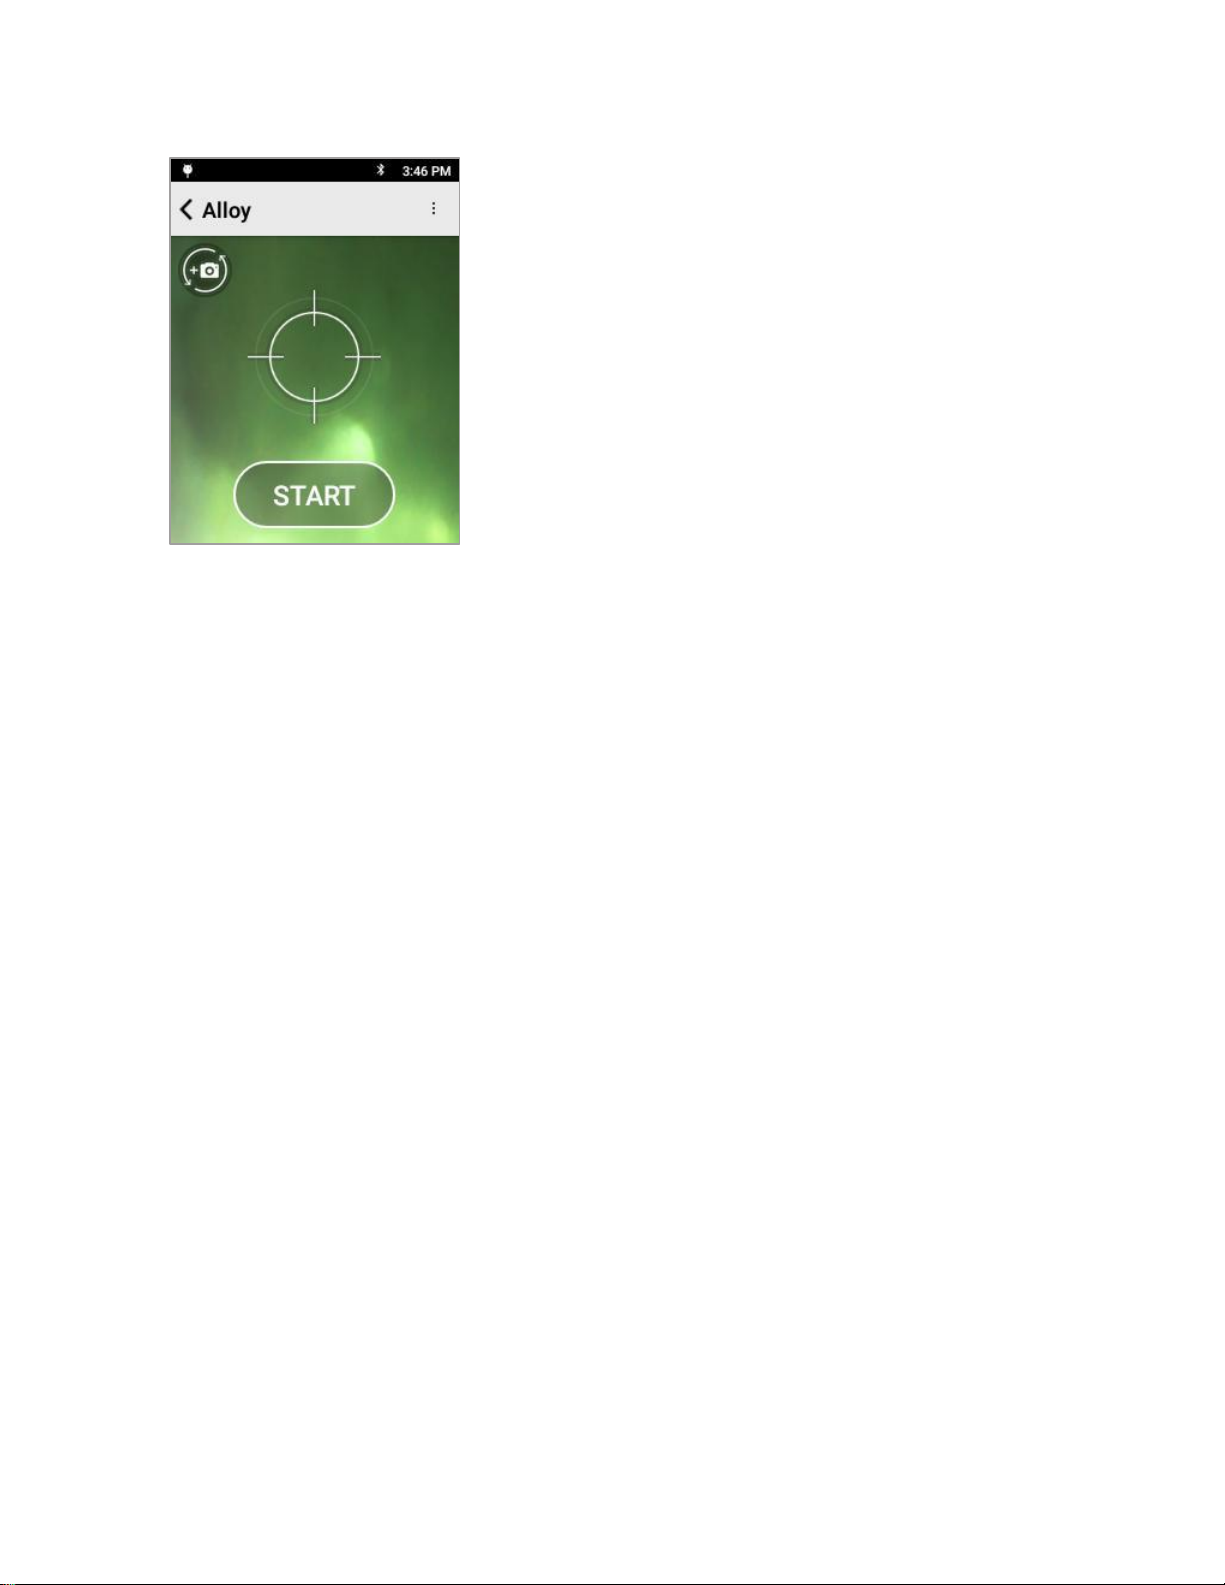
4. Taking a test
Align a sample with the window and tap START.
—OR—
Squeeze (and release) the trigger at the top of the handle.
The test will start.
Tests report findings in real time, so as the test continues and more information is obtained, the data
on the screen will be updated.
When the COMPLETED screen appears, the test is done and the final values are given.

SciAps X-550 and X-505 QuickStart Guide
9
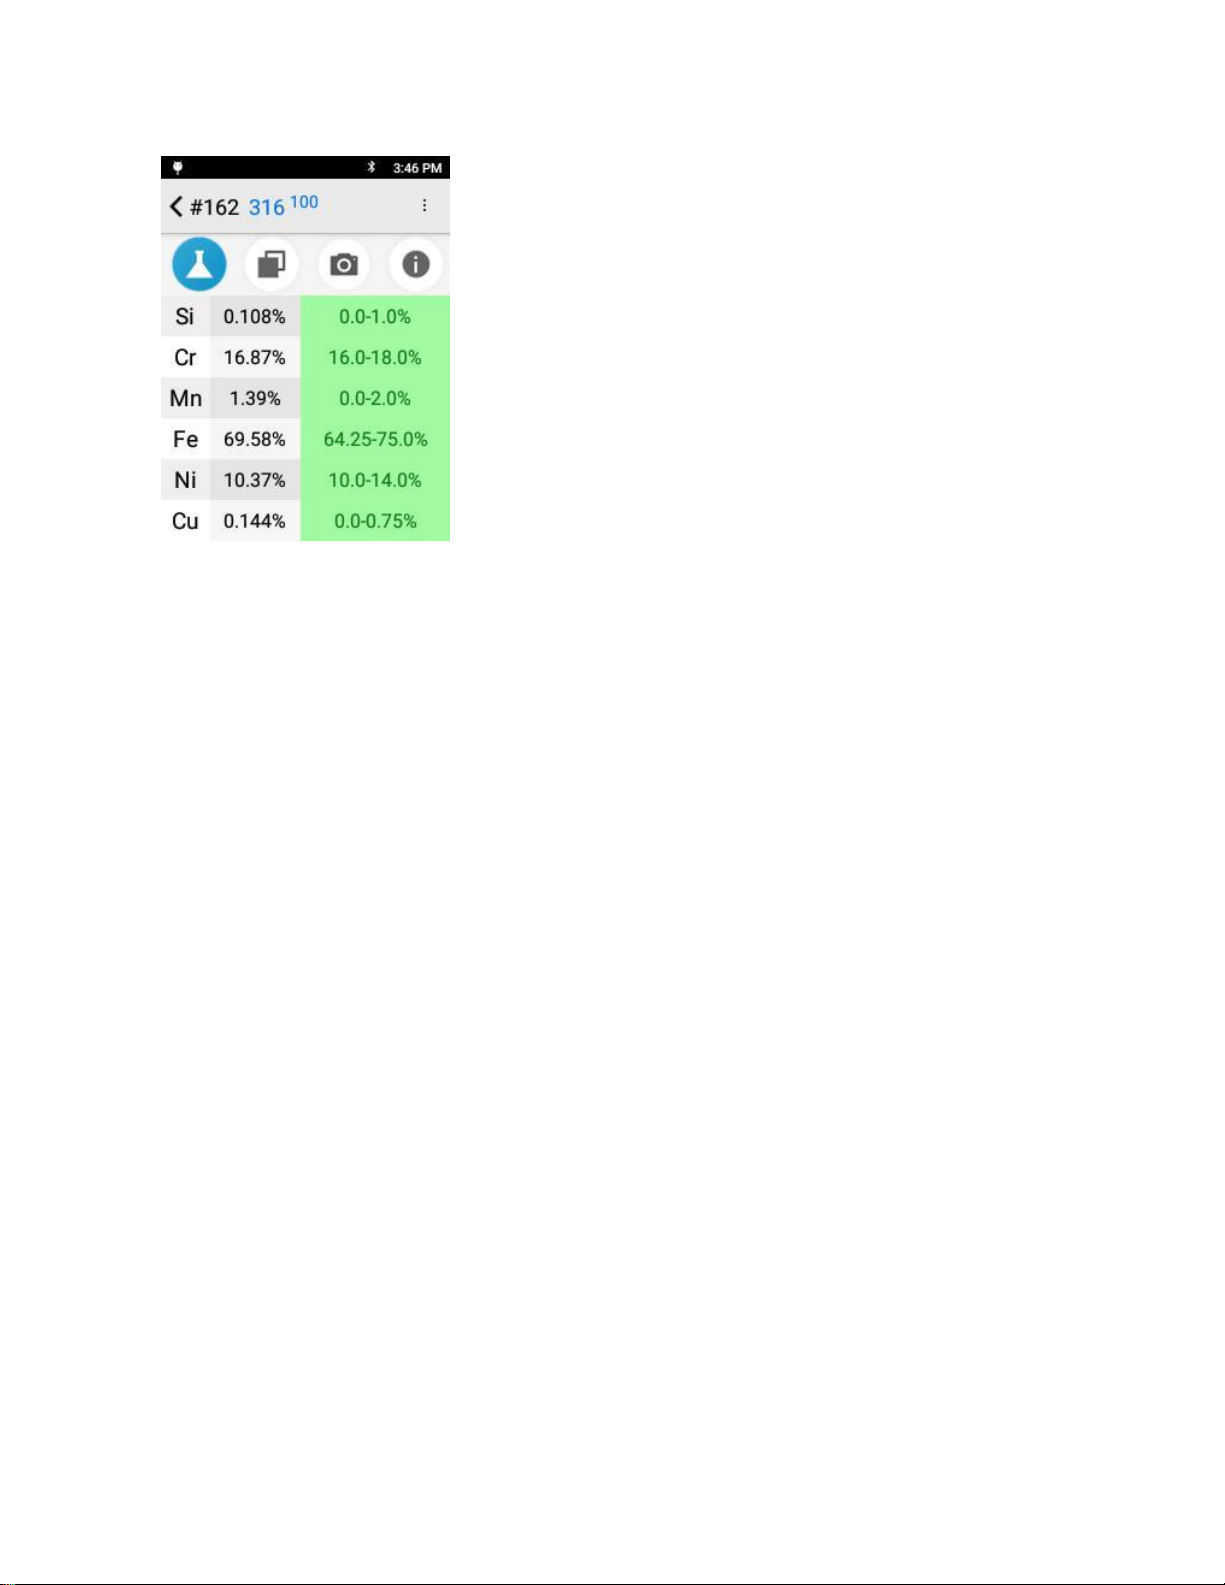
5. Looking at Results
The top portion of the screen lists:
•
Test Number
•
Top Grade Match
•
Grade Match Score where 100 is a perfect score meaning
that all elements measured fit within the alloy grade
specification.
The first column on the left lists all detected elements. Scroll down
to see additional elements.
The second column is the concentration of that element.
The third column is the “confidence”or “uncertainty”of the
measurement.
The green column on the right is the Specifications column.
Specifications column lists the specification of the best alloy grade
match for the determined chemistry of the sample.
The grade specification will be highlighted in green if a detected
element is specified in the alloy grade and the amount detected is
within the grade’s specification.
In this example test, all elements found in the sample are in grade
316 and are within spec for that grade.
SciAps X-550 and X-505 QuickStart Guide
10
To see the complete information in the Specification column, tap
it.
The column will expand, showing the range of the spec for the
detected element for that grade.
In this test, all the detected elements are both found in SS 316,
and are within range for SS 316, so all the ranges are green.
Questo manuale è adatto per i seguenti modelli
1
Indice
Altri manuali SciAps Strumento di misura


