Get Ready
Apply Sensor
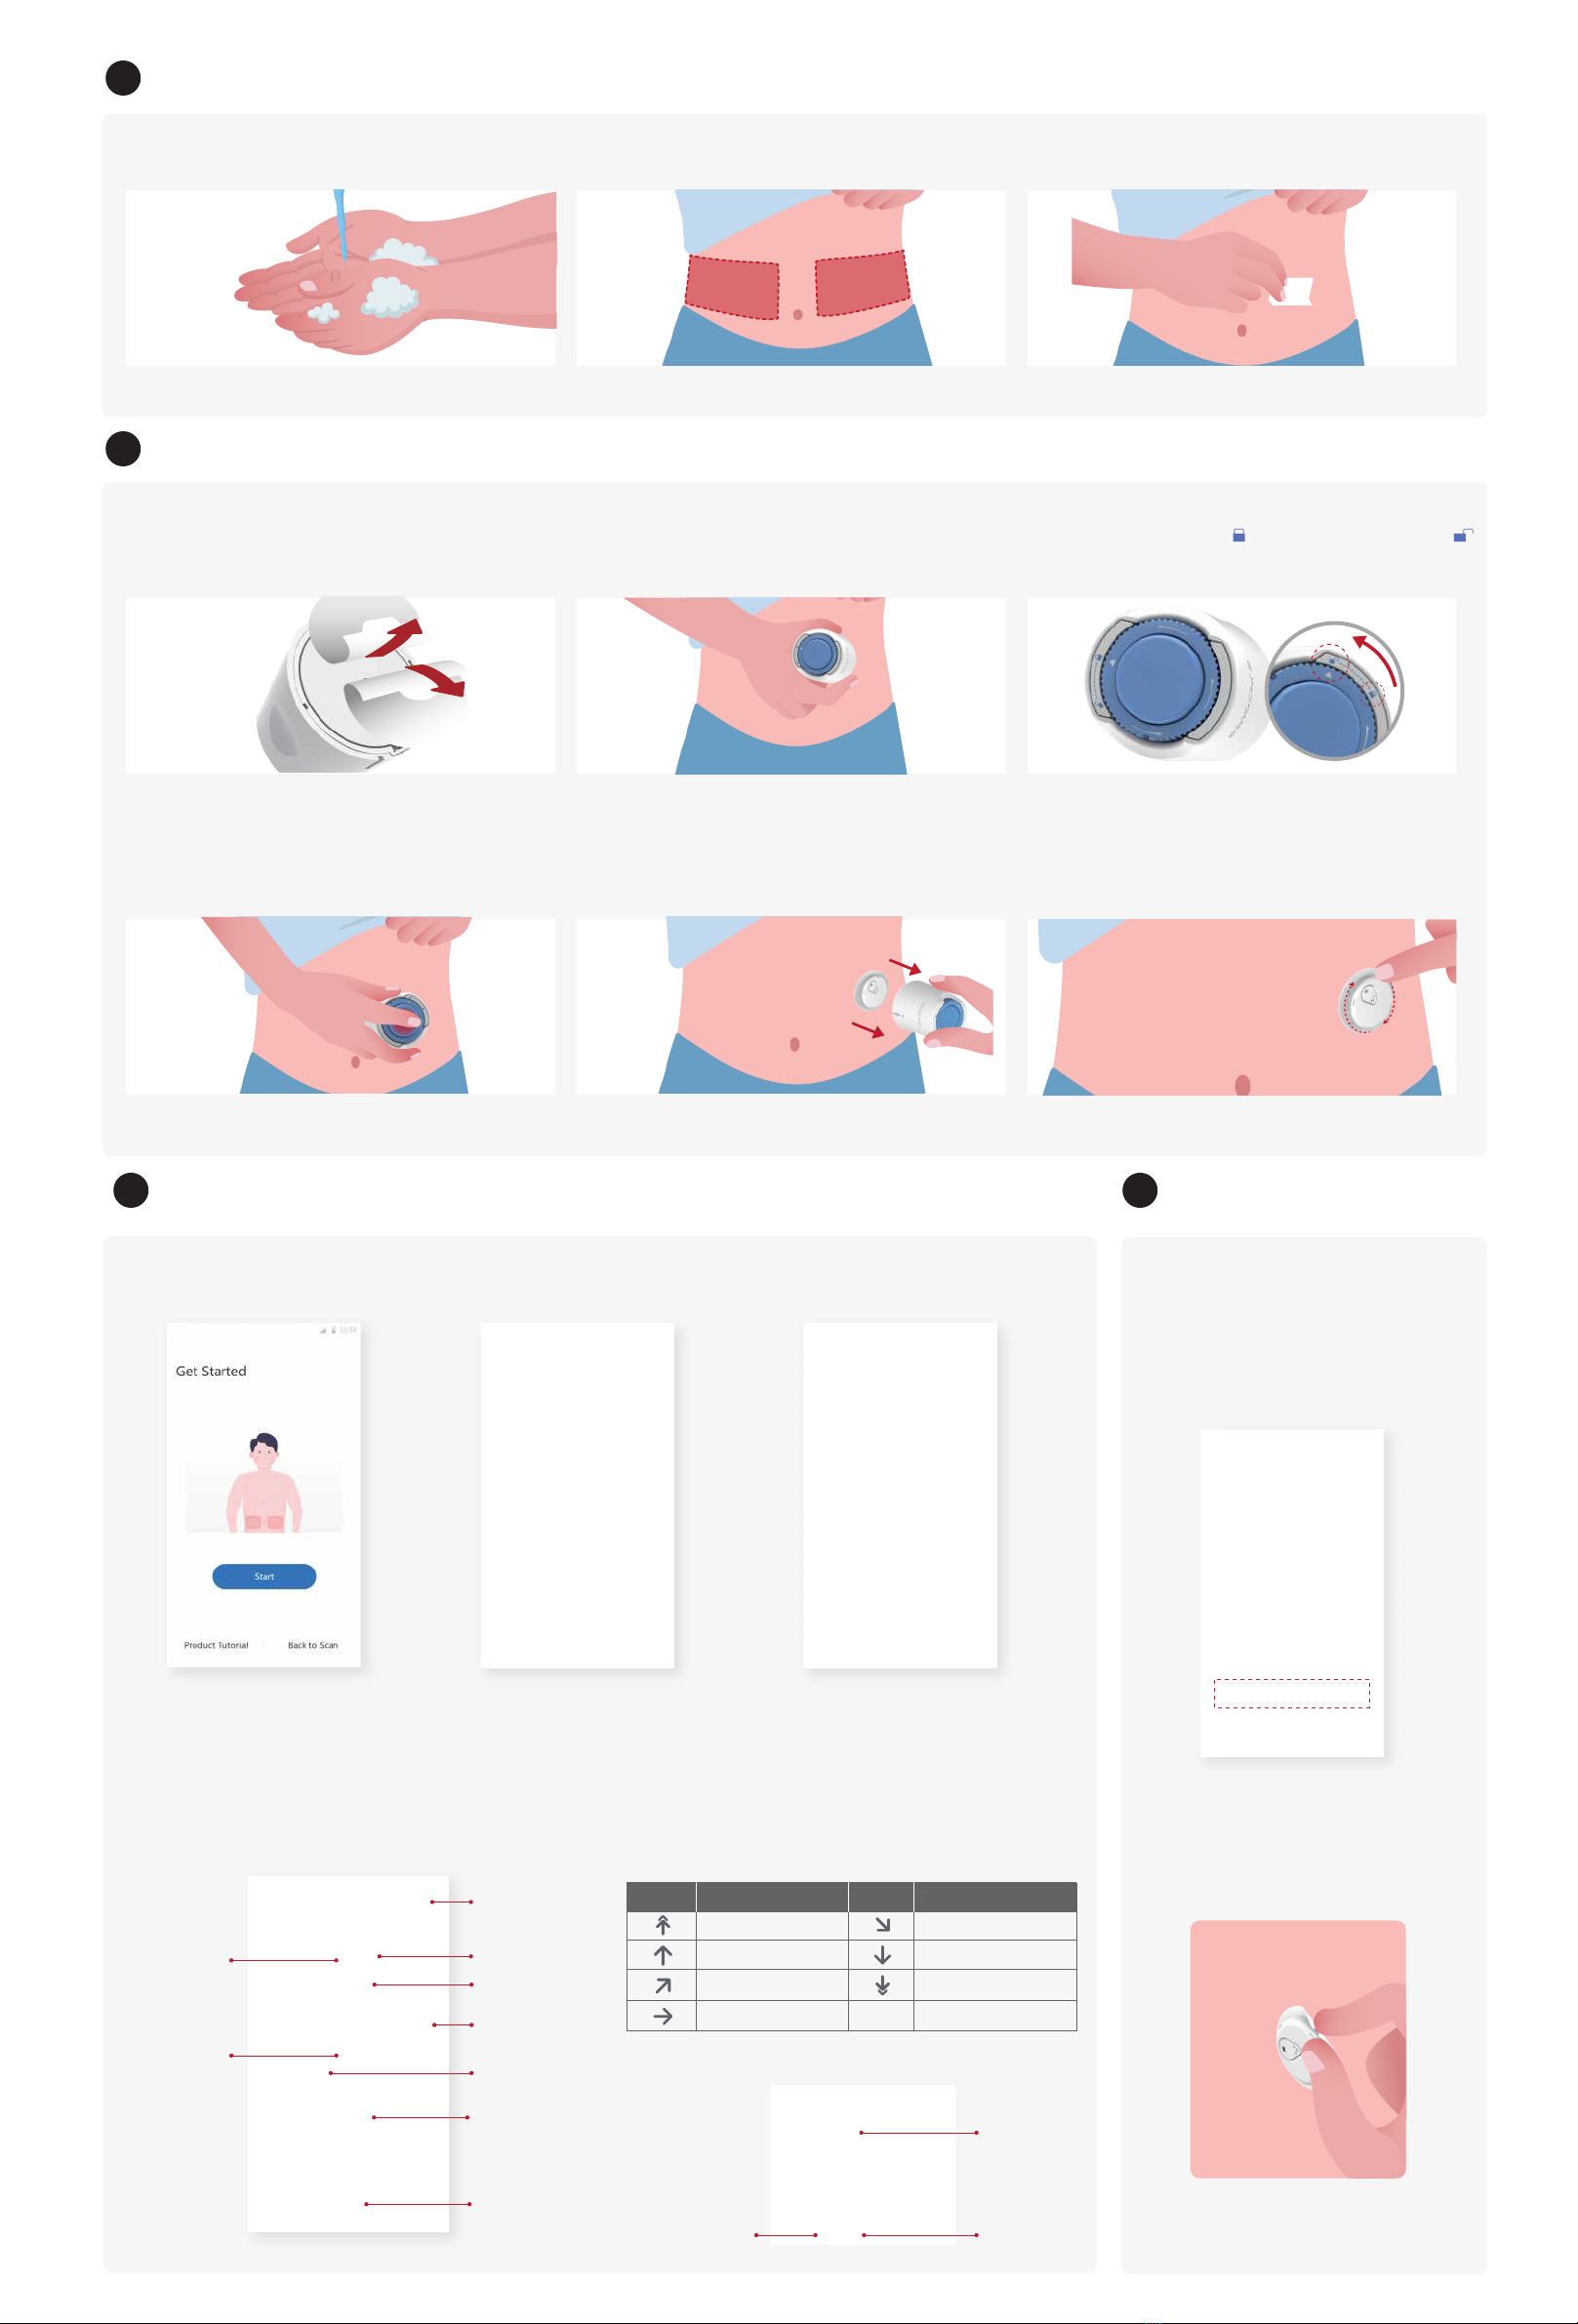
Step 1: Wash your hands with soap and
water
Step 2: Choose an insertion site on the
abdomen
Step 3: Clean the insertion site with alcohol
swab
Step 1: Remove adhesive pad liner Step 2: Place the armed Sensor-Applicator
over site
Step 3: Gently turn the safety switch from
the “Locked” icon to “Unlocked” icon
until you hear a click and can not turn further
Start Monitoring
Step 1: Start CGM
sensor
End Monitoring
Step 1: Confirm the current
session is completed
Step 2: Remove the Sensor
When the sensor is success-
fully inserted, your Sinocare i3
CGM App will prompt you to
start the sensor. Tap “Start”
for next step.
Step 2: Wait for sensor
to warm-up
Tap”Start” to begin 2-hour sensor
warm-up. There will not be any glucose
readings or alerts until warmup has ended.
Keep the App open and your smart device
within 20 feet of the transmitter during the
sensor warmup.
Step 3: Set up alerts
Caution: You will always receive a Low Glucose
Alarm when your sensor glucose value is 55
mg/dL or below. For detailed information
regarding glucose alerts and system setup, go
to “Important Safety Information” in the User
Manual.
Step 4: Check your glucose
When the 15-day monitoring session is
completed, the App will prompt you to
change a new sensor or review the
History Report.
a. Pull up the edge of the adhesive.
b. Slowly peel the adhesive away
from your skin in one motion.
Bluetooth
Connection
Current
Glucose
High Glucose
Alarm Level
Low Glucose
Alarm Level
Change from last
glucose reading
Landscape View
Glucose Graph
Add Note
Trend Arrow
Step 4: Press the button in the middle until
you hear an injection sound
Step 5: Gently pull the Applicator away from
your body
Step 6: Press the adhesive around the sensor
so that it sticks securely to your skin
Caution: Avoid scars, moles, stretch marks, lumps and insulin injection sites.
To prevent skin irritation, rotate sites between applications. Consider your
comfort and activities.
Caution: Let the alcohol dry before insertion.
Warming: The Sensor can not be re-used after removing.
Discard the used sensor according to local regulation.
Caution: Carefully remove the liner to avoid pulling off the entire adhesive.
Do not touch the adhesive. Caution: Do not push down on the middle button until the safety switch is fully
released to prevent unintended results or injury.
Caution: Check your sensor site for bleeding after you insert the sensor. If there
is bleeding that does not stop, remove the Sensor, apply steady pressure using
sterile gauze until the bleeding stops
Step 4: Press the button in the middle until you hear an injection sound.
Caution: Discard the used Applicator according to your local regulation.
Direction your glucose is going
Glucose Trend Arrow
Current
Glucose
Graph of your current and stored glucose readings
Insulin Note Sport Note
Glucose Graph
Glucose rising rapidly
Glucose rising quickly
Glucose rising slowly
Glucose steady
Glucose falling slowly
Glucose falling quickly
Glucose falling rapidly
What is meansArrow What is meansArrow
3
4
5 6


