7
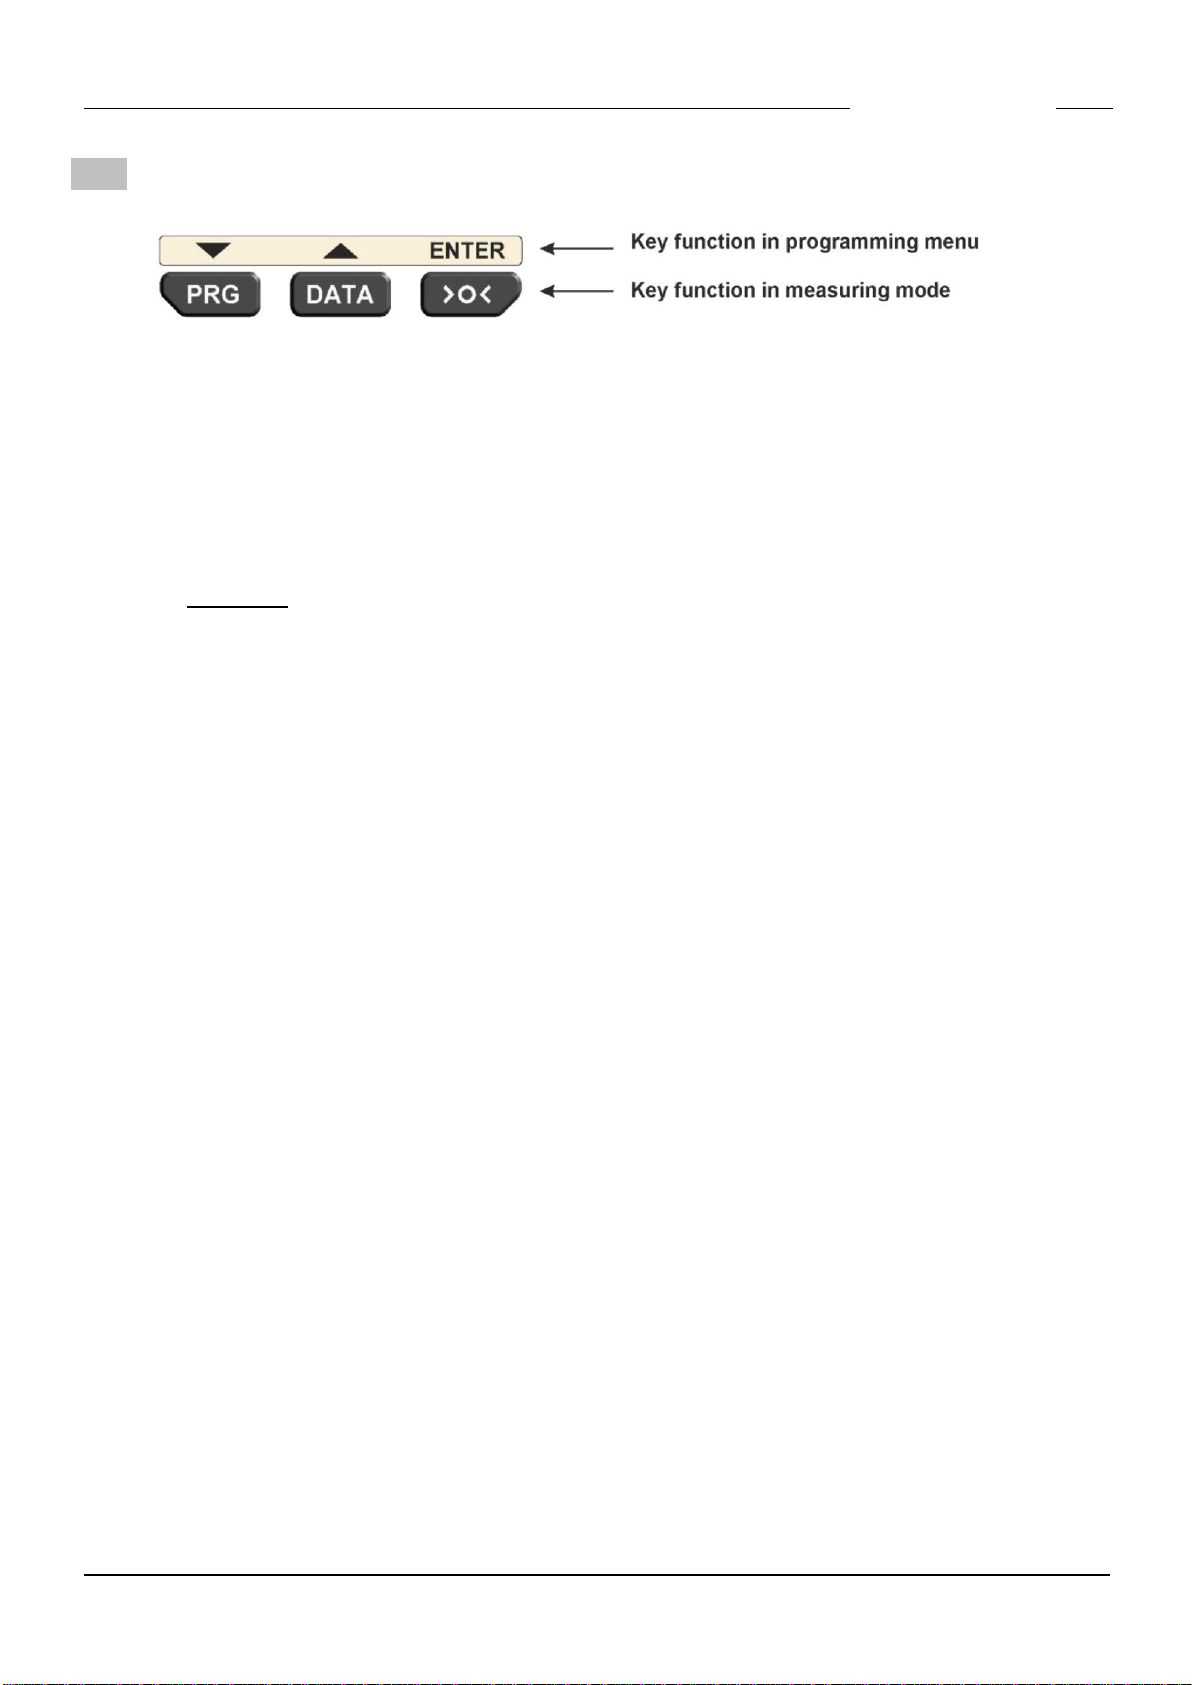
5. Programming menu
Open the programming menu by pressing the PRG button.
The following settings are available :
Note : The access to the settings via the programming menu can be restricted by using
the Windows configuration software SD1_Win.exe ( ➔see chapter 9 ).
Because of this, there may not be all of the following menu options available.
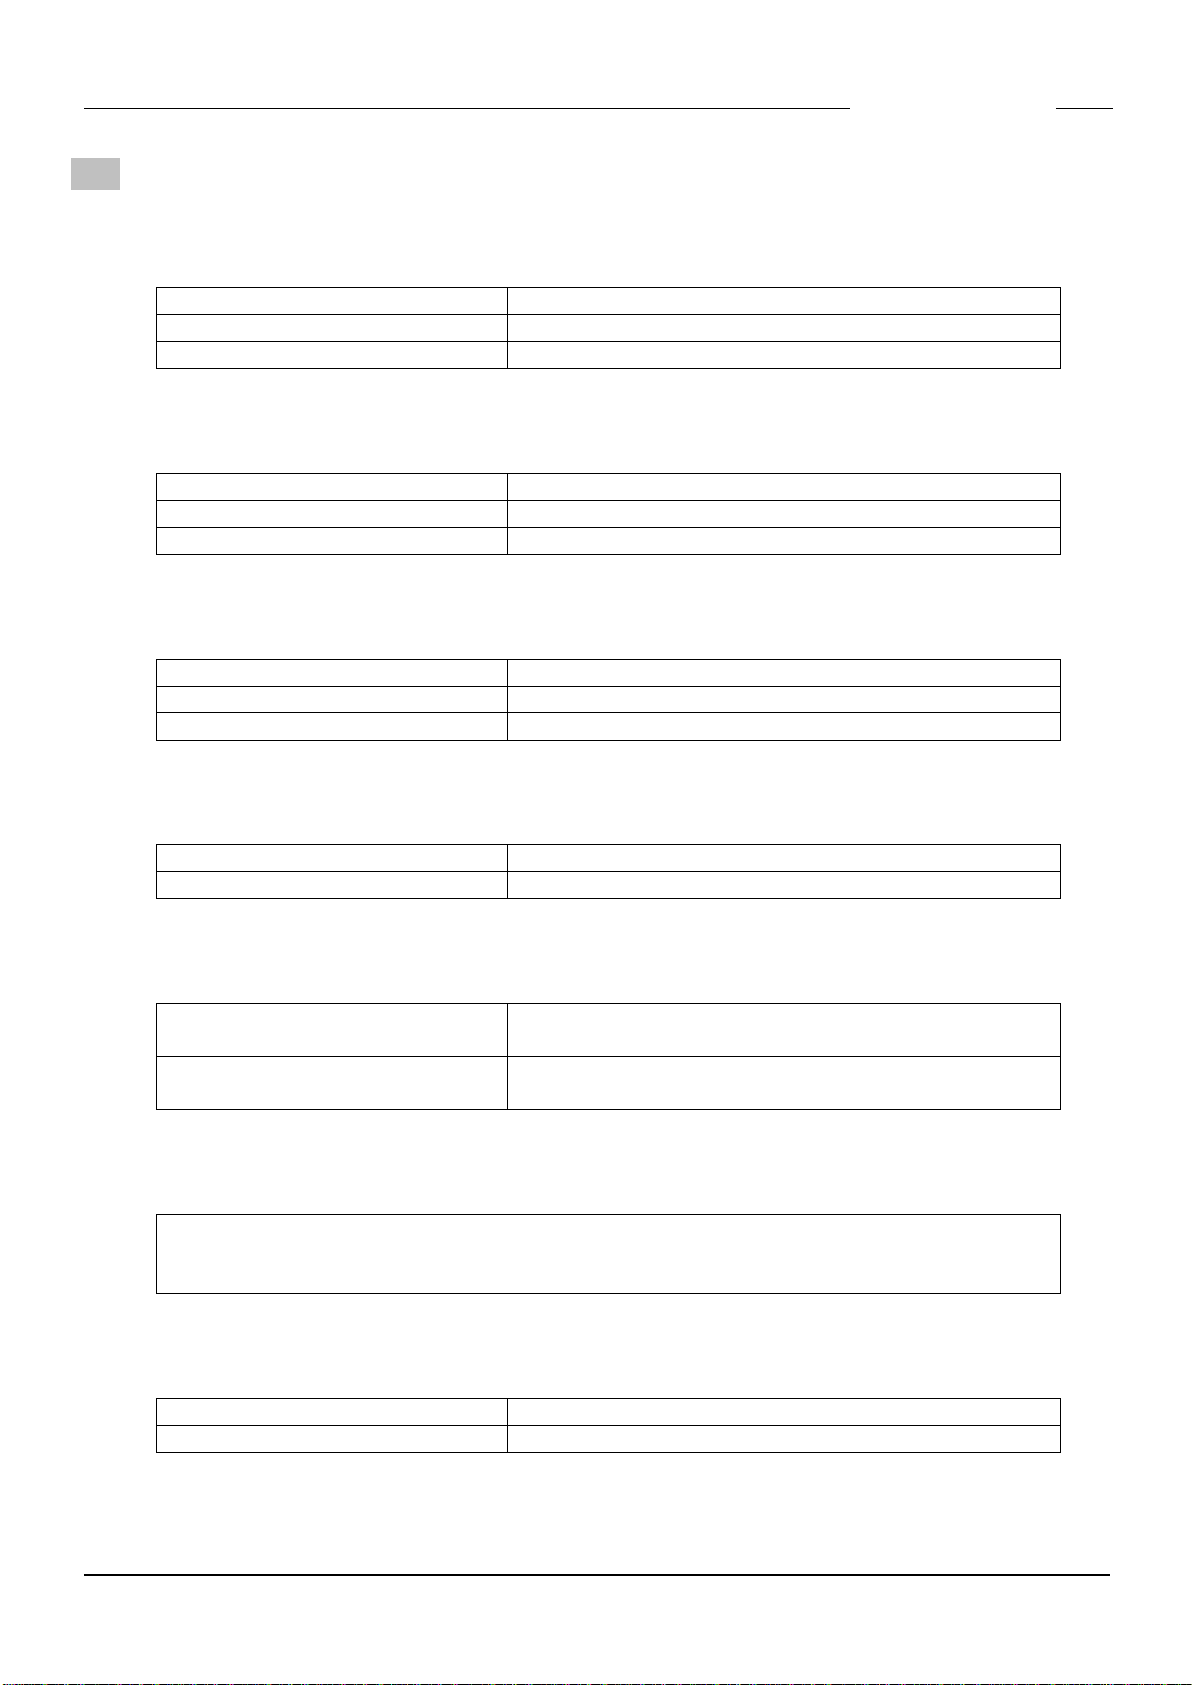
Overview :
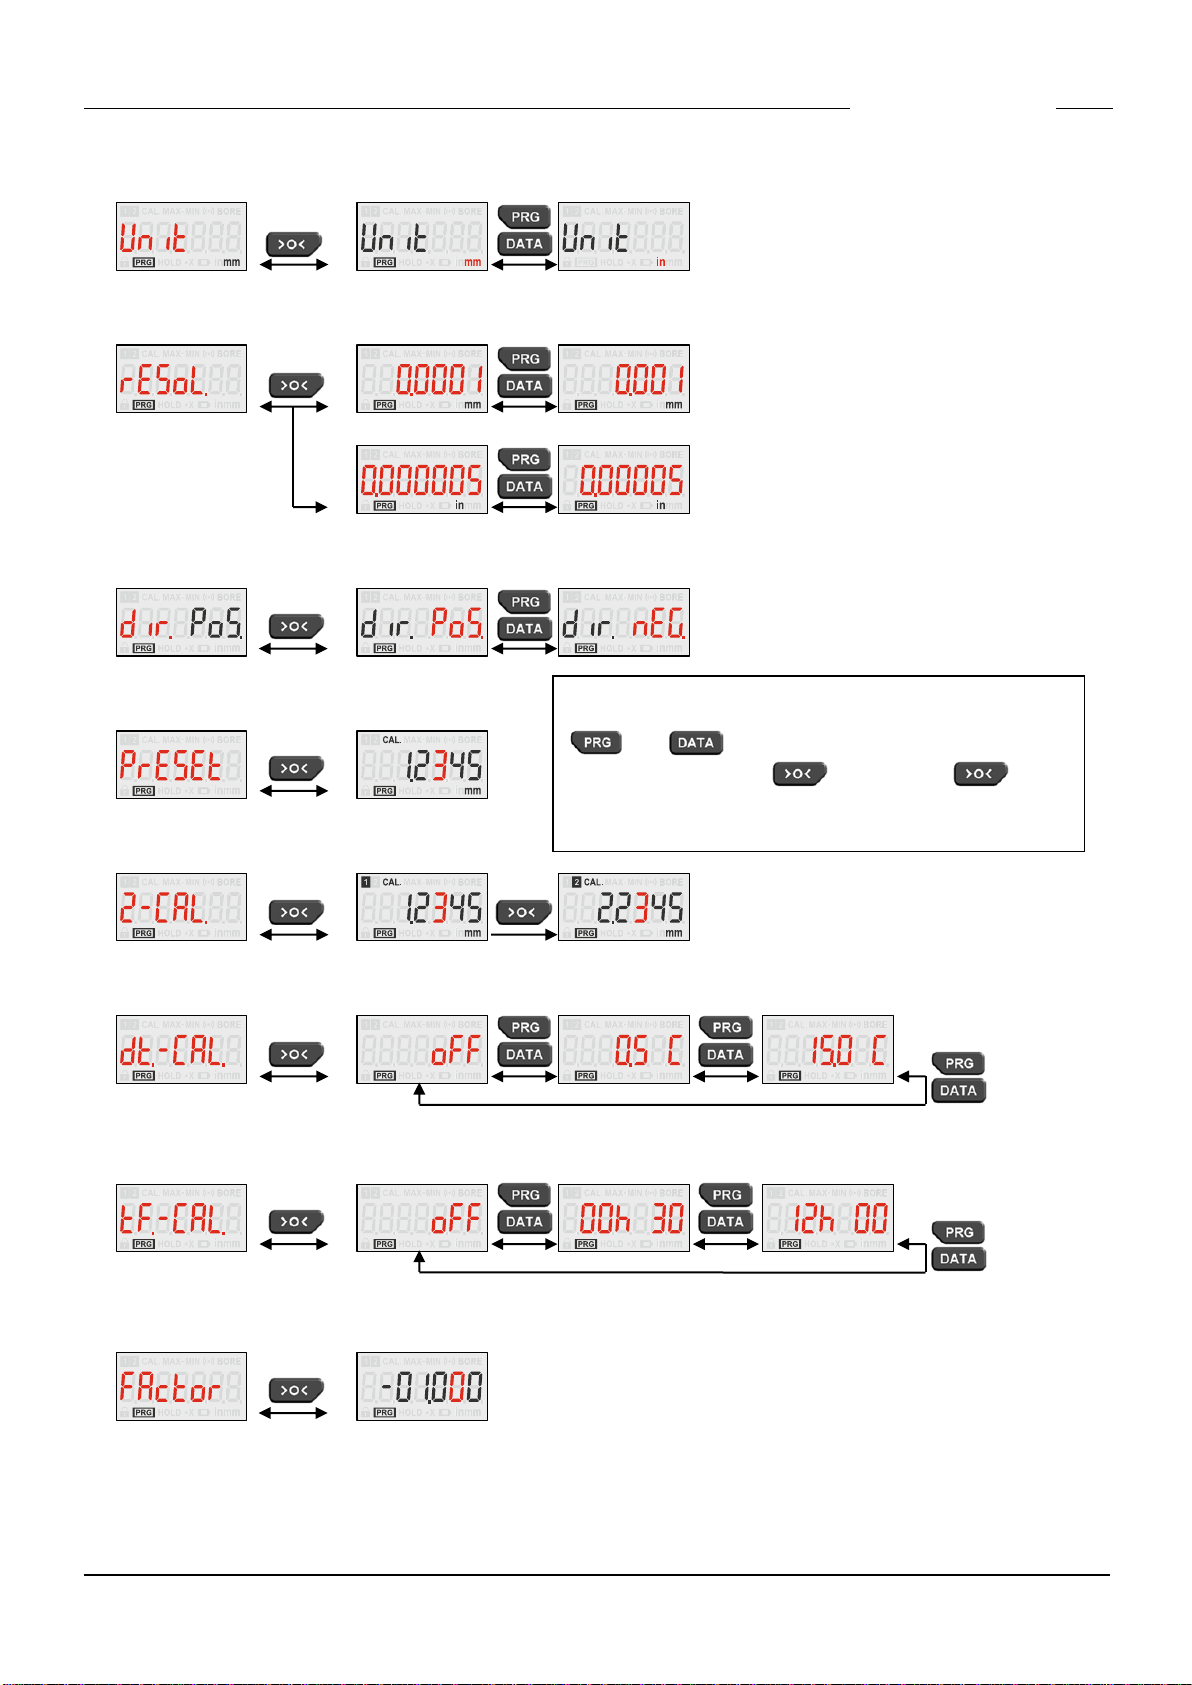
•Unit Selection of unit
•rESoL. Selection of resolution
•dir. Selection of measuring direction
•PrESEt Zeroadjustment / Preset
•2-CAL. 2 Master calibration
•dt.-CAL. Temperature forced calibration ( in steps of 0.5 °C )
•tF.-CAL. Timer forced calibration ( in steps of 30 min )
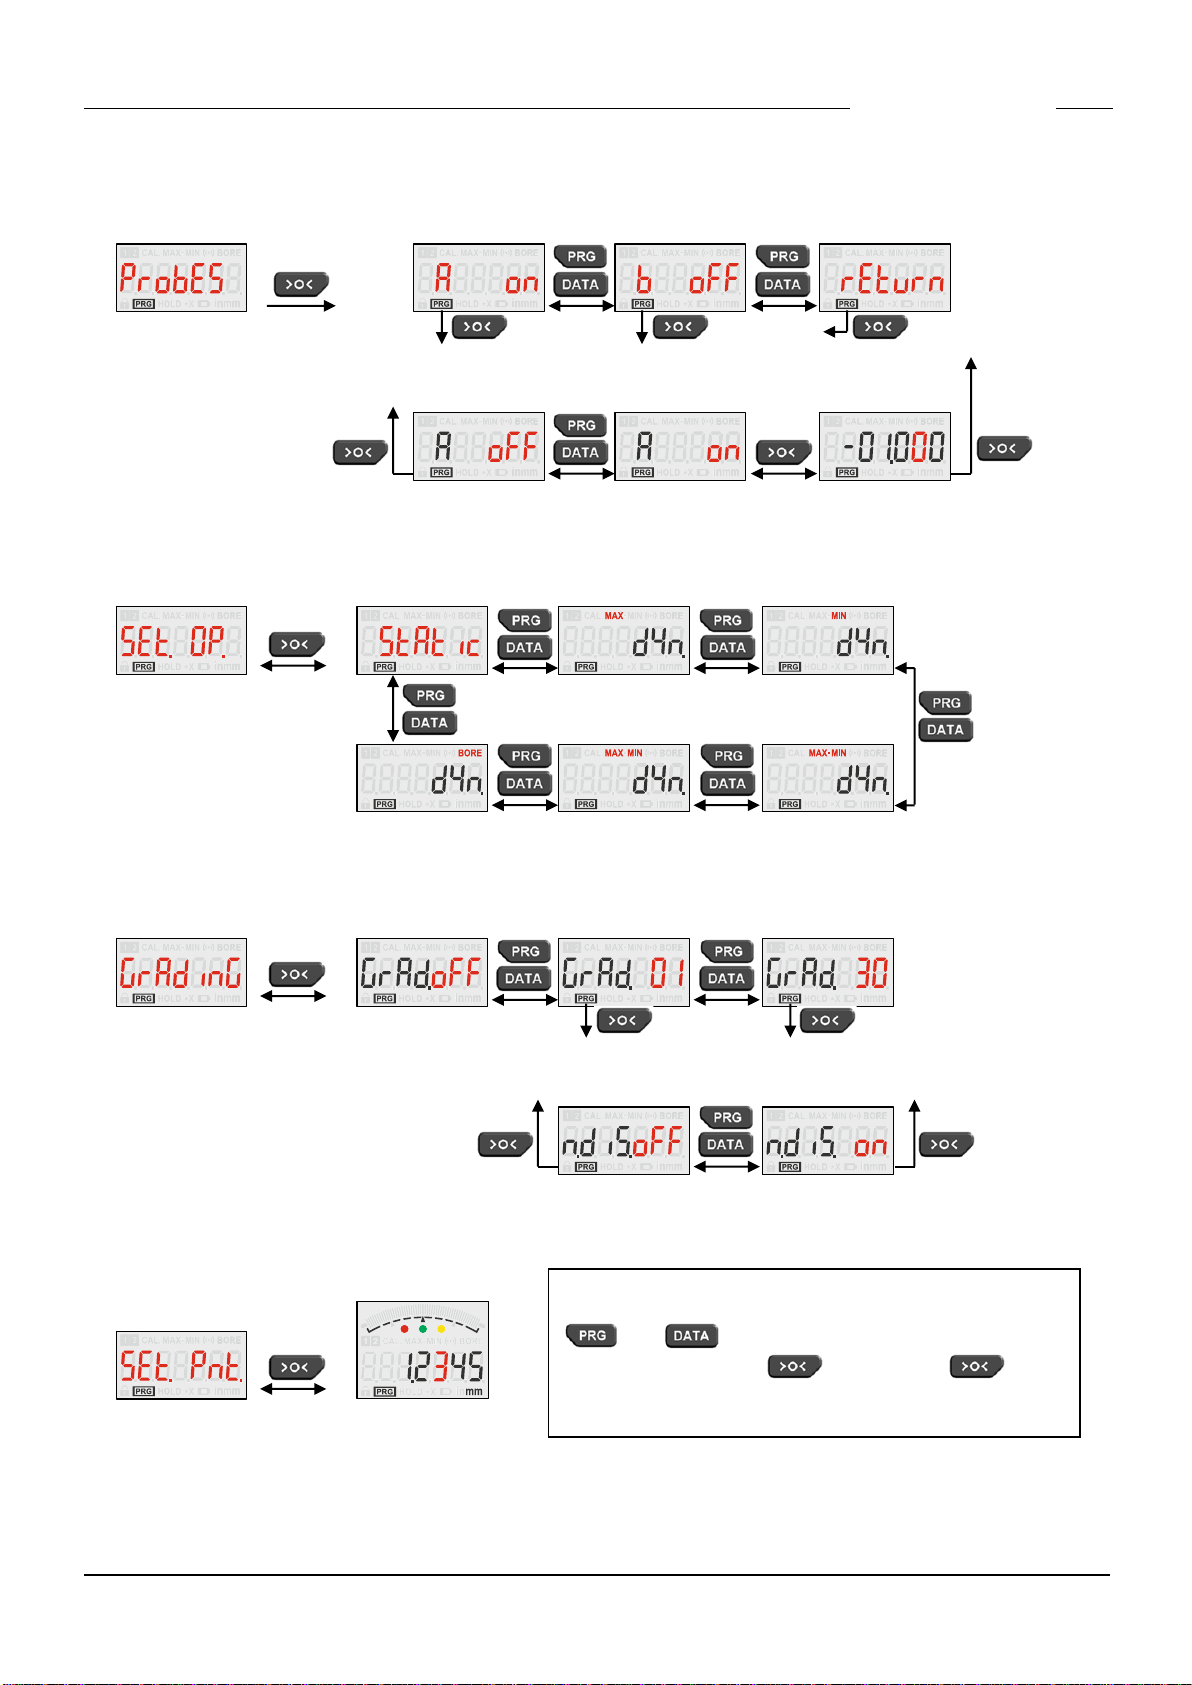
•FActor / ProbES (*) Measuring input A and B
•SEt.OP. Selection of a Measuring mode
•GrAdinG Selection of a Grading mode
•SEt.Pnt. (*) Input of the nominal value with relative tolerances
•SEt.toL. (*) Input of absolute tolerances
•toL.LED Tolerance LEDs
•CoL.diS. Analogue display
•hoLd Freezing of the display on a static measurement
•but.PRG. Assign a second function to the PRG button
•but.dAtA. Assign a second function to the DATA button
•but.CAL. Assign a second function to the >O< button
•FootS. Assign a function to a hand / foot switch
•P.C.ProG. Passcode for the programming menu ( 4 digits )
•P.C.CAL. Passcode for the calibration ( 4 digits )
•Auto.oFF Setting the Auto Power Off time
•SA.rAtE Setting the measurement rate
•BEEP Button tone
•ProG.End Leave the programming menu
Note : The selection of the active menus ( marked with (*) ) is only possible with the
Windows configuration software SD1_Win.exe ( ➔see chapter 9 ), not with the
programming menu of the SD1.