turn (this allows for axle compression while under skewer clamp pressure). For precise
adjustment the use of a Chris King Hub Cone Adjusting Tool may be necessary. Hub
cone adjusting tools are available from any authorized Chris King dealer, or directly from
Chris King Precision Components, www.chrisking.com/store.
5. Once preload is set, tighten axle assembly to 110 inch-pounds (12.4Nm).
6. Double check adjustment by clamping wheel into fork with quick-release. Check for play
or binding, and readjust if needed.
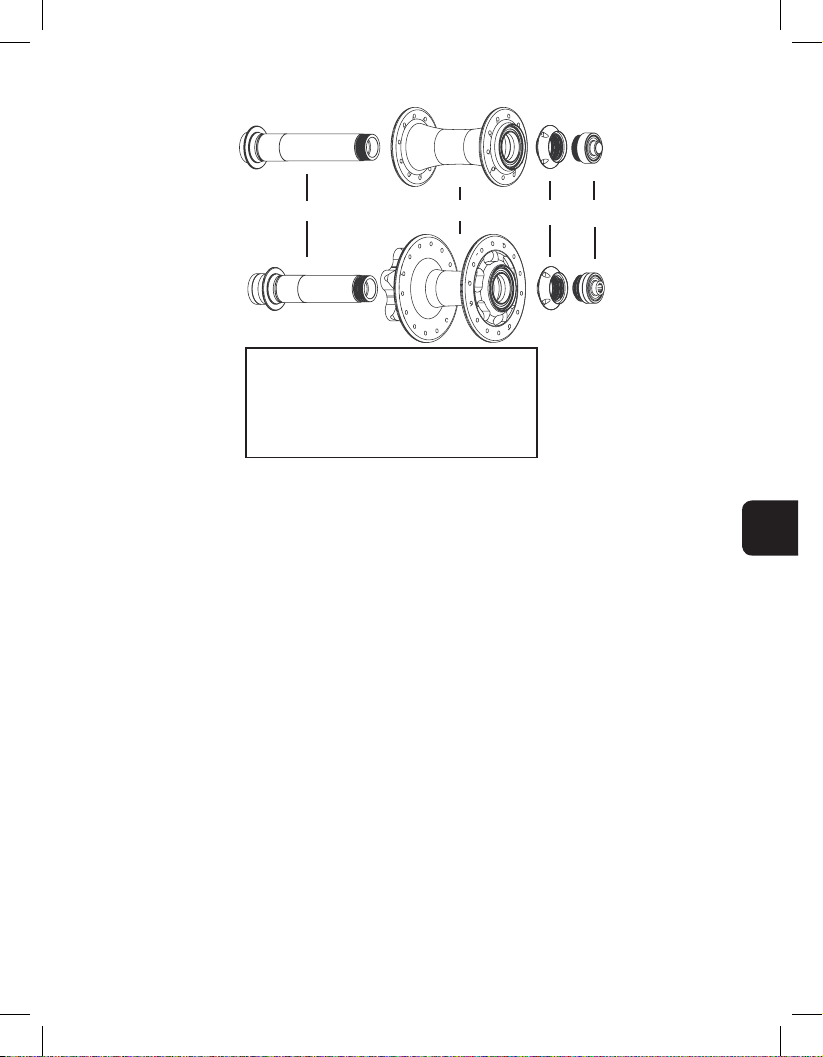
Disassembly of rear R45 and R45 Disc Hub
(
see Figure 4)
Shimano and SRAM Compatible
Campagnolo Compatible
I.
E.
B. G.
F. H.
B.B. I. J.
*R45 and R45 Disc hubshells, axles and
axle ends are not cross compatible.
A. H.
G.
F.E.
D.
C.
B. B. B.
B.
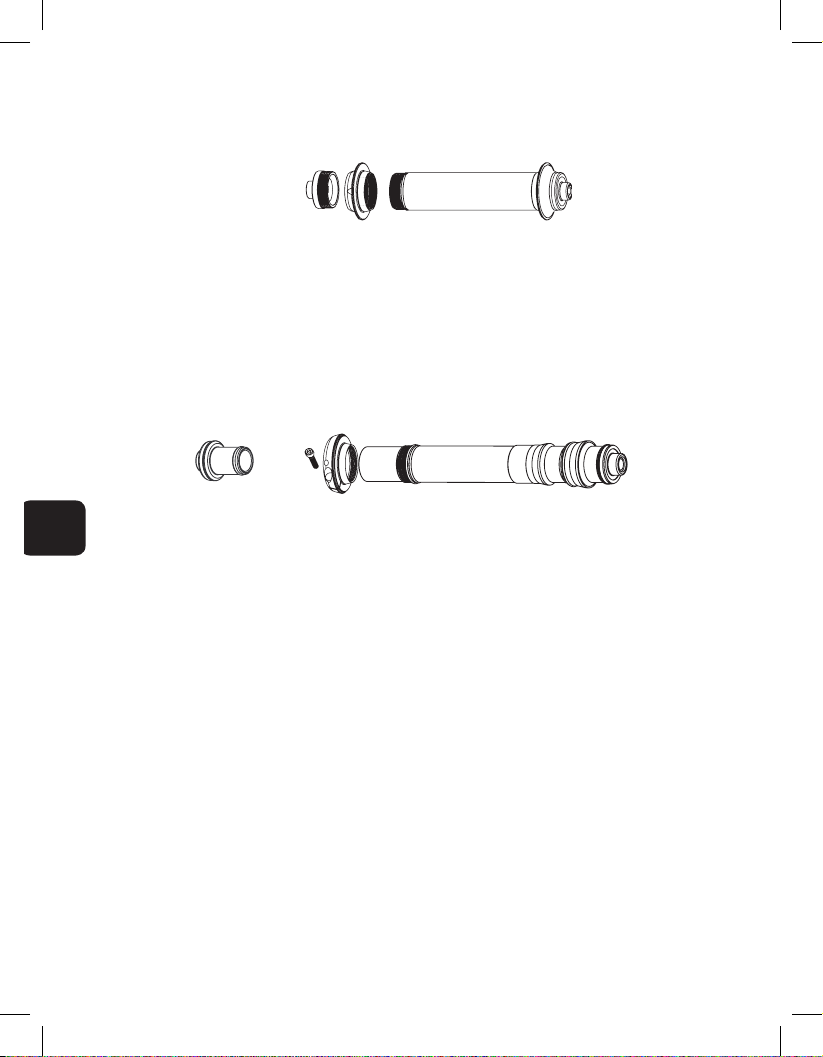
A. R45 or R45 Disc QR insert
B. O-ring
C. R45 adjusting clamp
D. R45 and R45 Disc hubshell assembly
E. R45 driveshell assembly
F.
R45 bearing spacer spring
G.
Bearing spacer spring O-ring
H.
Outboard driveshell bearing
I. R45 or R45 Disc rear axle
J. Bearing retainer sleeve
Figure 4
130mm axle only
135mm axle only
Campagnolo-compatible R45 rear hub
The Campagnolo-compatible R45 and R45 Disc rear hub operates in the same way as
the Shimano and Sram compatible R45 hub, with a few differences. The Campagnolo-
compatible R45 hub uses dedicated driveshell, non-disc specific axle, disc specific axle,
spacer spring, outboard bearing, bearing sleeves and cassette lock rings. An 11-tooth
lock ring is included with each hub. A 12-tooth cassette lock ring is available from any
authorized Chris King dealer, or directly from Chris King Precision Components, www.
chrisking.com/store.
R45 and R45 Disc basic service
R45 and R45 Disc rear hub service
Follow these instructions for a basic cleaning, relubrication, and bearing preload procedure.
Refer to the schematics (see figure 4) of this manual for specific part listing.
For a more comprehensive service, including a thorough cleaning, inspection and replace-
ment of parts, and removal of hub bearings, an R45 Hub Service Tool is required. R45 Hub
Service Tools are available from any authorized Chris King dealer, or directly from Chris
King Precision Components, www.chrisking.com/store.
R45 and R45 Disc rear hub disassembly
1. Remove skewer, cassette lock ring and cassette from hub.
2. Loosen 2.5mm hex bolt on adjusting clamp and then remove R45 QR insert from
main axle assembly by pulling it directly out of the non-driveside of axle.
3. Unscrew adjusting clamp and remove it from axle. [Tech Tip: if adjusting clamp is
difficult to remove, first insert a 5mm hex key into drive side axle end to keep axle
stationary. Then insert a 2.5mm hex key into helper hole on adjusting clamp adjacent
to 2.5mm hex bolt. Use 2.5mm hex key as a lever to unscrew adjusting clamp.]
4. Remove axle from the main hub assembly by pushing it through from the non-
driveside. [Tech note: The outboard driveshell bearing of the Shimano-compatible
R45 may or may not remain on the axle as it is pushed out of the hubshell assembly.
It will be remain on the axle in the Campagnolo-compatible version.]
5. Remove driveshell by holding hubshell or wheel in one hand and with other hand
pull driveshell counter clockwise out of the hubshell assembly.
6. All rear hub bearing and RingDrive assemblies can now be accessed for basic
cleaning and relubrication.
Rear hub basic cleaning
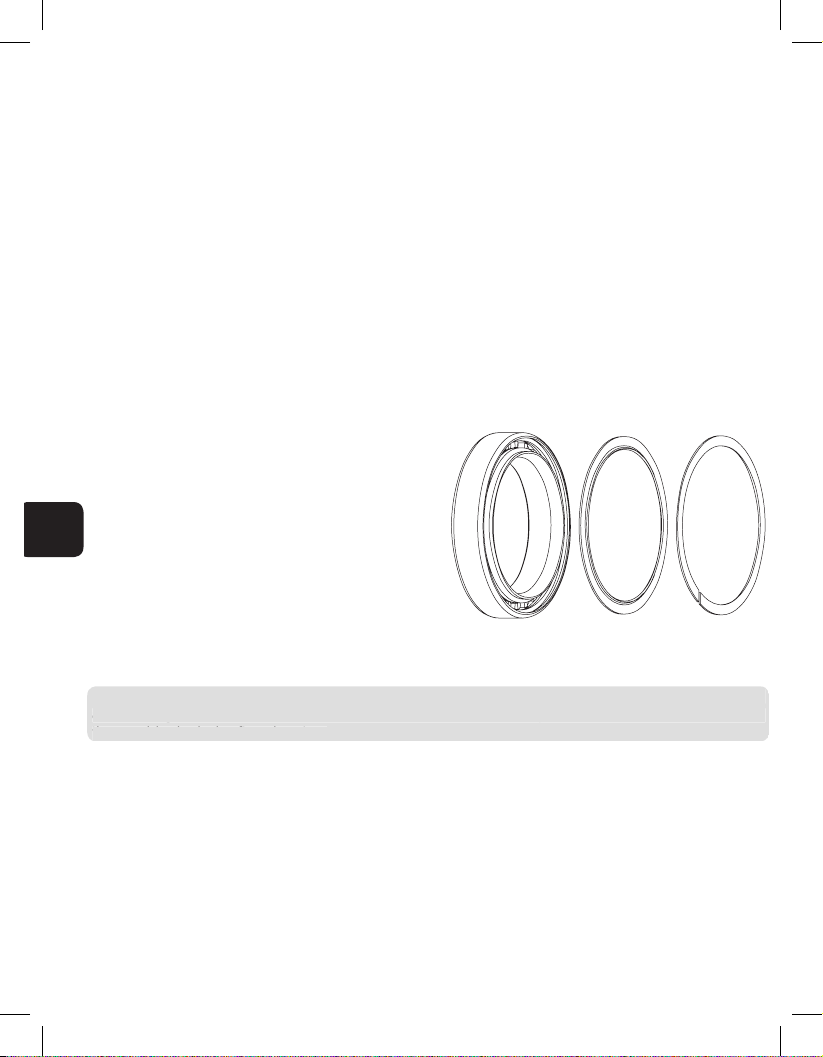
1. Chris King sealed bearings have removable snap rings that hold the rubber seals
in place.
2. Carefully, using a very small screwdriver, pick, or penknife, remove the snap ring
by inserting tool into split of snap ring. Gently work one end of the snap ring toward
bearing center until it is out of its groove. Follow the ring around with the tool until
the snap ring is completely dislodged.
3. Lift and remove exposed rubber seal to access the interior of the bearing. Thoroughly
7